
DeepSeek Harness Setup Guide
Using third-party clients
For a more consistent and complete experience, we recommend using each model in its provider’s official client.
Third-party apps update at different speeds and may adapt APIs differently. Compatibility issues can include cache misses, unavailable tools, or request errors. If you encounter a problem, first check the client version, configuration, and model support.
This guide focuses on simple, quick setup for basic use. Advanced features and custom workflows are welcome to explore, but usually require technical knowledge and fall outside our standard support scope. Our support team may offer suggestions where practical, but cannot guarantee troubleshooting or a solution for every issue.
This guide uses the DeepSeek Harness preview interface to set up basic text conversations with GPT and Claude. Before starting, open DeepSeek Harness using the official startup instructions and prepare your own token key. The screenshots show the Chinese interface.
1. Open settings
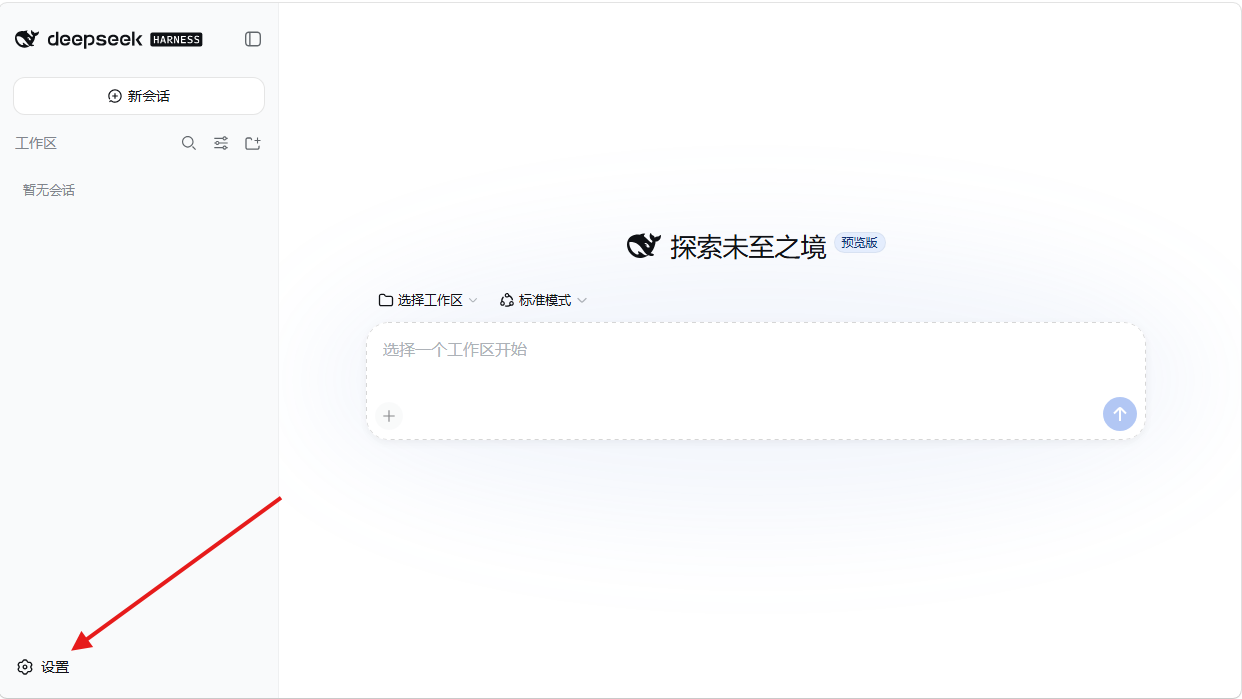
Click Settings (设置) in the bottom-left of the main screen.
2. Add a custom provider
Open Models (模型) and click Add a custom provider (添加自定义提供方).
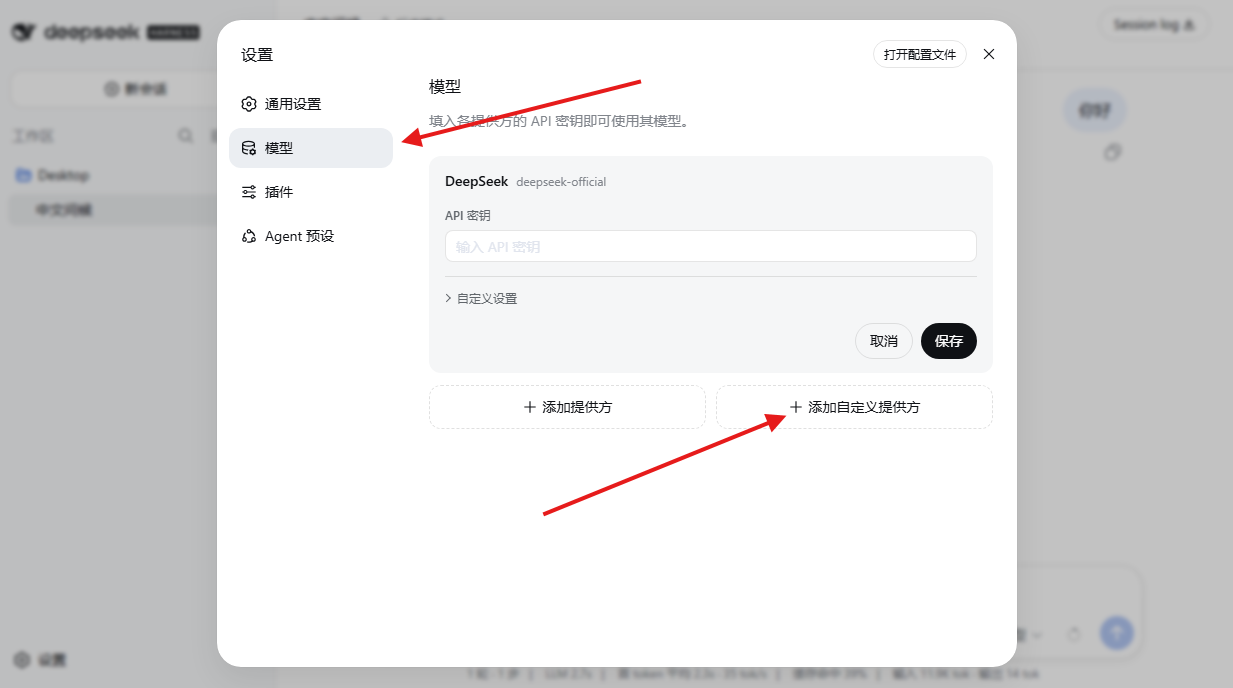
GPT and Claude use different protocols, so add a separate provider for each. The cctq ID in the screenshots is an example; use different Provider IDs when adding both.
3. Connect GPT models
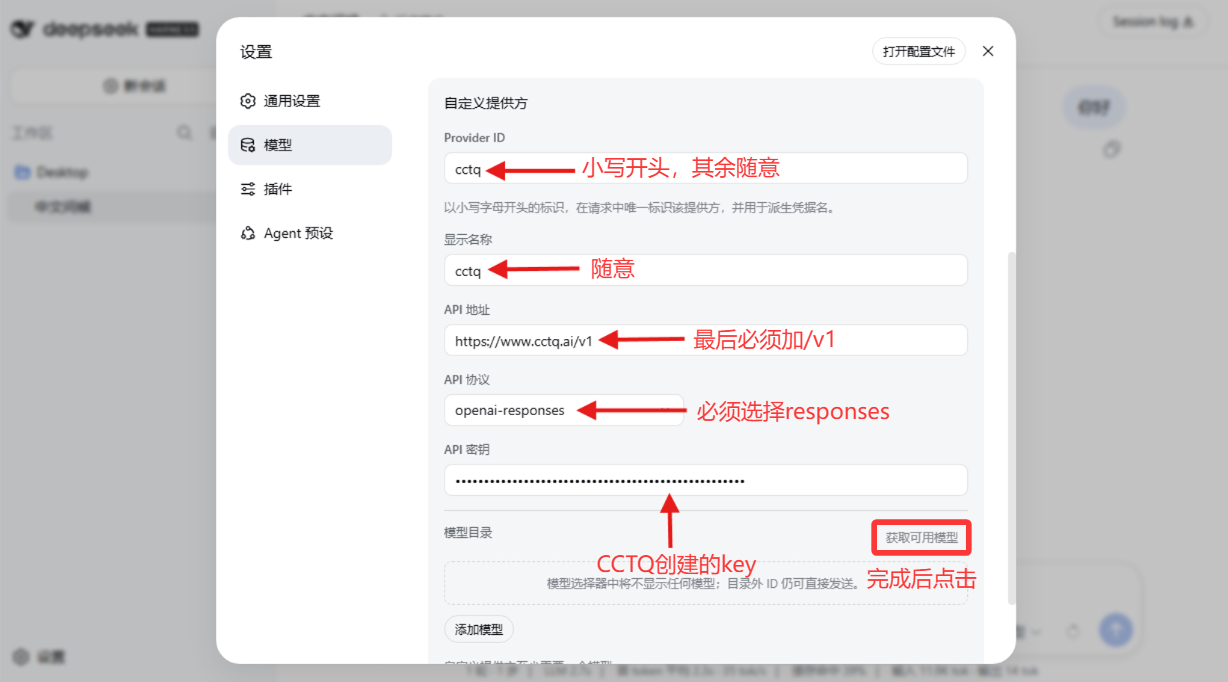
Fill in the following, then click Fetch available models (获取可用模型).
| Setting | Value |
|---|---|
| Provider ID | For example, cctqgpt; start with a lowercase letter and use a unique ID |
| Display name (显示名称) | Any name, e.g. CCTQ GPT |
| API base URL (API 地址) | https://www.cctq.ai/v1, including /v1 |
| API protocol (API 协议) | openai-responses |
| API key (API 密钥) | Your own token key created on CCTQ |
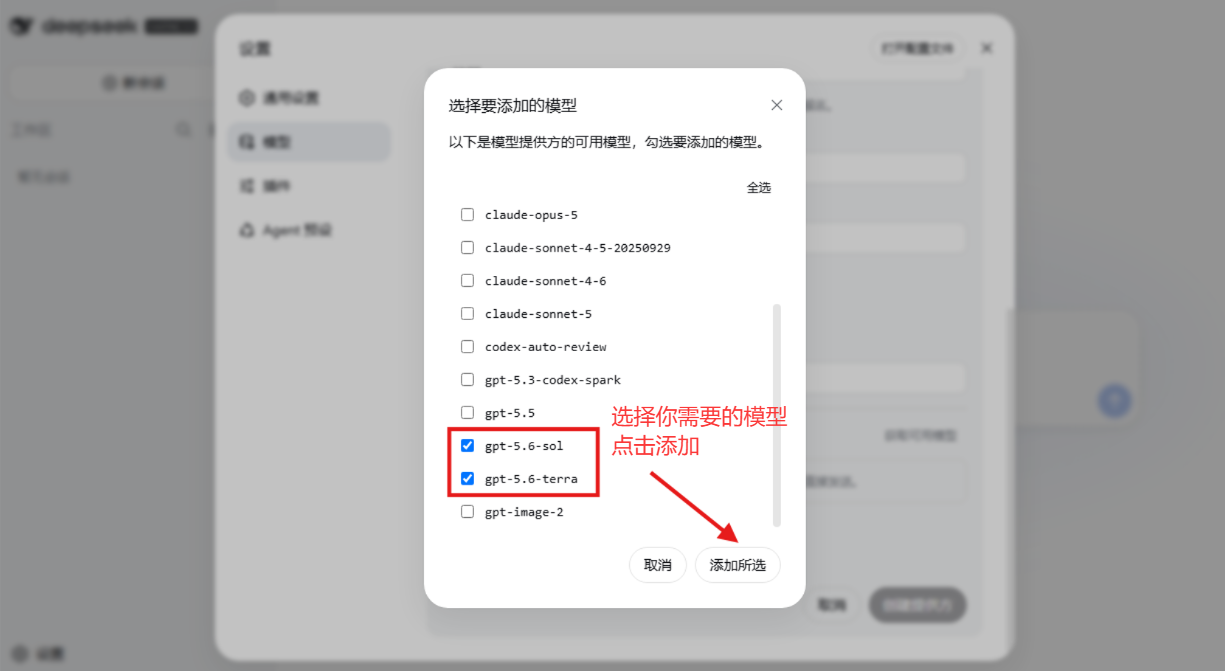
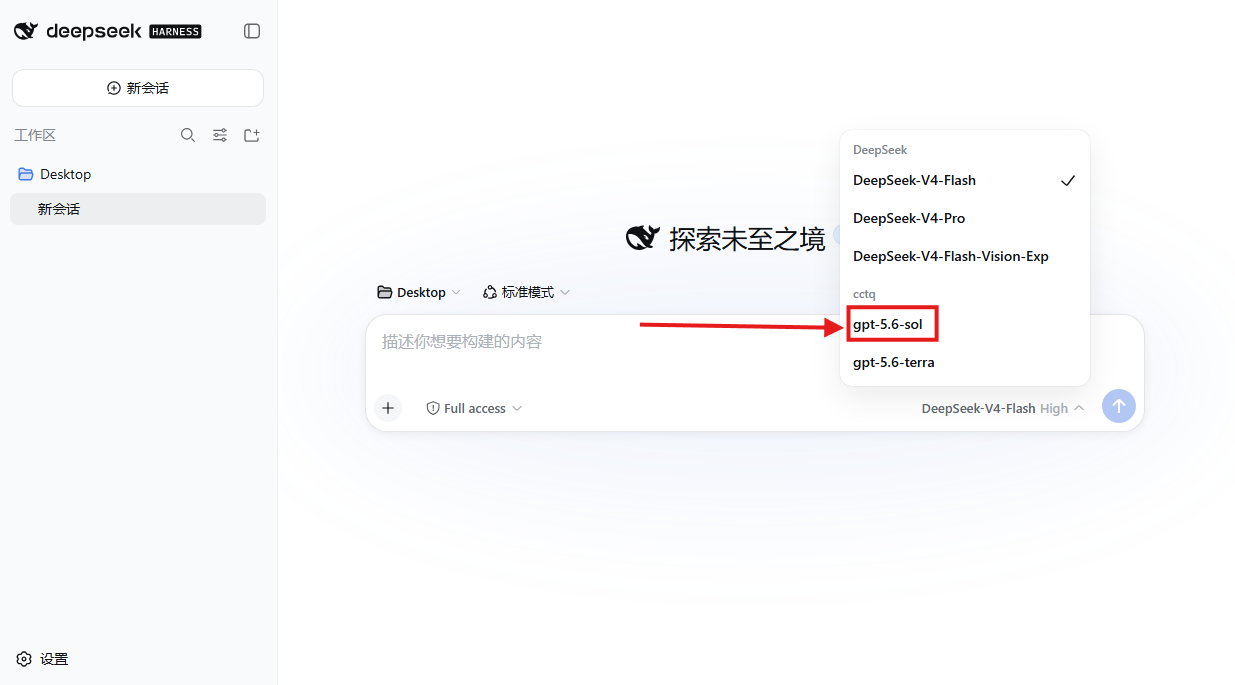
Select the GPT models you want, click Add selected (添加所选), then save the provider. The screenshots use gpt-5.6-sol and gpt-5.6-terra as examples; choose from the available models returned for your key.
Return to the main screen and choose a workspace. In a new session, open the model list at the bottom-right of the message box and select a GPT model you added.
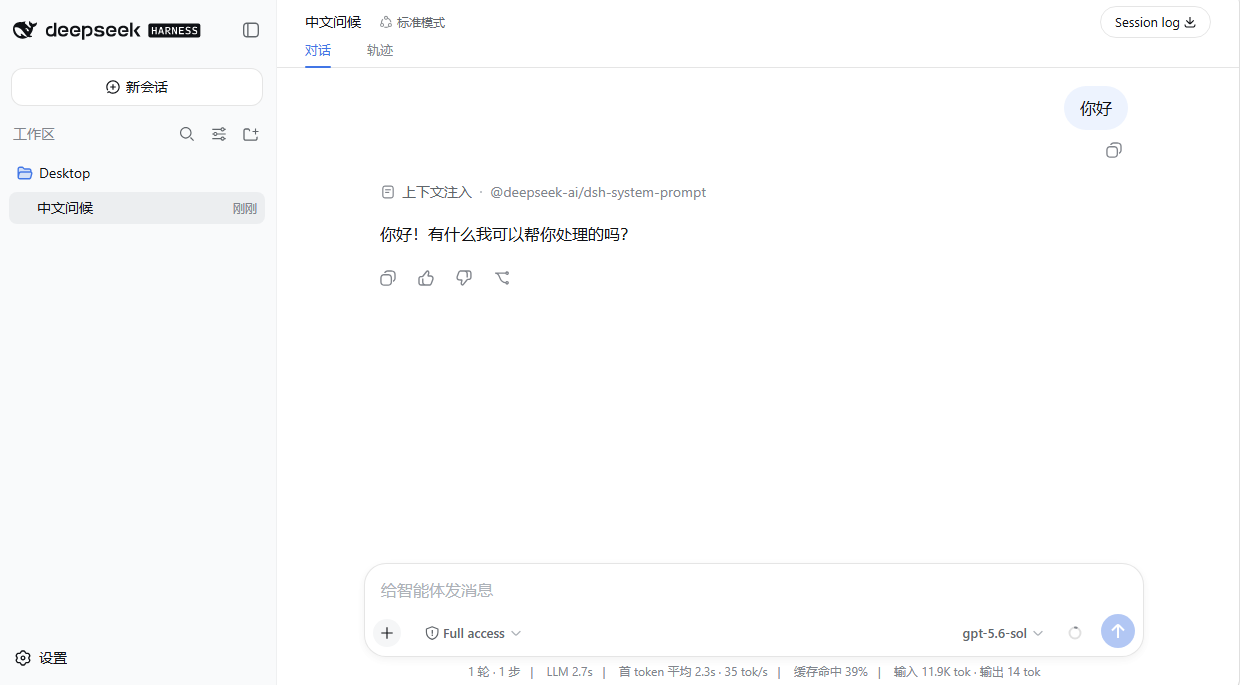
Send a simple message such as Hello. A normal reply confirms that basic text conversations are working.
4. Connect Claude models
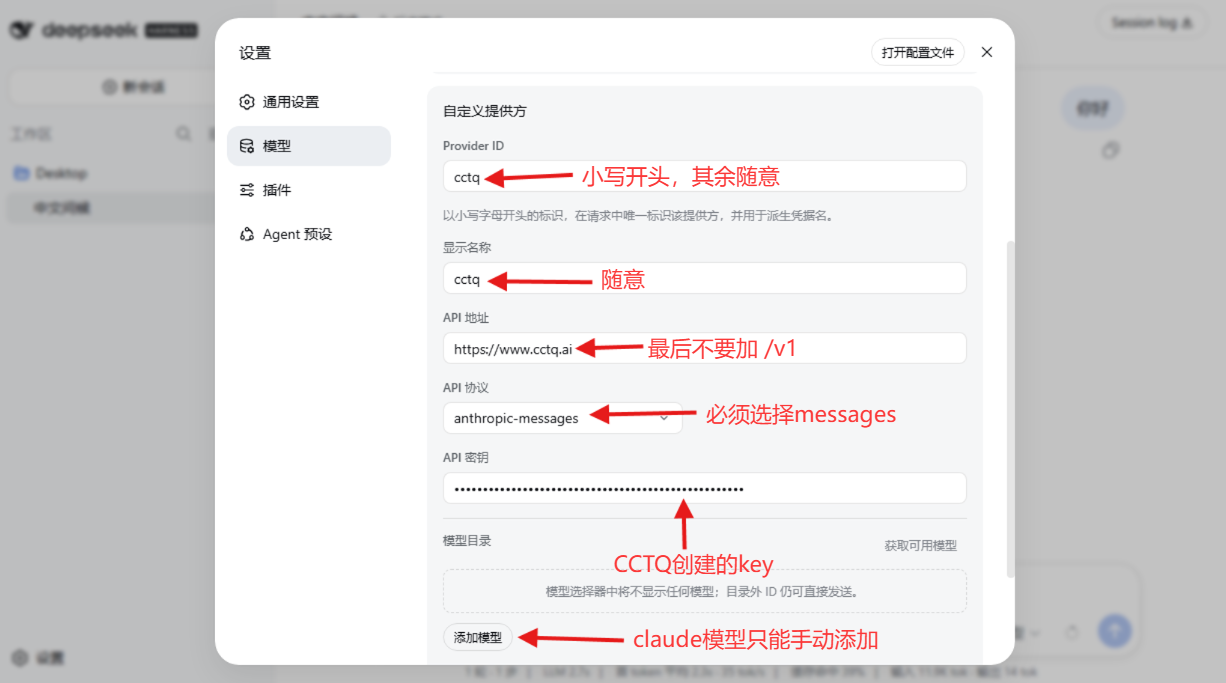
Go back to Settings → Models → Add a custom provider and enter:
| Setting | Value |
|---|---|
| Provider ID | For example, cctqclaude; use a different ID from your GPT provider |
| Display name (显示名称) | Any name, e.g. CCTQ Claude |
| API base URL (API 地址) | https://www.cctq.ai, without /v1 |
| API protocol (API 协议) | anthropic-messages |
| API key (API 密钥) | Your own token key created on CCTQ |
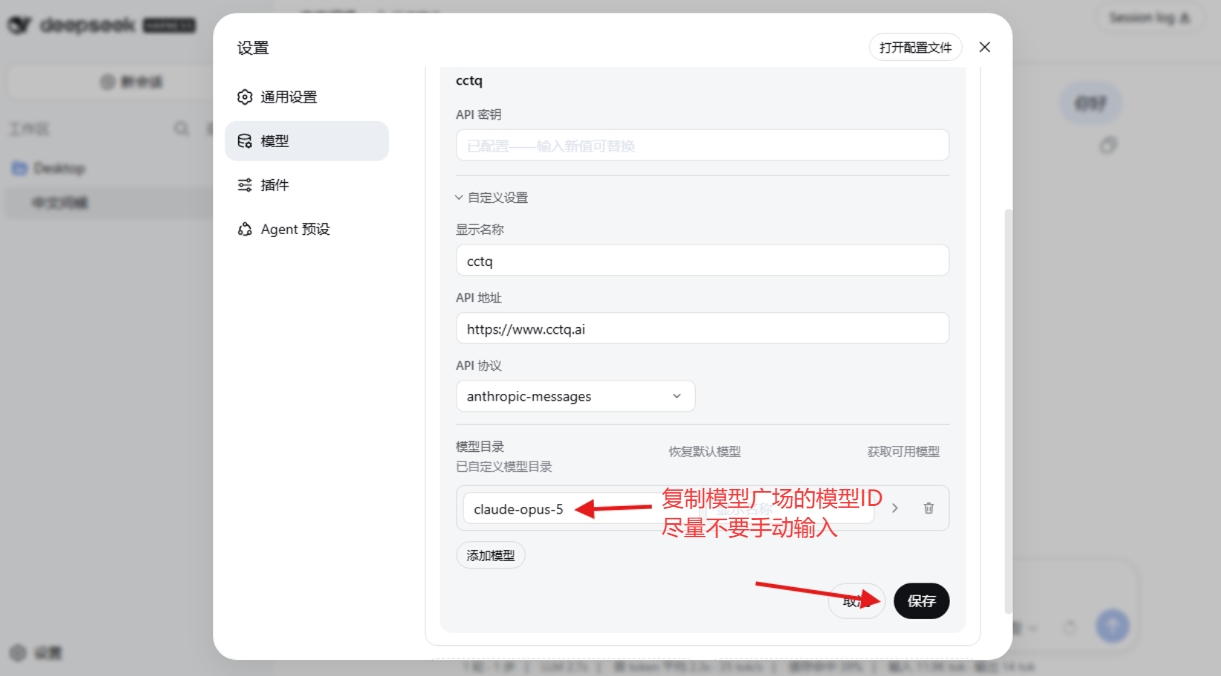
This guide adds Claude models manually as shown in the screenshots. Click Add model (添加模型).
Copy the required Claude model ID from CCTQ's Model Marketplace (模型广场), paste it into the field, and click Save (保存). The screenshot uses claude-opus-5 as an example; use a model your key supports and copy the ID to avoid typing errors.
Return to the main screen, start a new session, and select the Claude model you added from the model list.
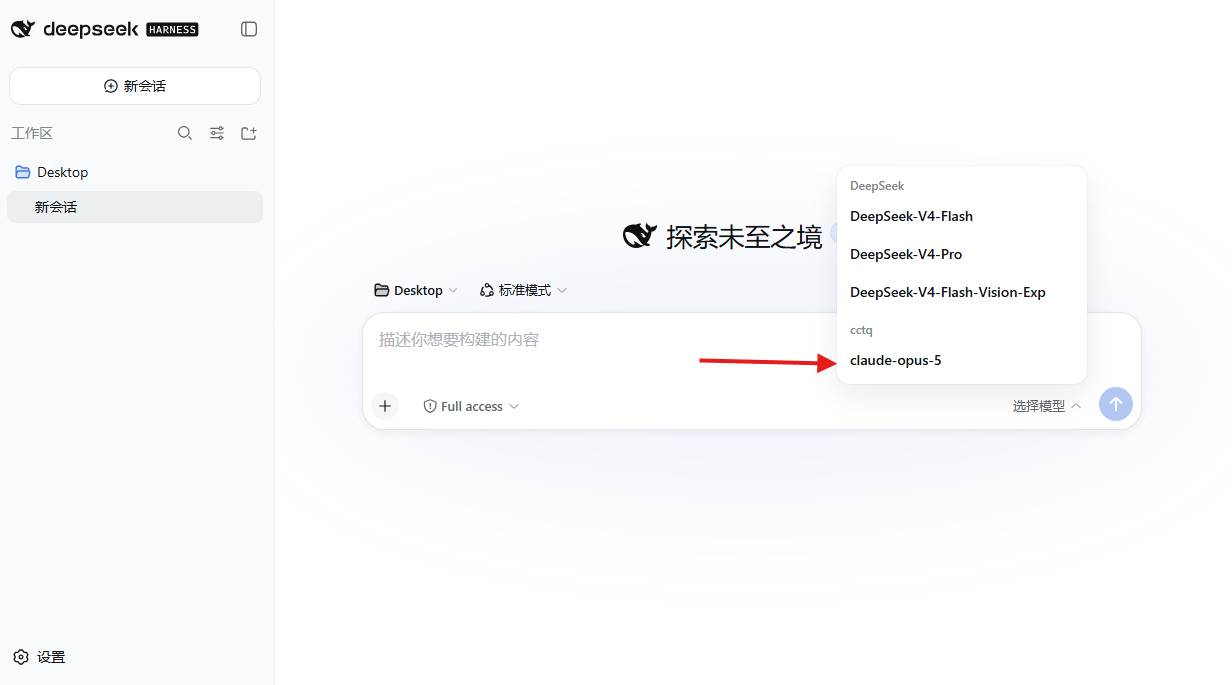
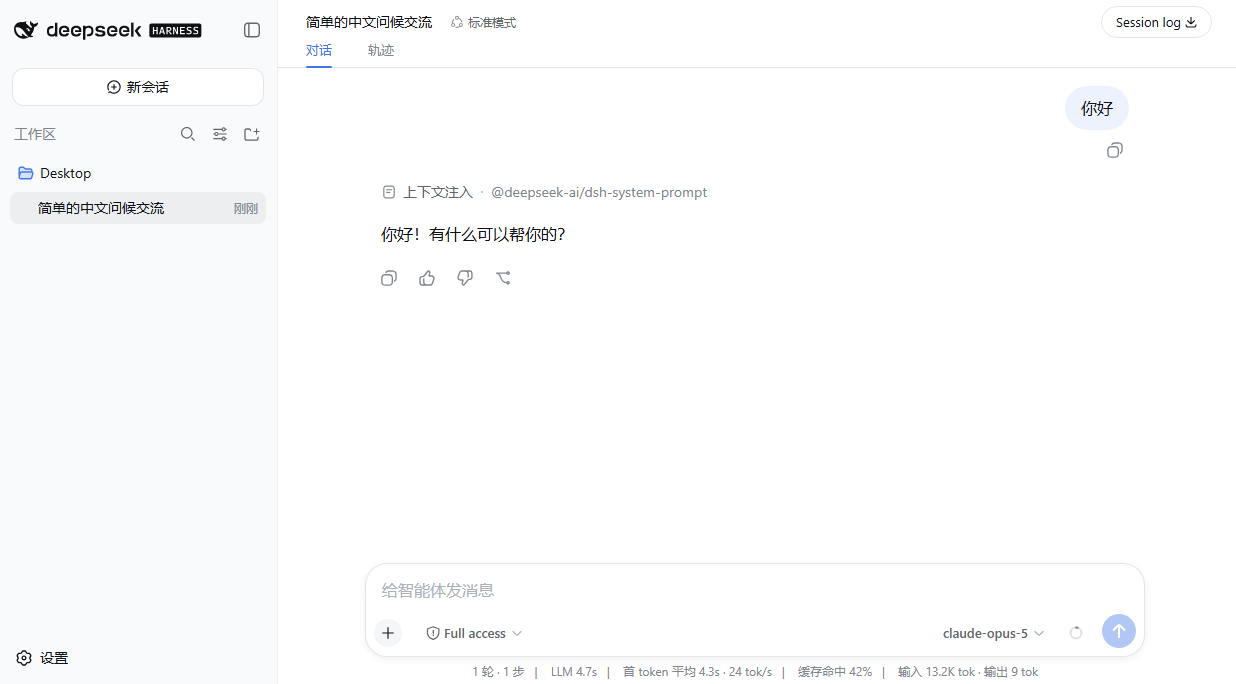
Send a simple message such as Hello and confirm that you receive a normal reply.
Keep your real key private. If a request fails, check the key, base URL, protocol, and model ID, then see Request Errors.
5. Image input and advanced configuration
Models added manually in this guide are treated as text-only unless image input is declared. In Settings, click Open configuration file and follow the official guide to add input: [text, image] for the model. The model and endpoint must also support image input.
See the official advanced configuration guide for instructions.