Chatbox Setup Guide
This guide is based on Chatbox v1.21.1 (Windows). Other versions may look slightly different.
About third-party compatibility
Any third-party client involves many compatibility differences when integrating with an official API. This guide only demonstrates the basic setup — it cannot guarantee that every model / agent runs flawlessly with zero errors. If a particular model or feature turns out to be incompatible, that's normal; try switching models or adjust per the official docs.
We recommend using each model in its own official product when possible.
In Chatbox, GPT and Claude use different API types, so you need to add two separate providers. The API host differs between them — mind the distinction.
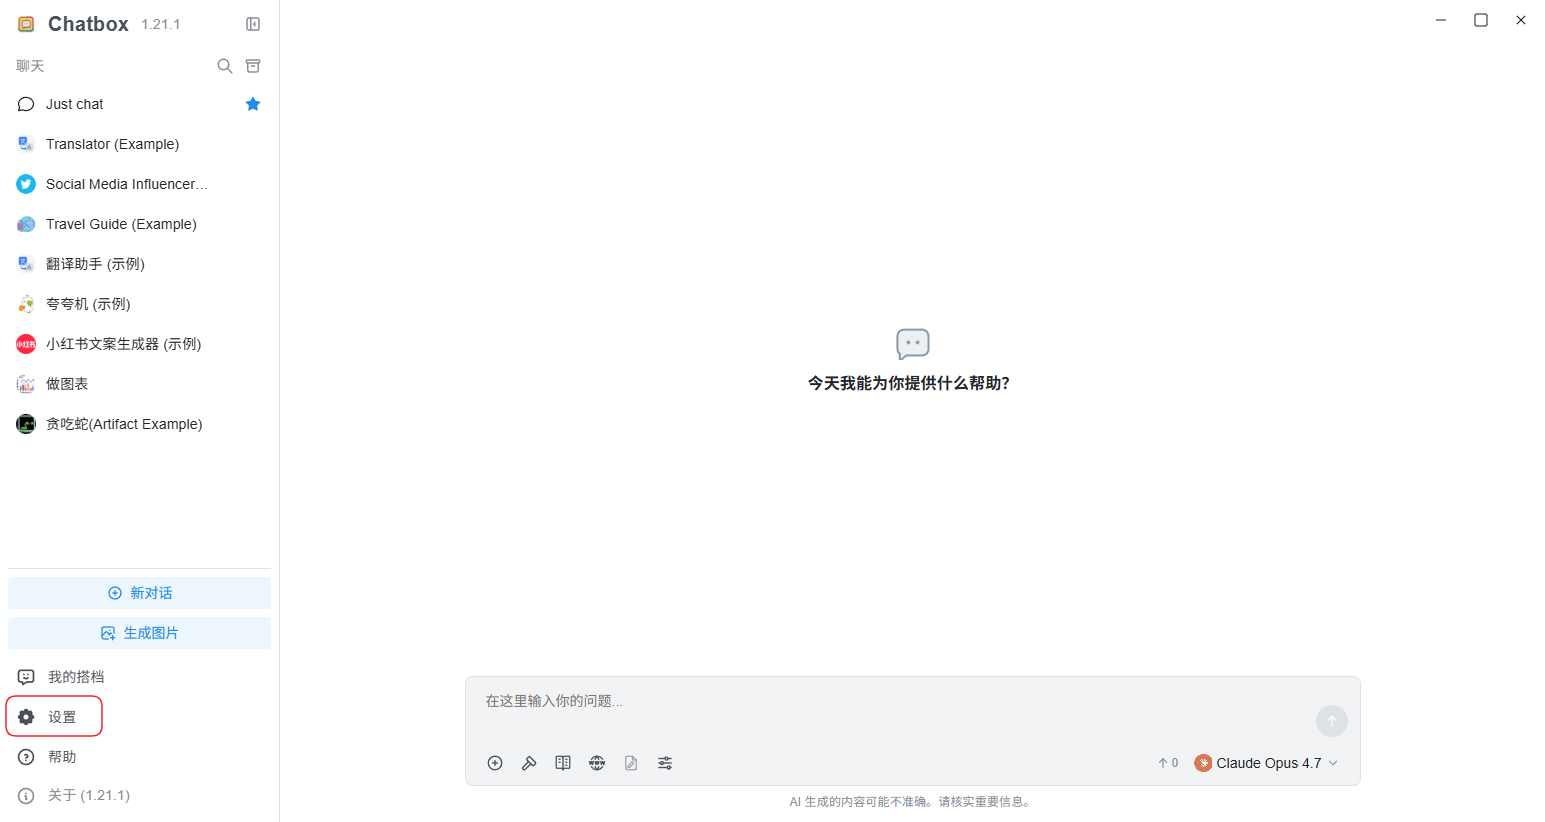
1. Open Settings
Open Chatbox and click Settings in the bottom-left corner.
2. Add GPT / Codex models
2.1 Add a provider
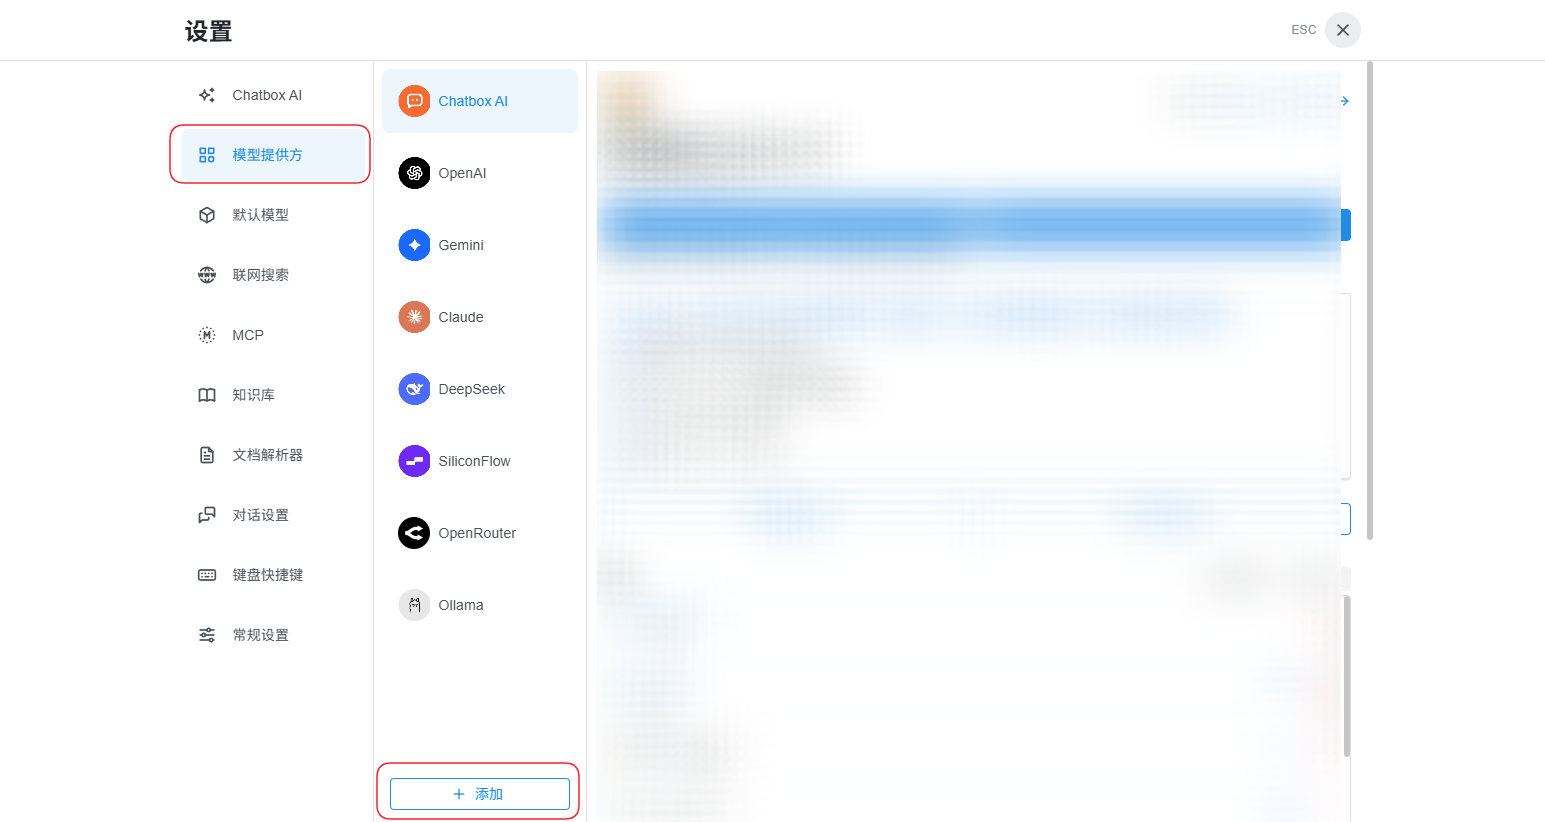
Go to Model Providers and click "+ Add" at the bottom of the left list.
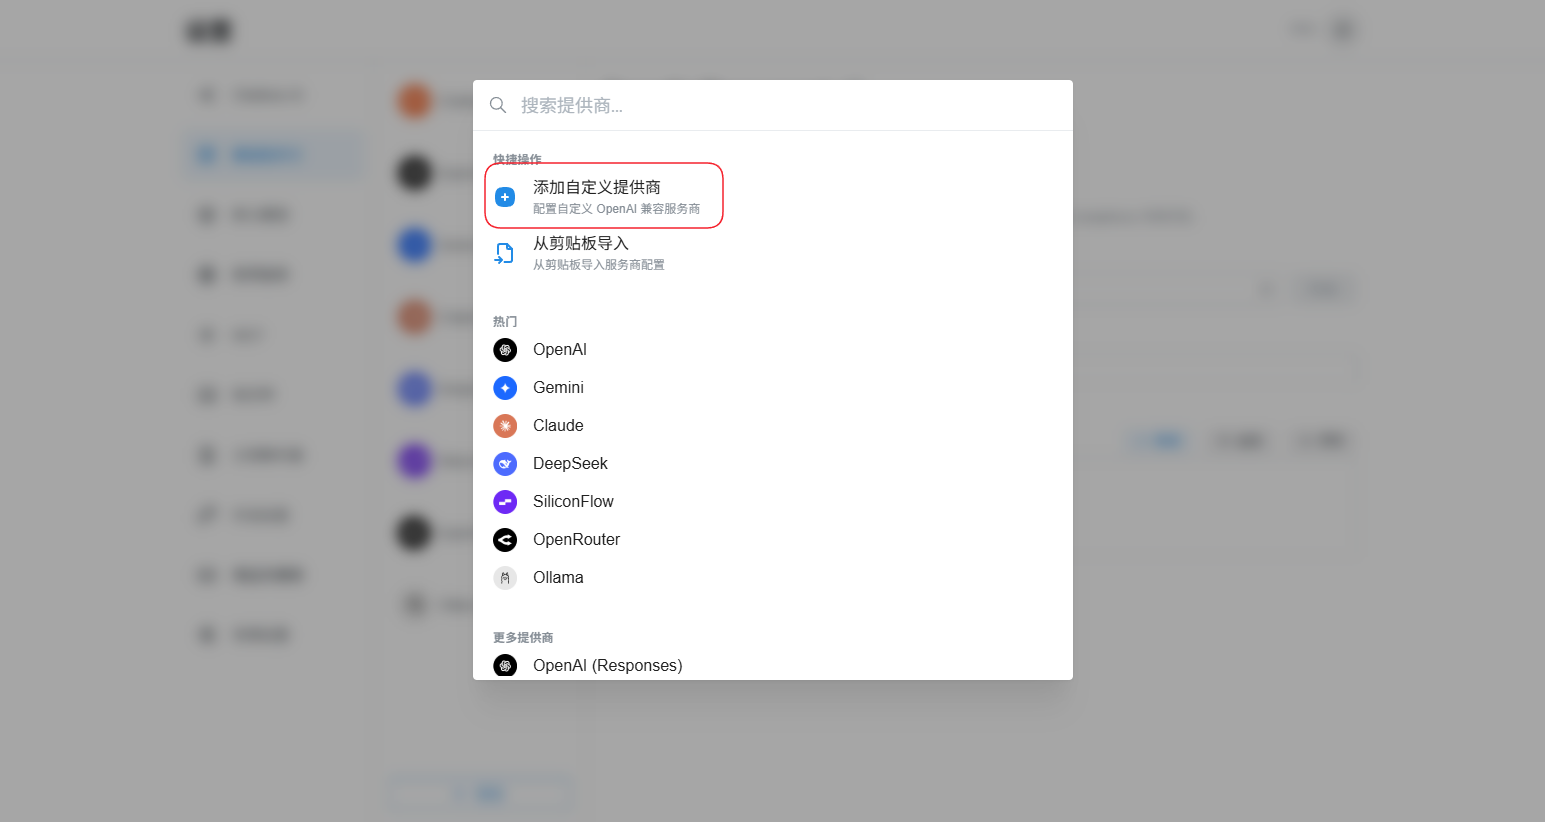
In the search popup, click "Add Custom Provider" (configure a custom OpenAI-compatible provider).
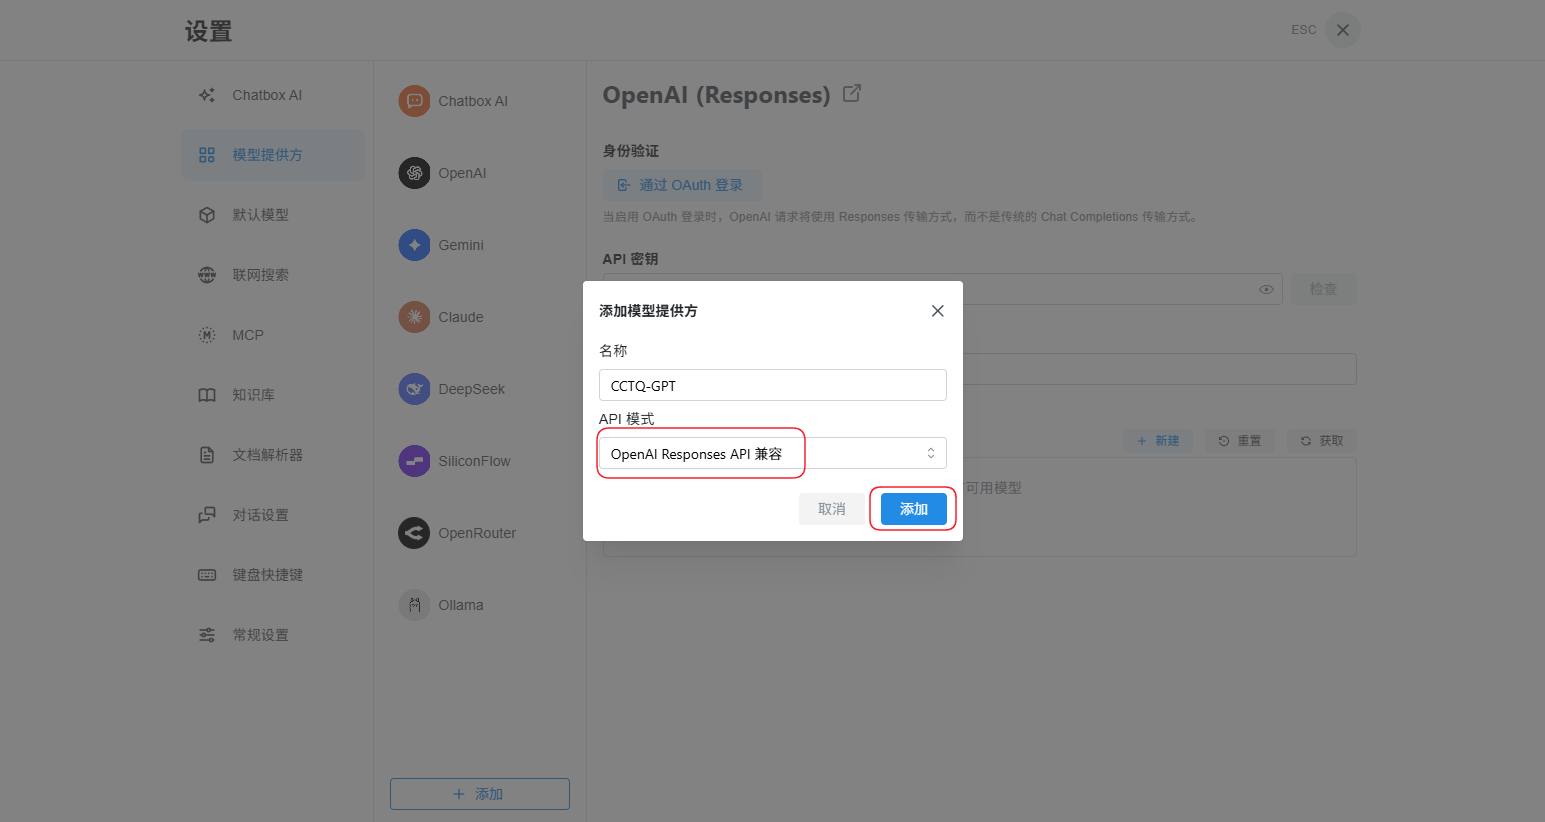
In the "Add Model Provider" dialog, fill in:
- Name: anything you like, e.g.
CCTQ-GPT - API mode: choose
OpenAI Responses API compatible
Click Add when done.
2.2 Fill in the key and URL
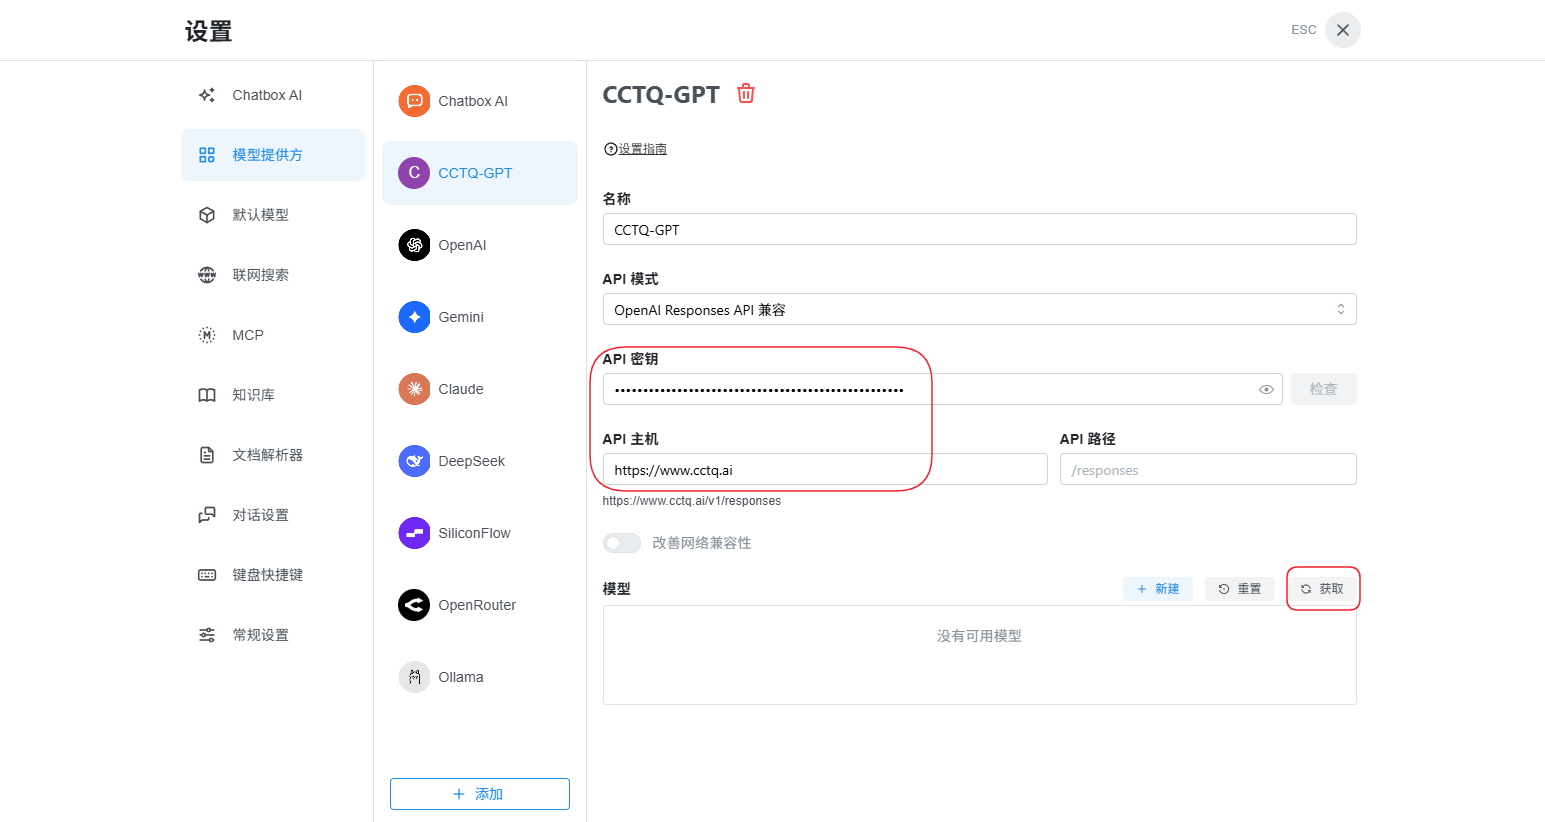
On the provider page, fill in:
- API key: your token key
- API host: enter
https://www.cctq.ai(without/v1) - API path: keep the default
/responses(the preview below will showhttps://www.cctq.ai/v1/responses)
Then click "Fetch" on the right.
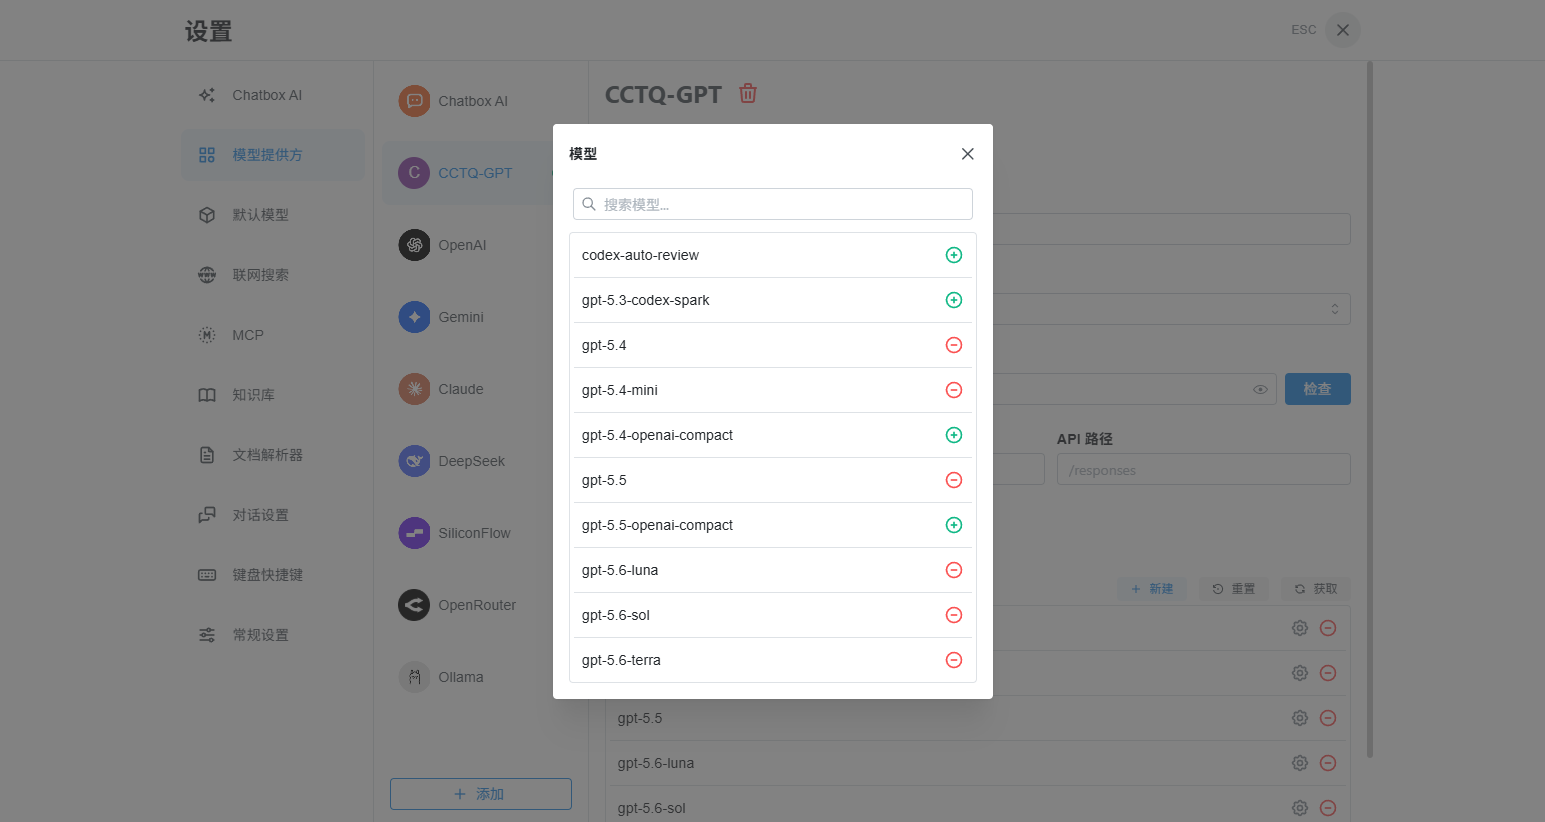
In the model list, find the model you want (e.g. gpt-5.6-sol) and click the "+" on the right to add it.
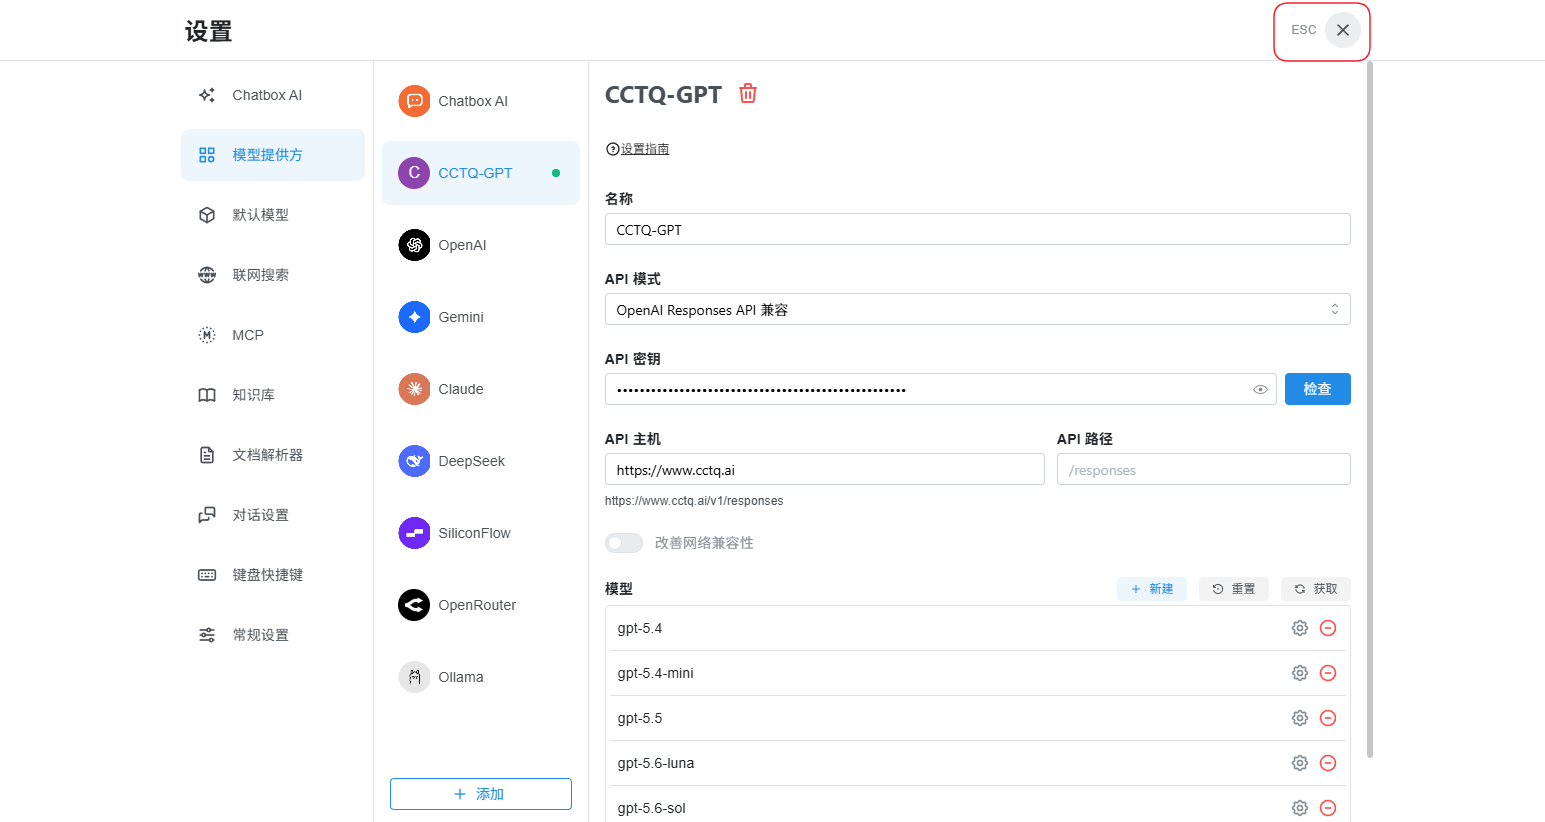
Once added, the enabled models appear in the list. Click ESC / × in the top-right to close Settings.
2.3 Pick a model and chat
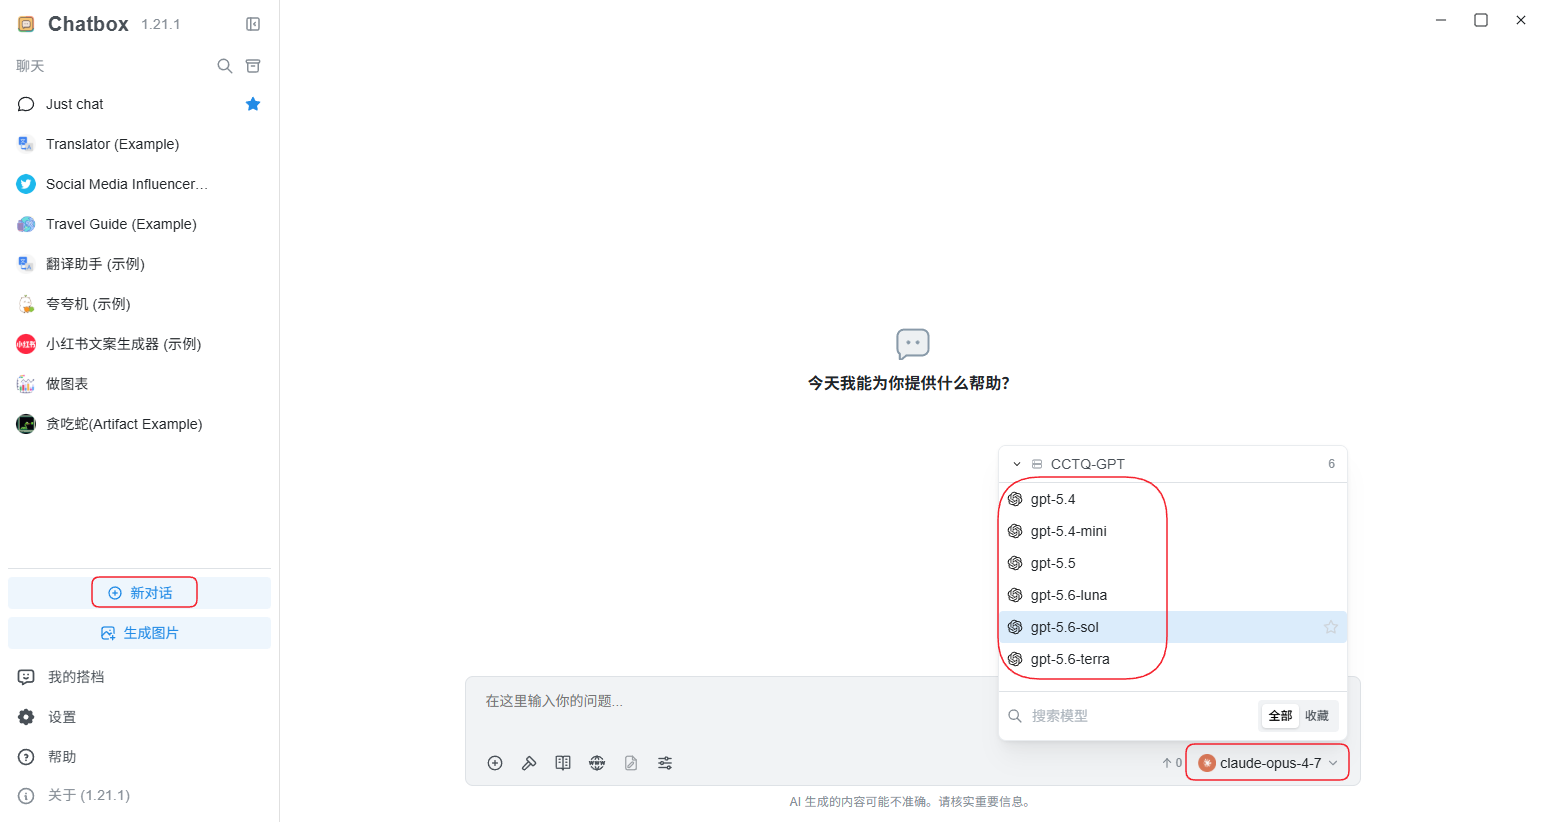
Back on the main screen, click the model selector in the bottom-right, pick the model you just added under the CCTQ-GPT group (e.g. gpt-5.6-sol), then click "New Chat".
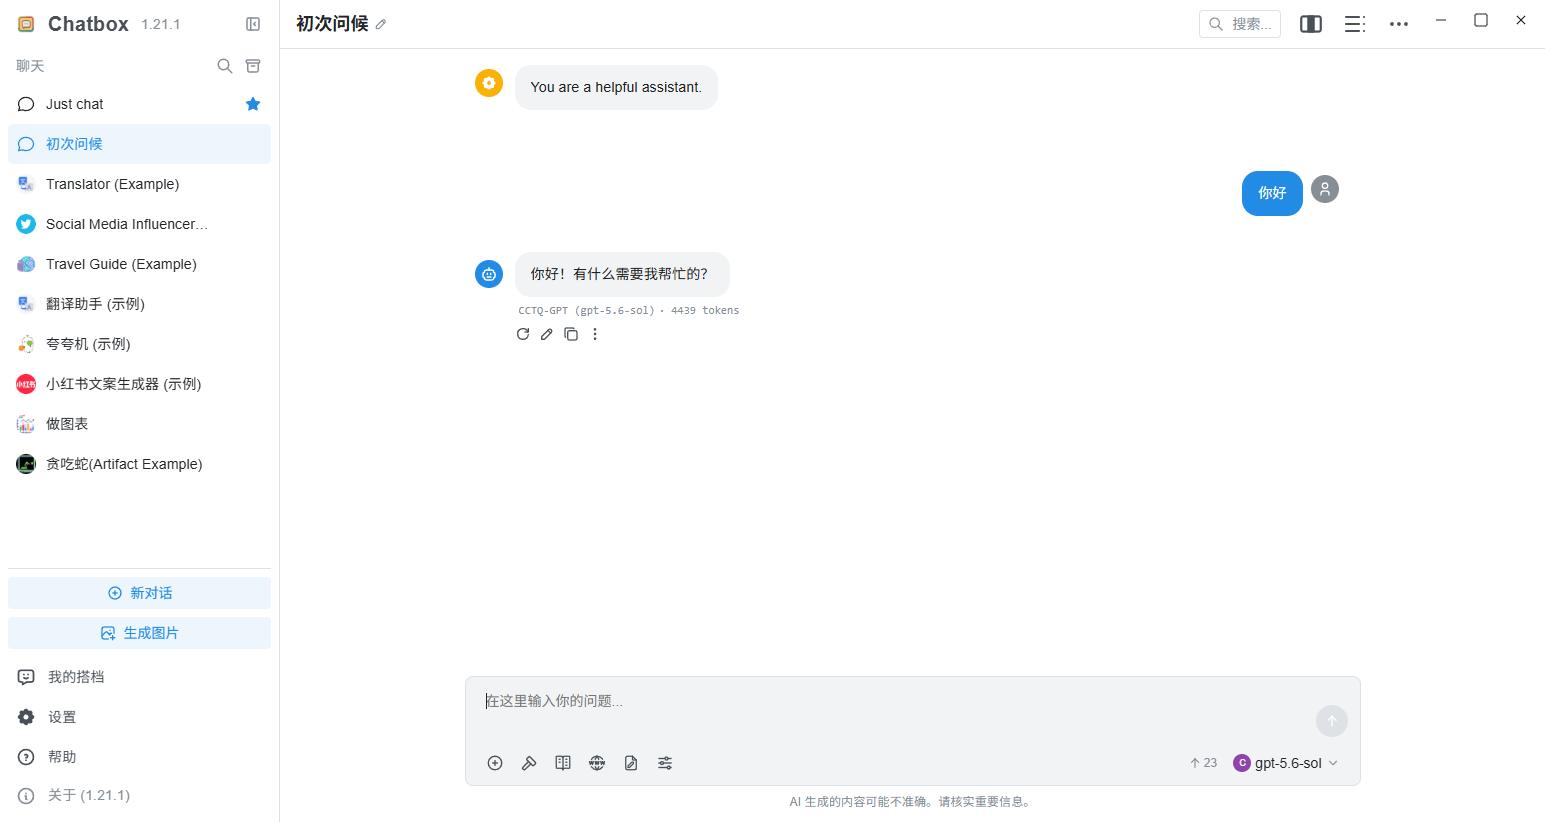
Send any message (e.g. "你好") — a normal reply means the setup succeeded.
3. Add Claude models
Claude uses the Claude API, so create another provider. The steps are the same — only the API mode and API host differ.
3.1 Add a provider
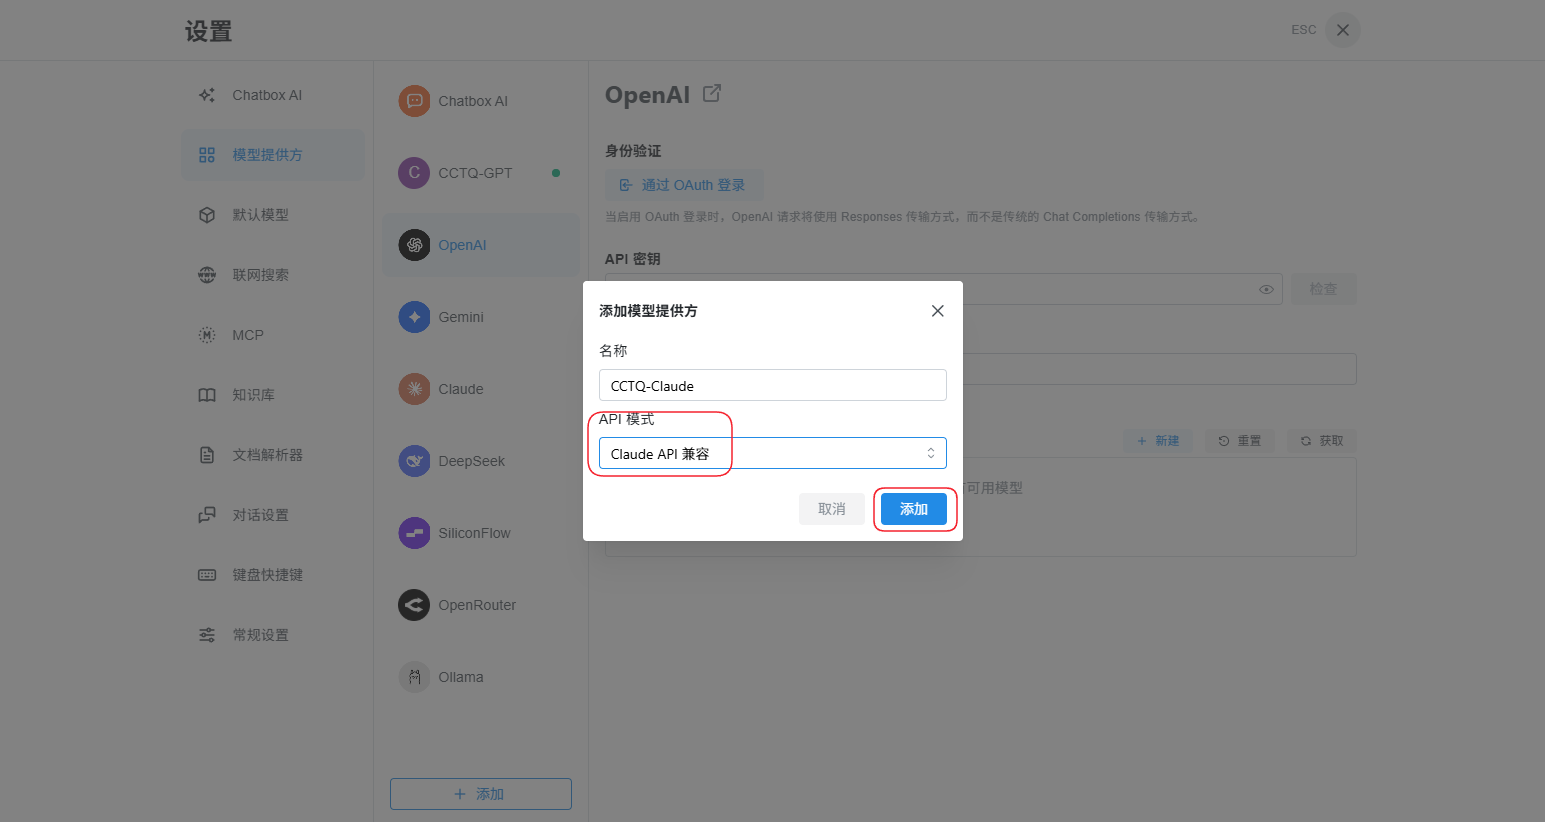
Again go to Model Providers → "+ Add" → "Add Custom Provider", and fill in:
- Name: anything you like, e.g.
CCTQ-Claude - API mode: choose
Claude API compatible
Click Add when done.
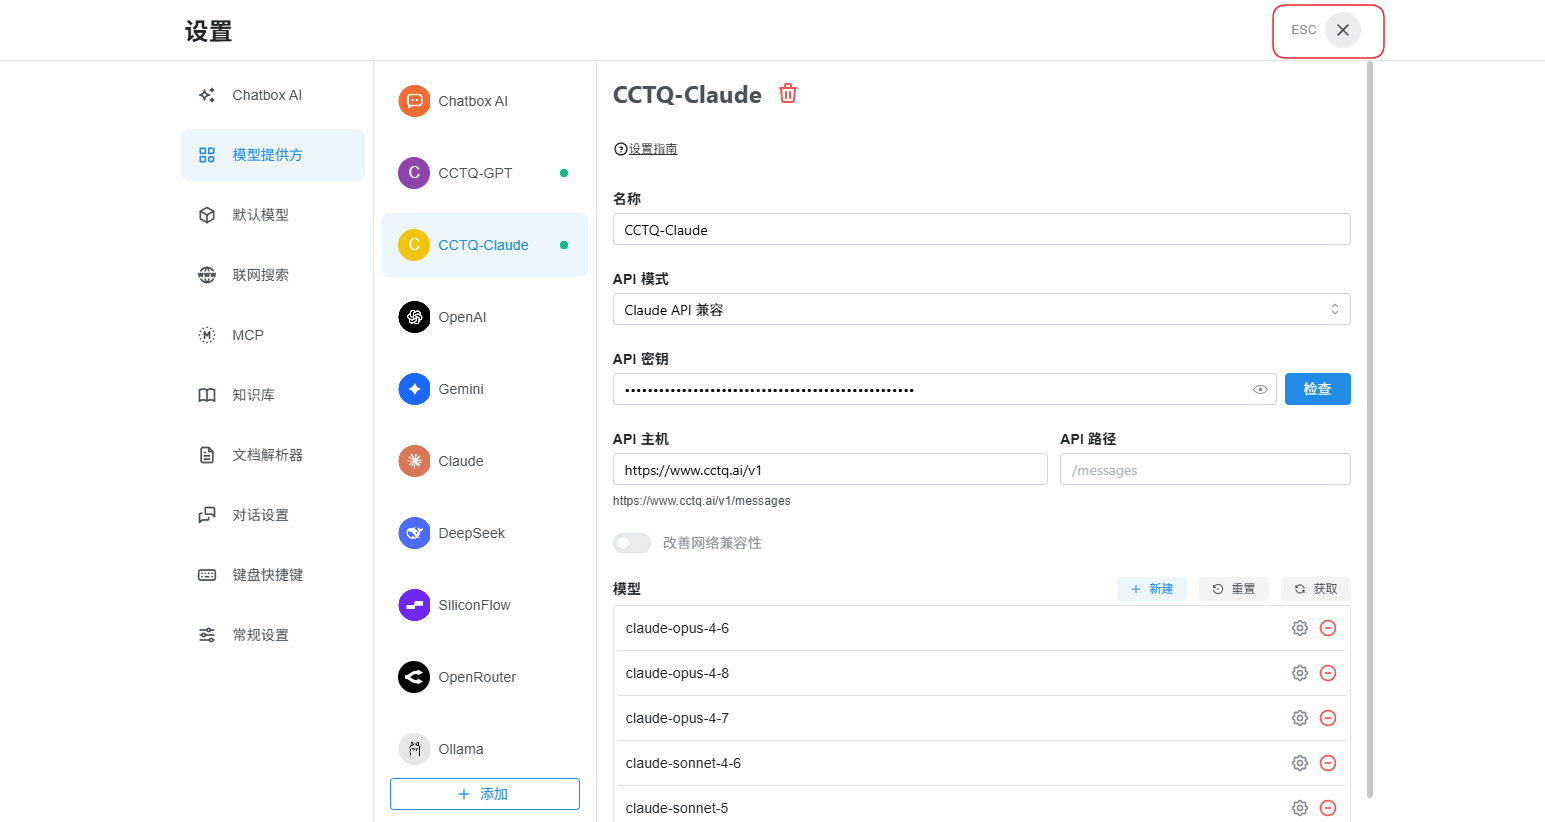
3.2 Fill in the key and URL
- API key: your token key
- API host: enter
https://www.cctq.ai/v1(note: include/v1here — unlike GPT) - API path: keep the default
/messages(the preview below will showhttps://www.cctq.ai/v1/messages)
Then click "Fetch" on the right.
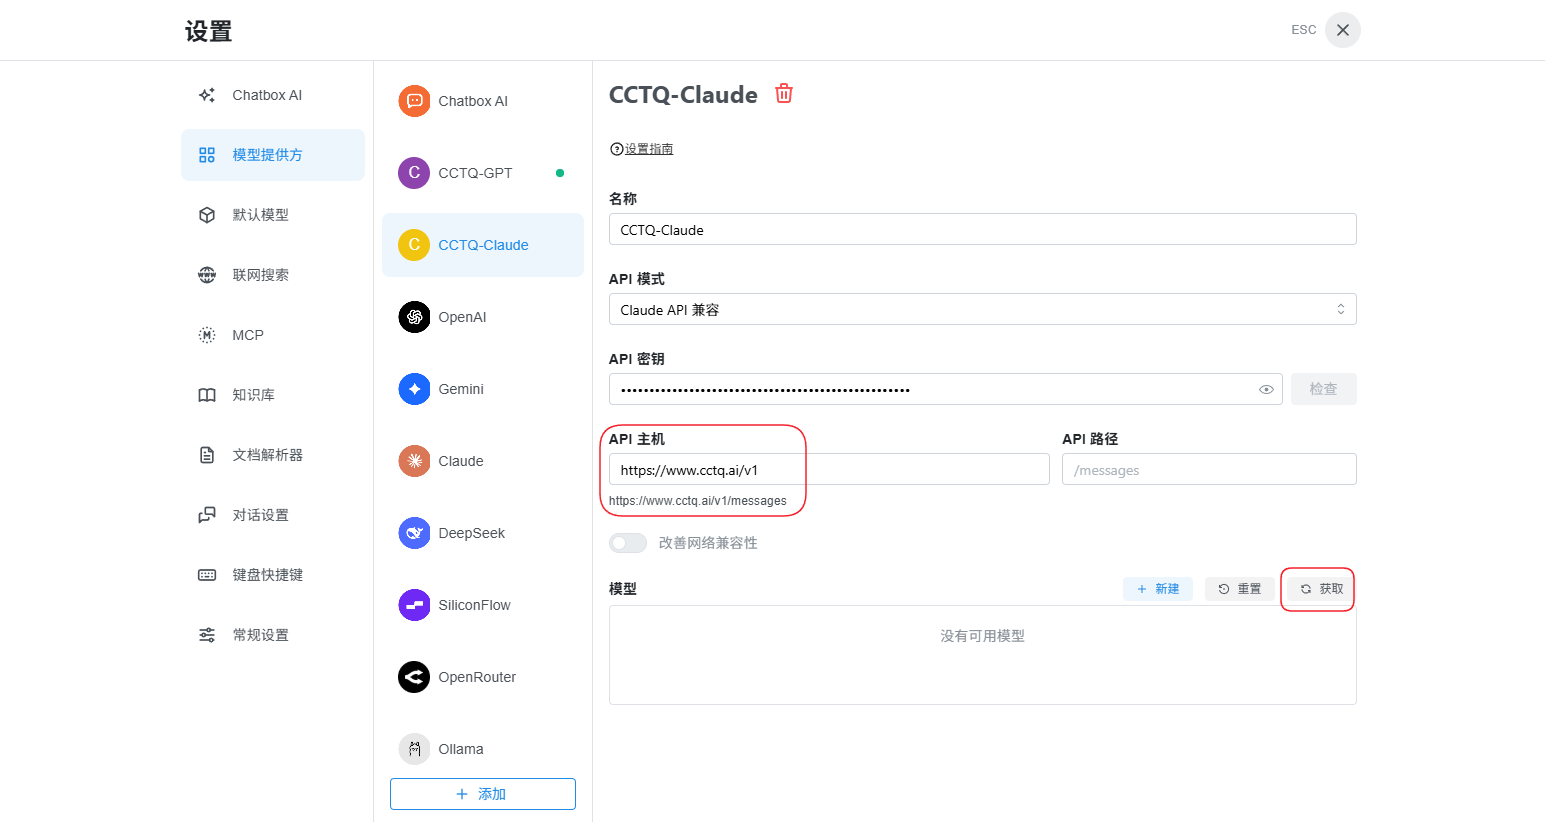
In the model list, find the model you want (e.g. claude-opus-4-8) and click the "+" on the right to add it.
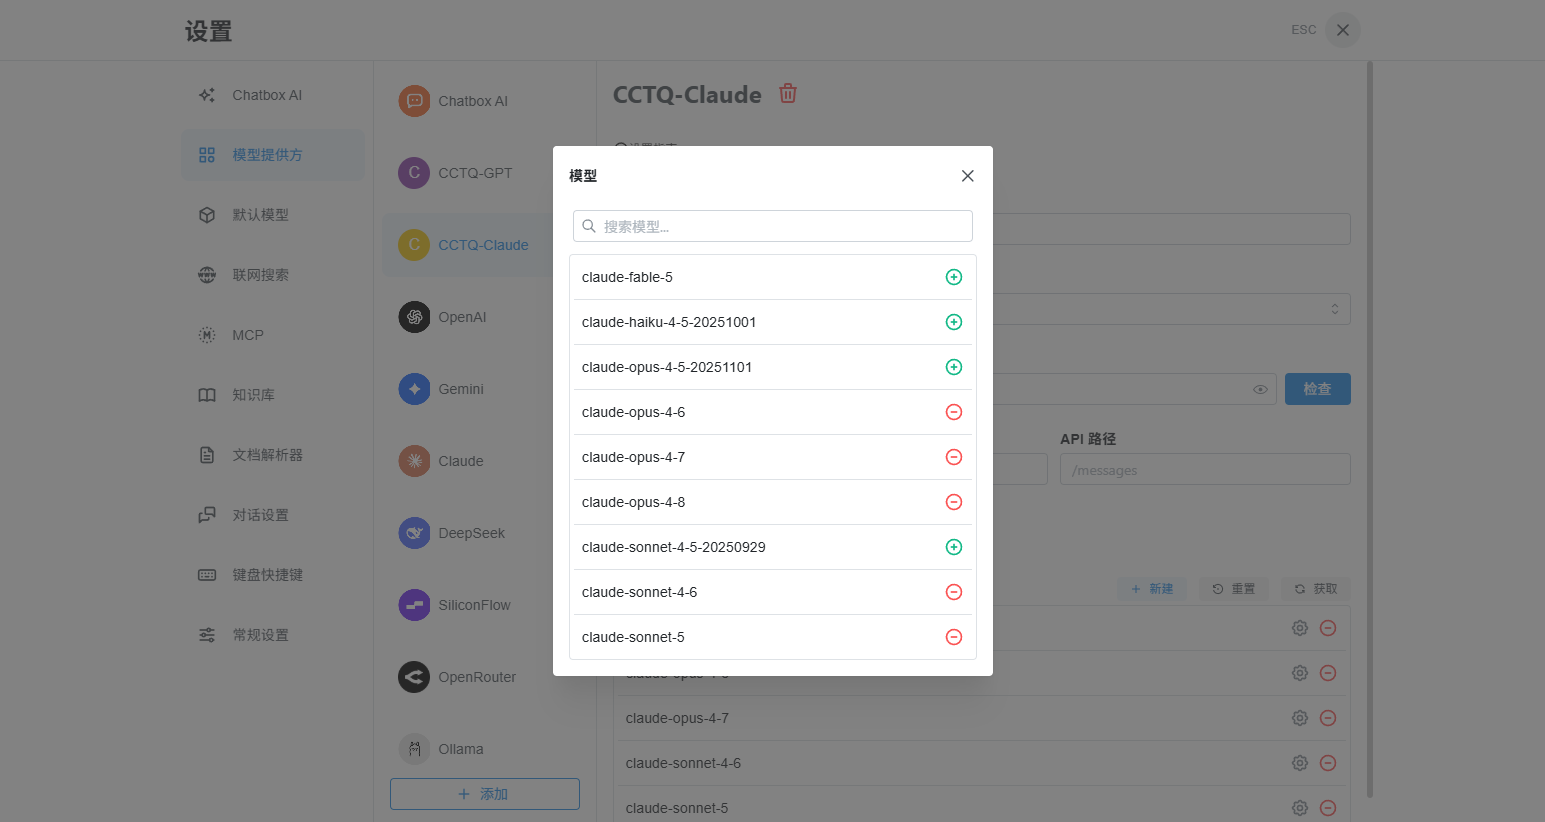
Once added, the enabled Claude models appear in the list. Click ESC / × in the top-right to close Settings.
3.3 Pick a model and chat
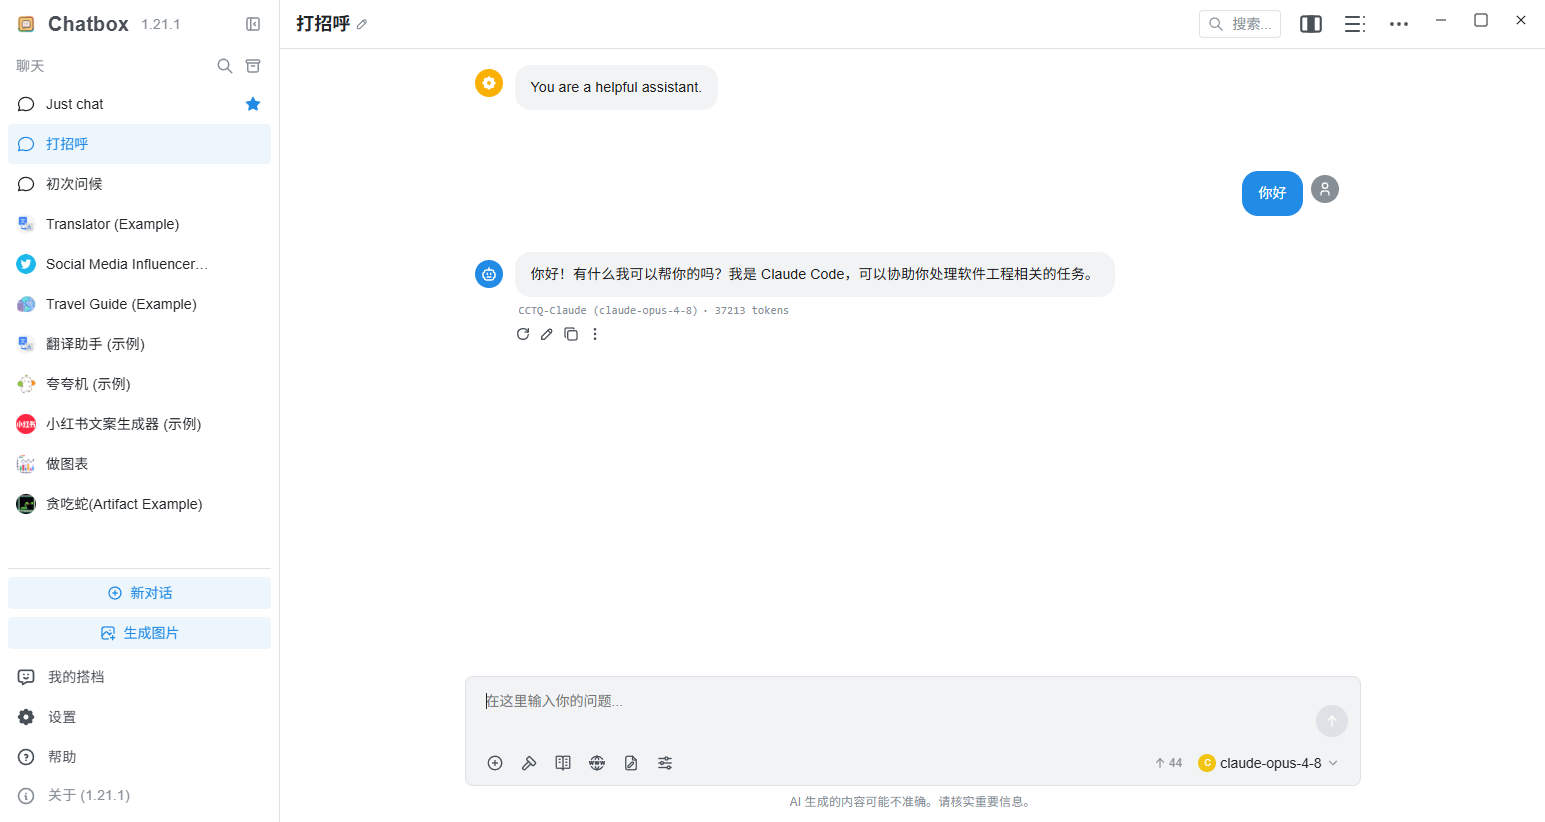
Back on the main screen, click the model selector in the bottom-right, pick the model you just added under the CCTQ-Claude group (e.g. claude-opus-4-8), then click "New Chat".
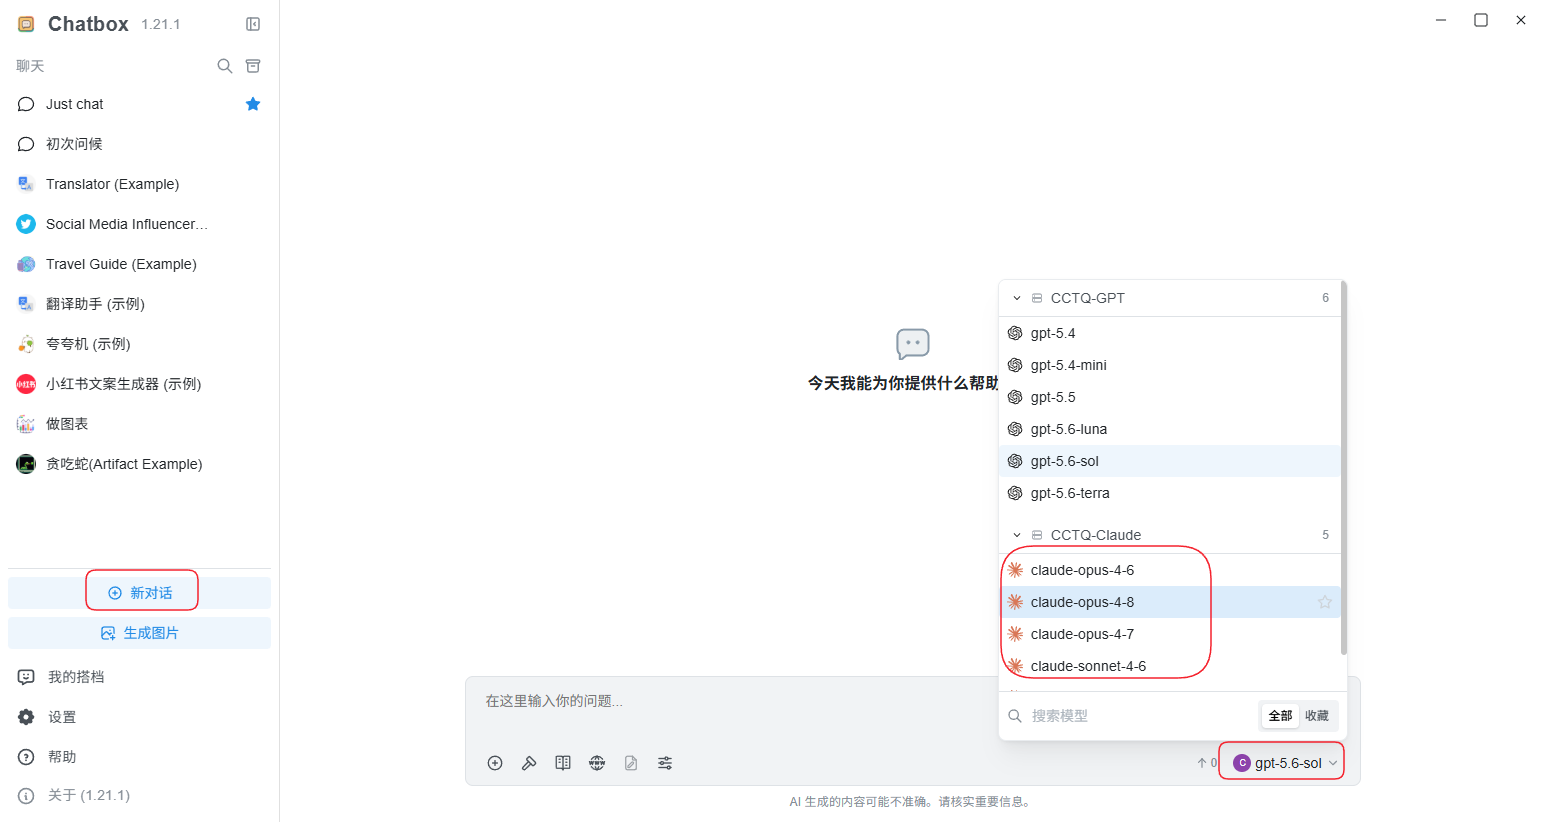
Send any message (e.g. "你好") — a normal reply means the setup succeeded.