
iOS Kelivo Setup Guide
This guide follows screenshots of Kelivo for iOS and currently covers adding GPT models and starting a chat. Other versions may look slightly different.
Using third-party clients
For a more consistent and complete experience, we recommend using each model in its provider’s official client.
Third-party apps update at different speeds and may adapt APIs differently. Compatibility issues can include cache misses, unavailable tools, or request errors. If you encounter a problem, first check the client version, configuration, and model support.
This guide focuses on simple, quick setup for basic use. Advanced features and custom workflows are welcome to explore, but usually require technical knowledge and fall outside our standard support scope. Our support team may offer suggestions where practical, but cannot guarantee troubleshooting or a solution for every issue.
Before starting, install Kelivo and prepare your own token key. This guide uses the OpenAI provider type with Response API enabled and https://www.cctq.ai/v1 as the base URL. The screenshots show the Chinese interface; the Chinese labels below help you locate the controls.
1. Open provider settings
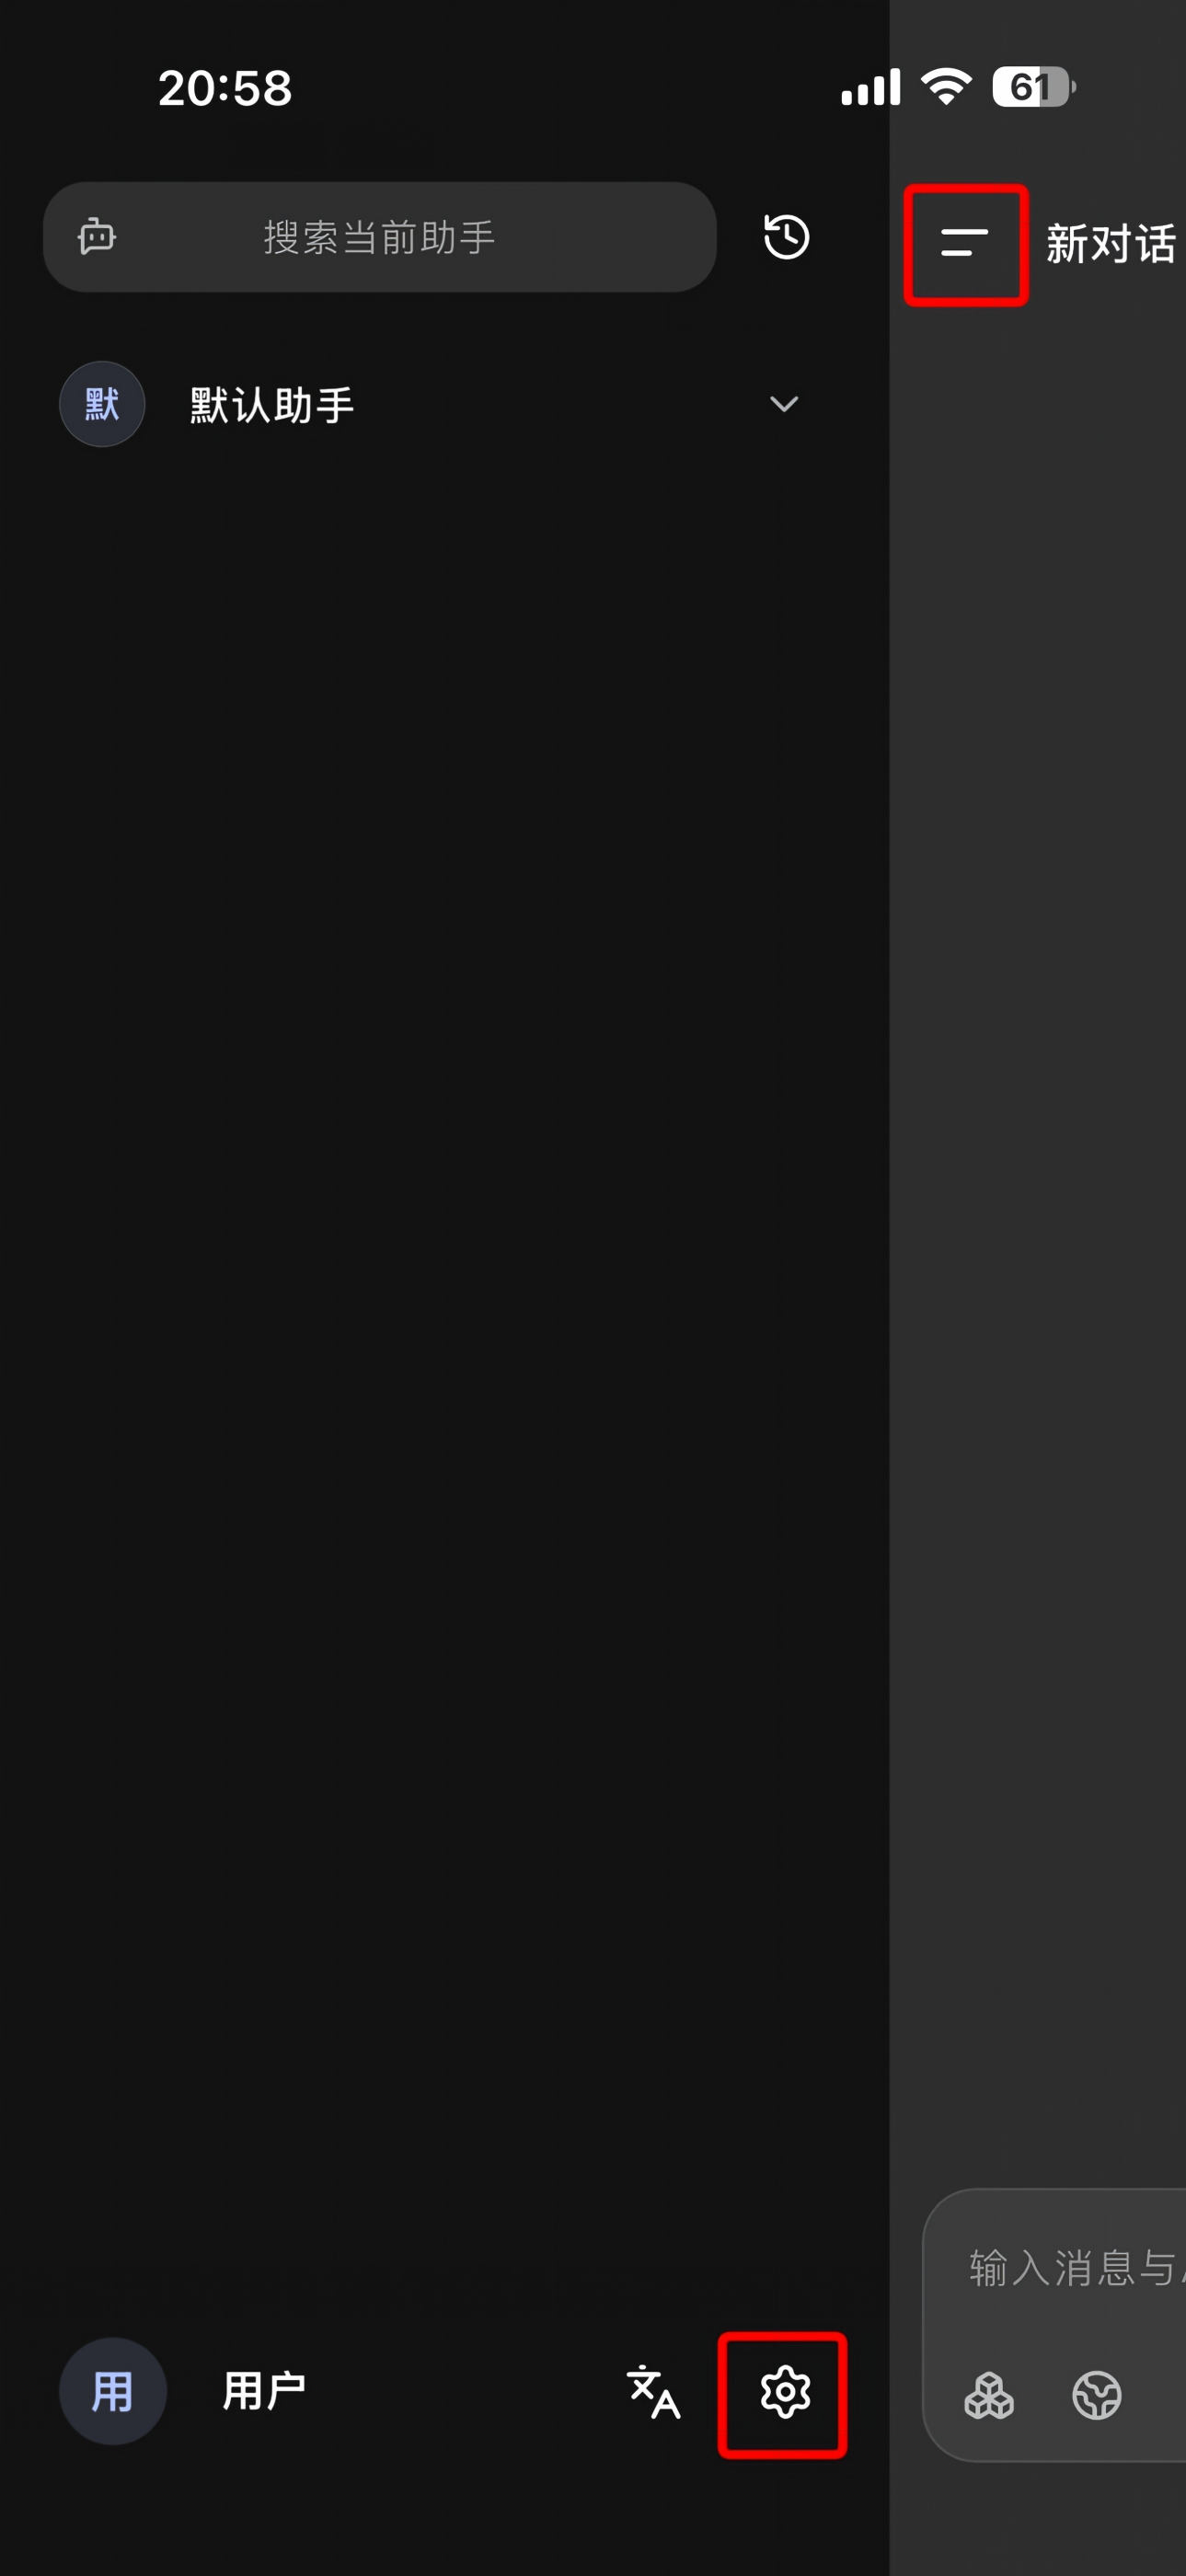
Open Kelivo, tap the menu in the top-left to expand the sidebar, then tap Settings (gear) at the bottom of the sidebar.
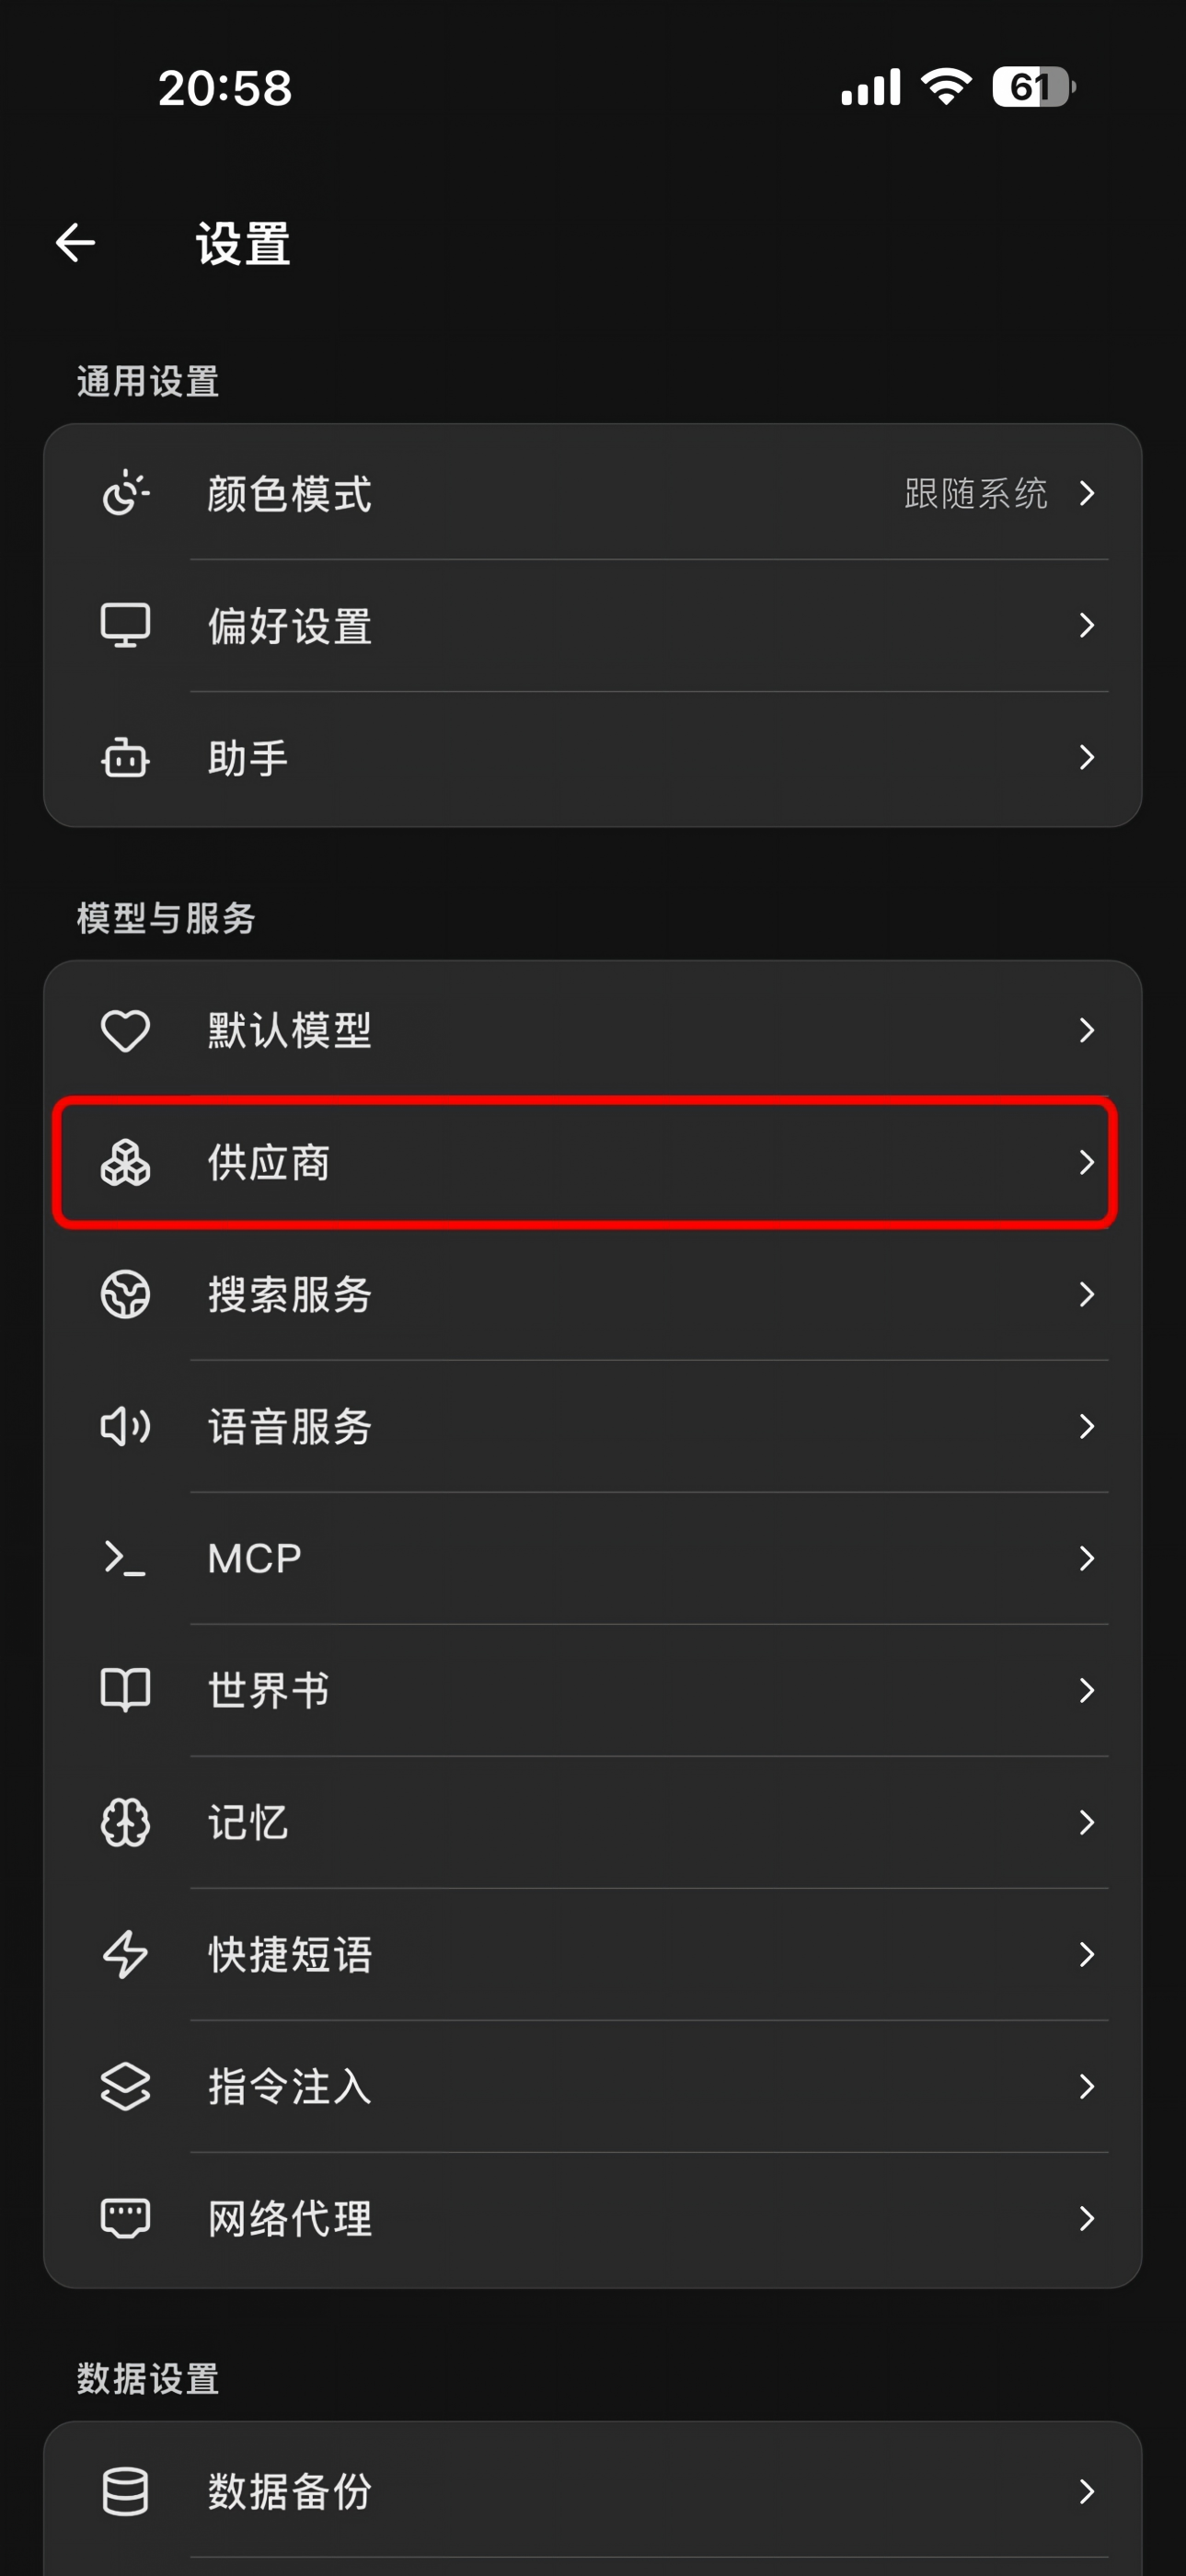
Under Models and Services (模型与服务), tap Providers (供应商).
2. Add a GPT provider
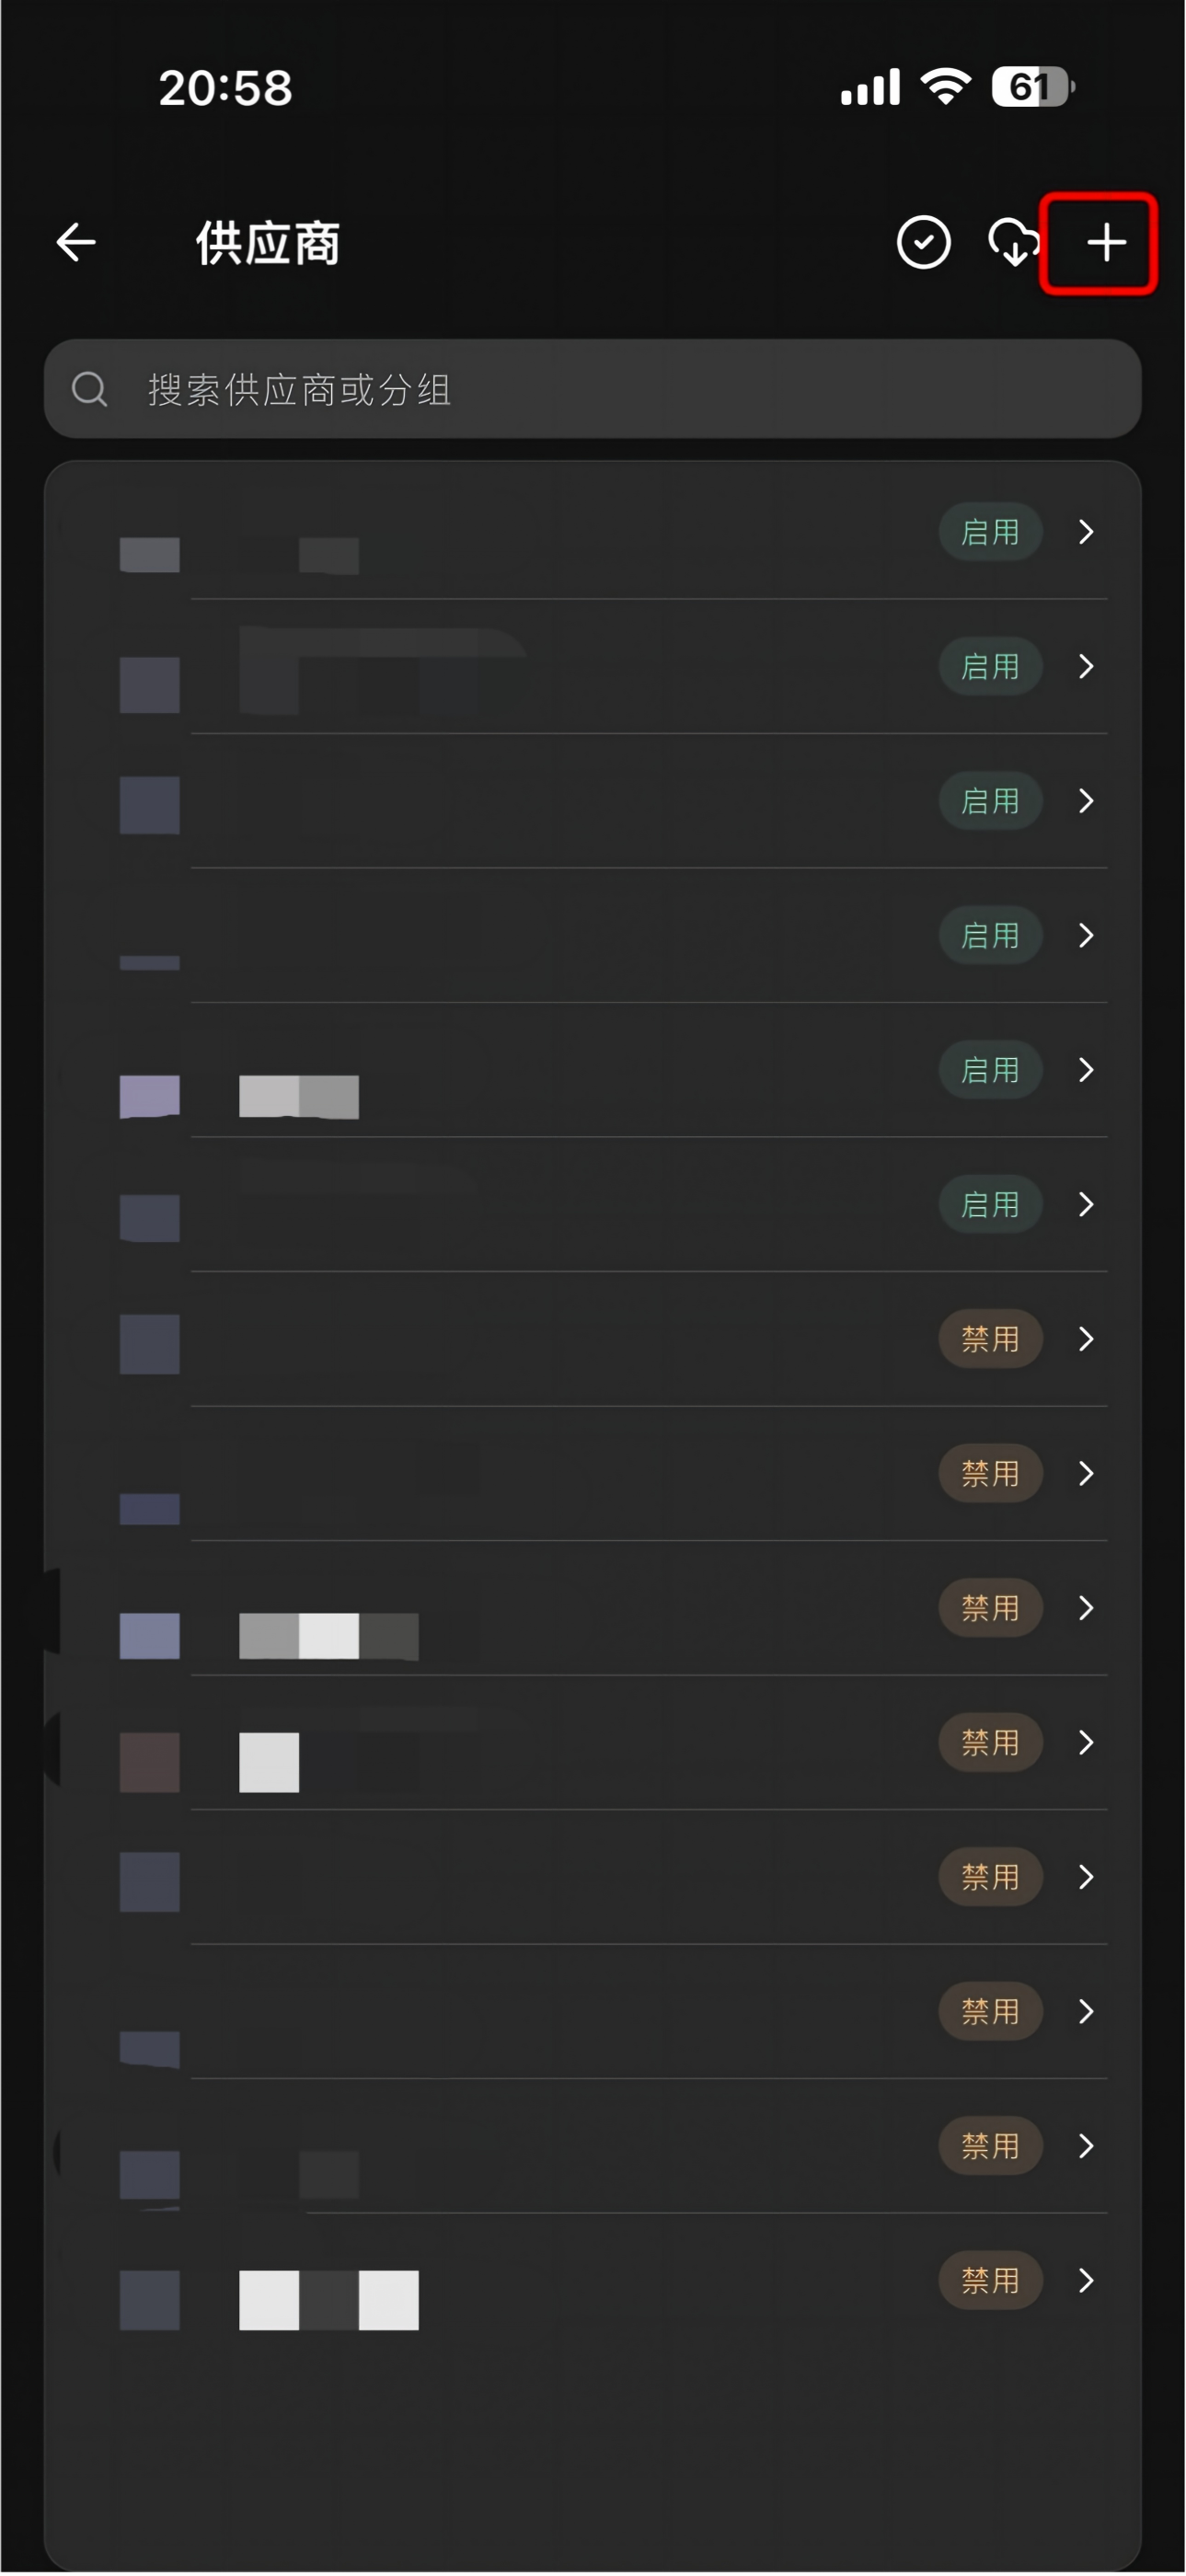
Tap “+” in the top-right of the provider list.
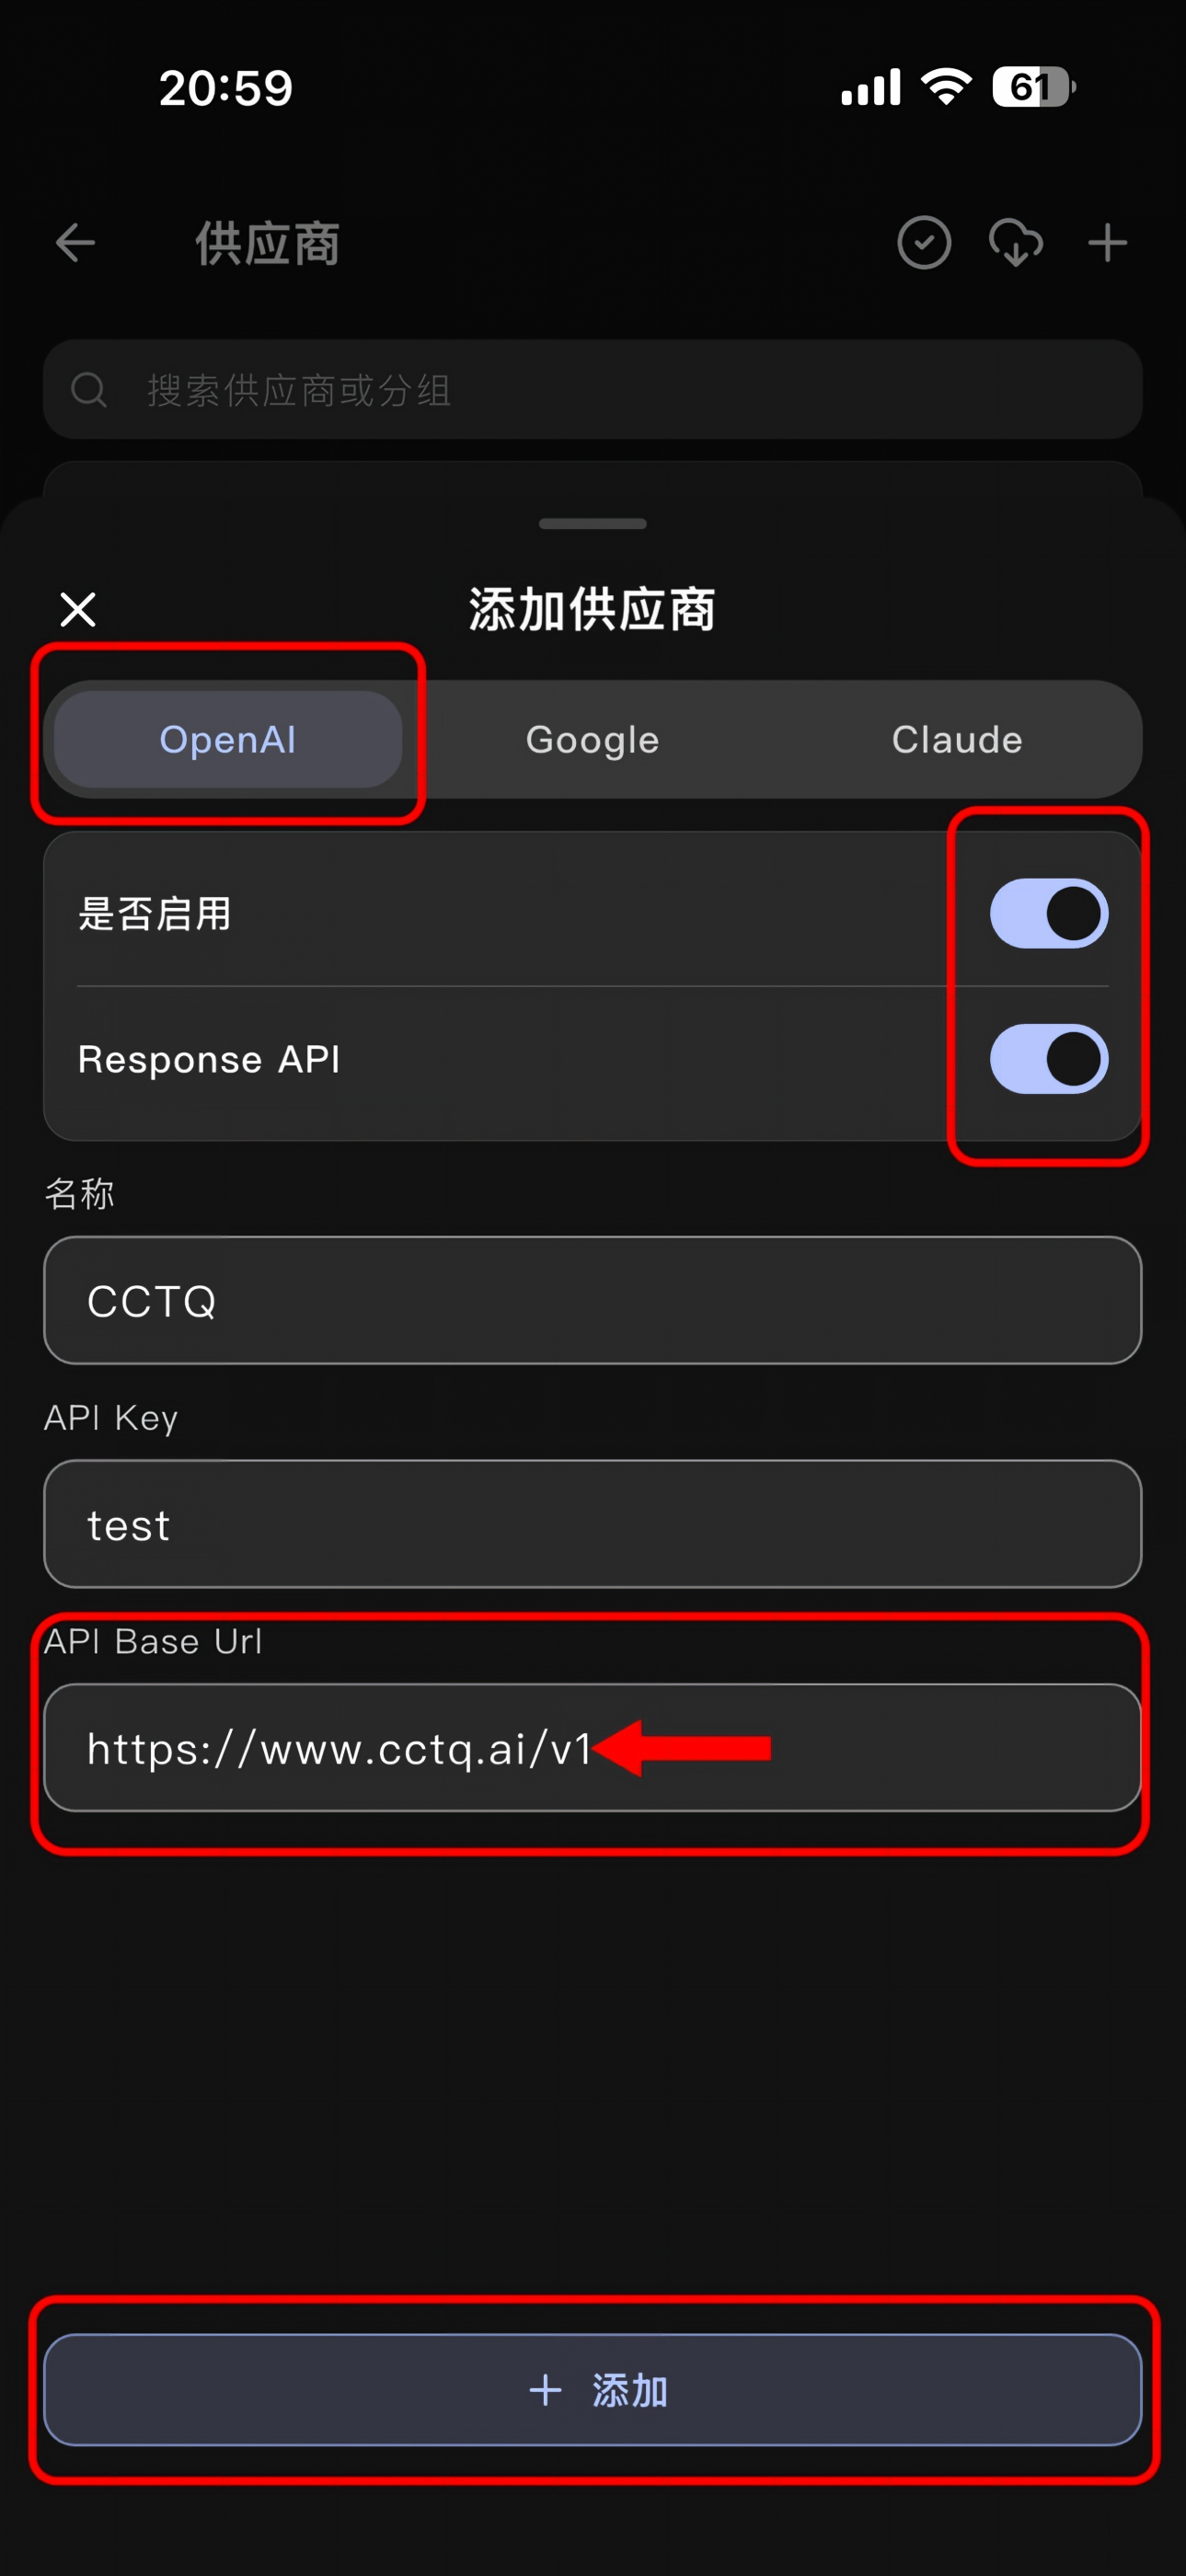
In Add Provider (添加供应商), enter the following:
| Setting | Value |
|---|---|
| Provider type | Select OpenAI |
| Enabled (是否启用) | On |
| Response API | On |
| Name (名称) | Any name, e.g. CCTQ |
| API Key | Your own token key |
| API Base Url | https://www.cctq.ai/v1, including /v1 |
Key and URL
The test value in the screenshot is only a placeholder. Replace it with your own valid token key. Use the URL above without manually appending /responses.
Once filled in, tap “+ Add (添加)” at the bottom.
3. Fetch and add GPT models
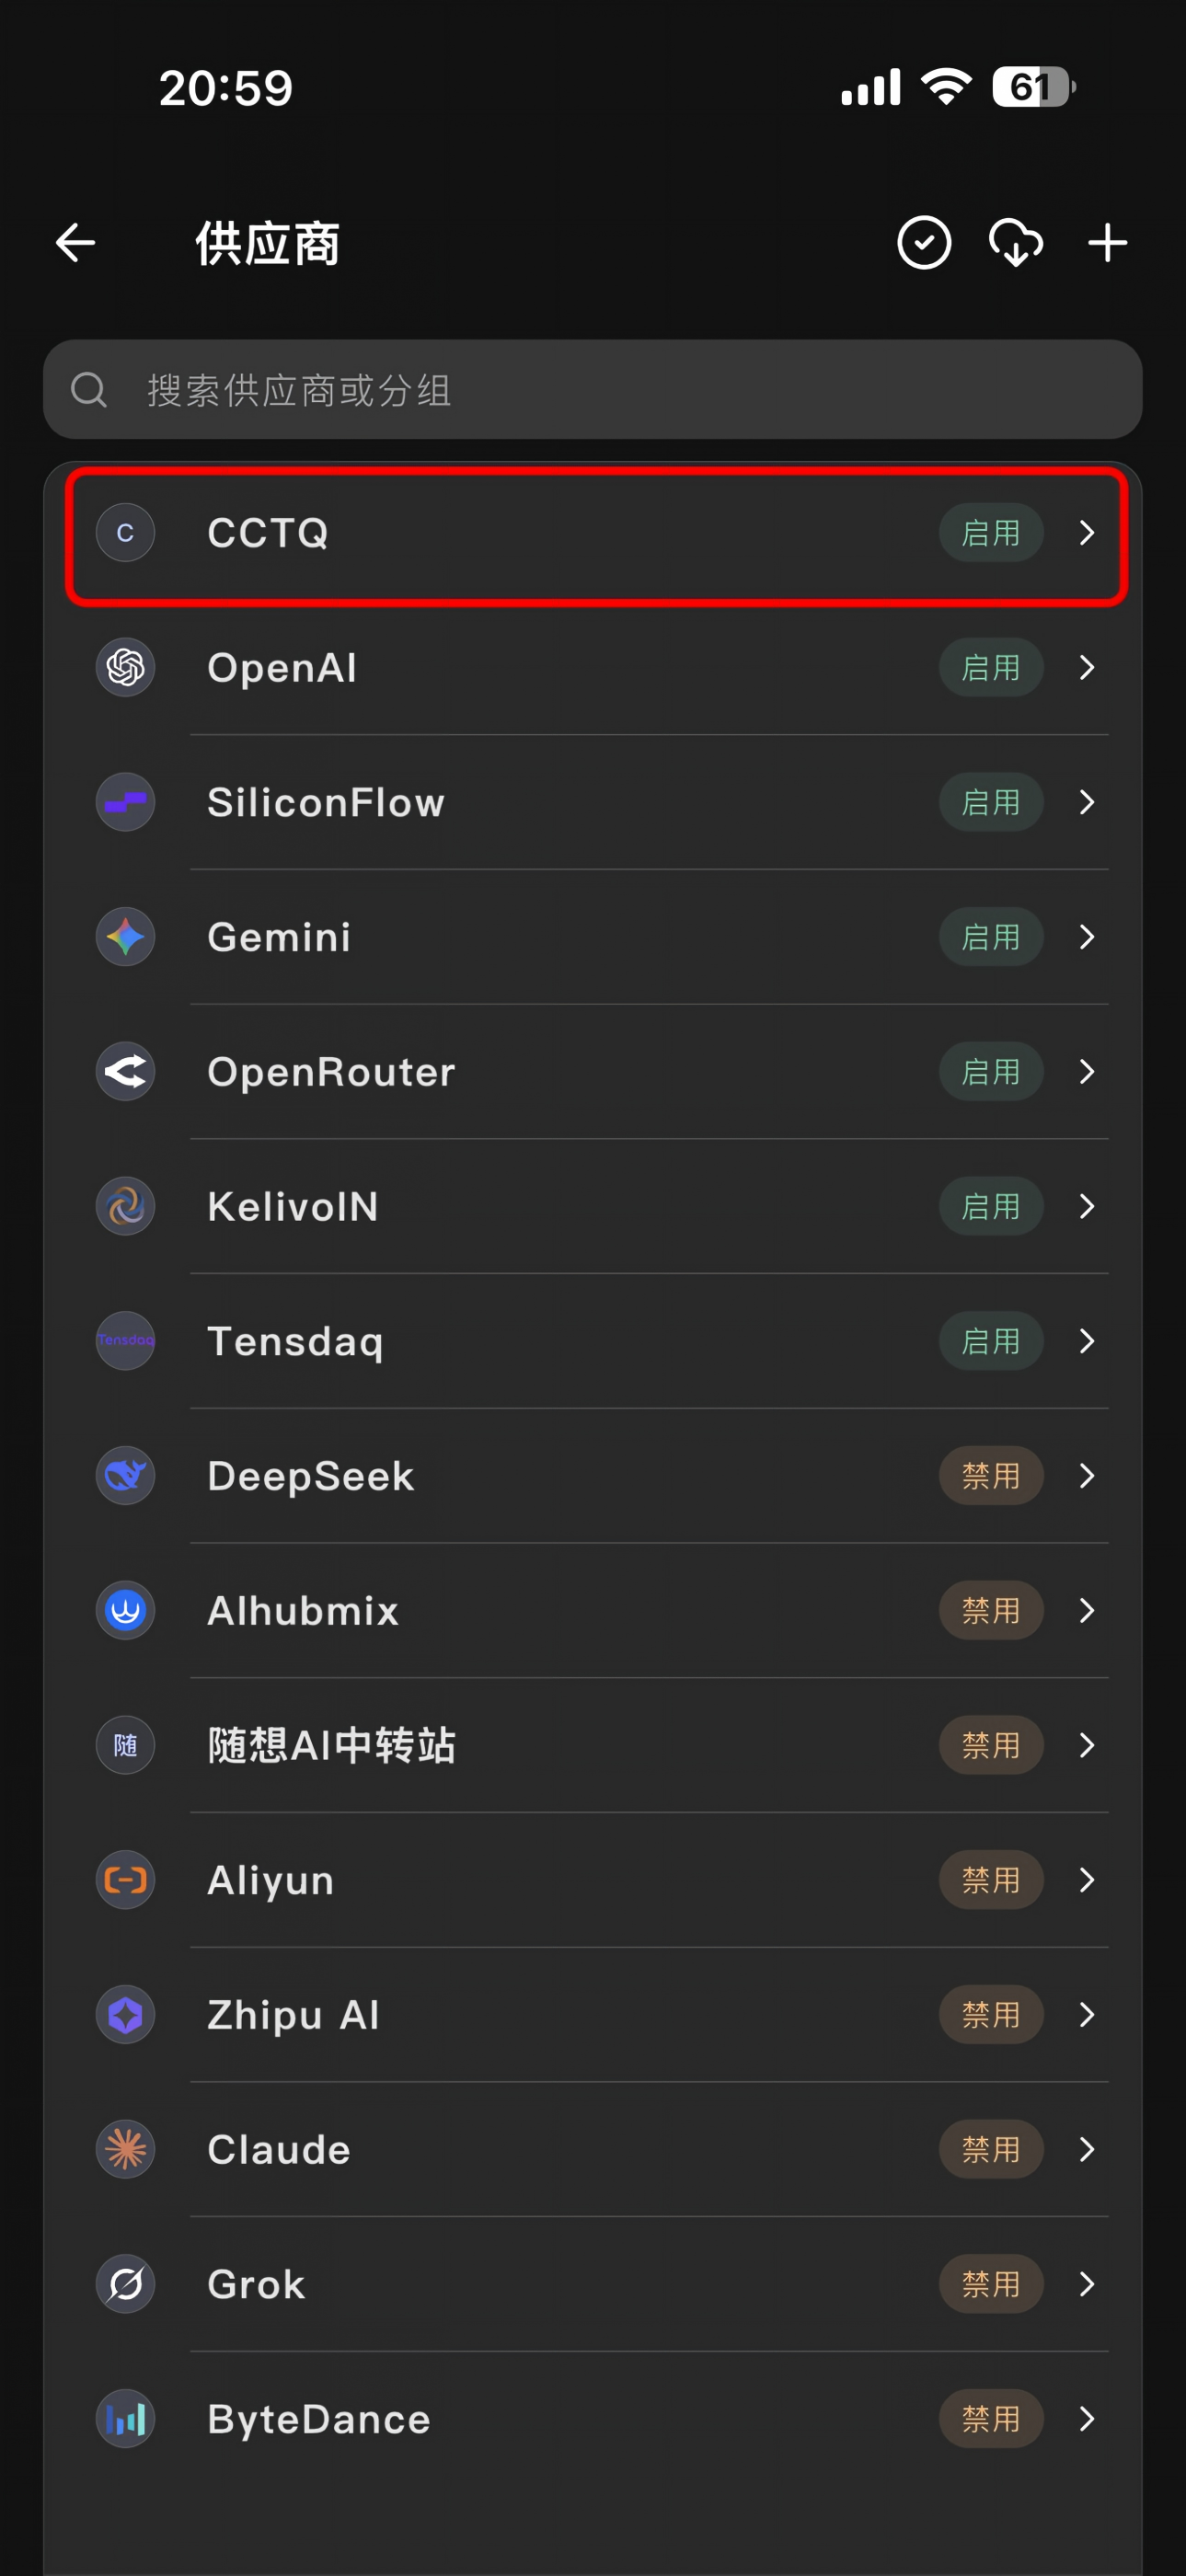
Back in the provider list, tap the newly added CCTQ entry and make sure its status is Enabled (启用).
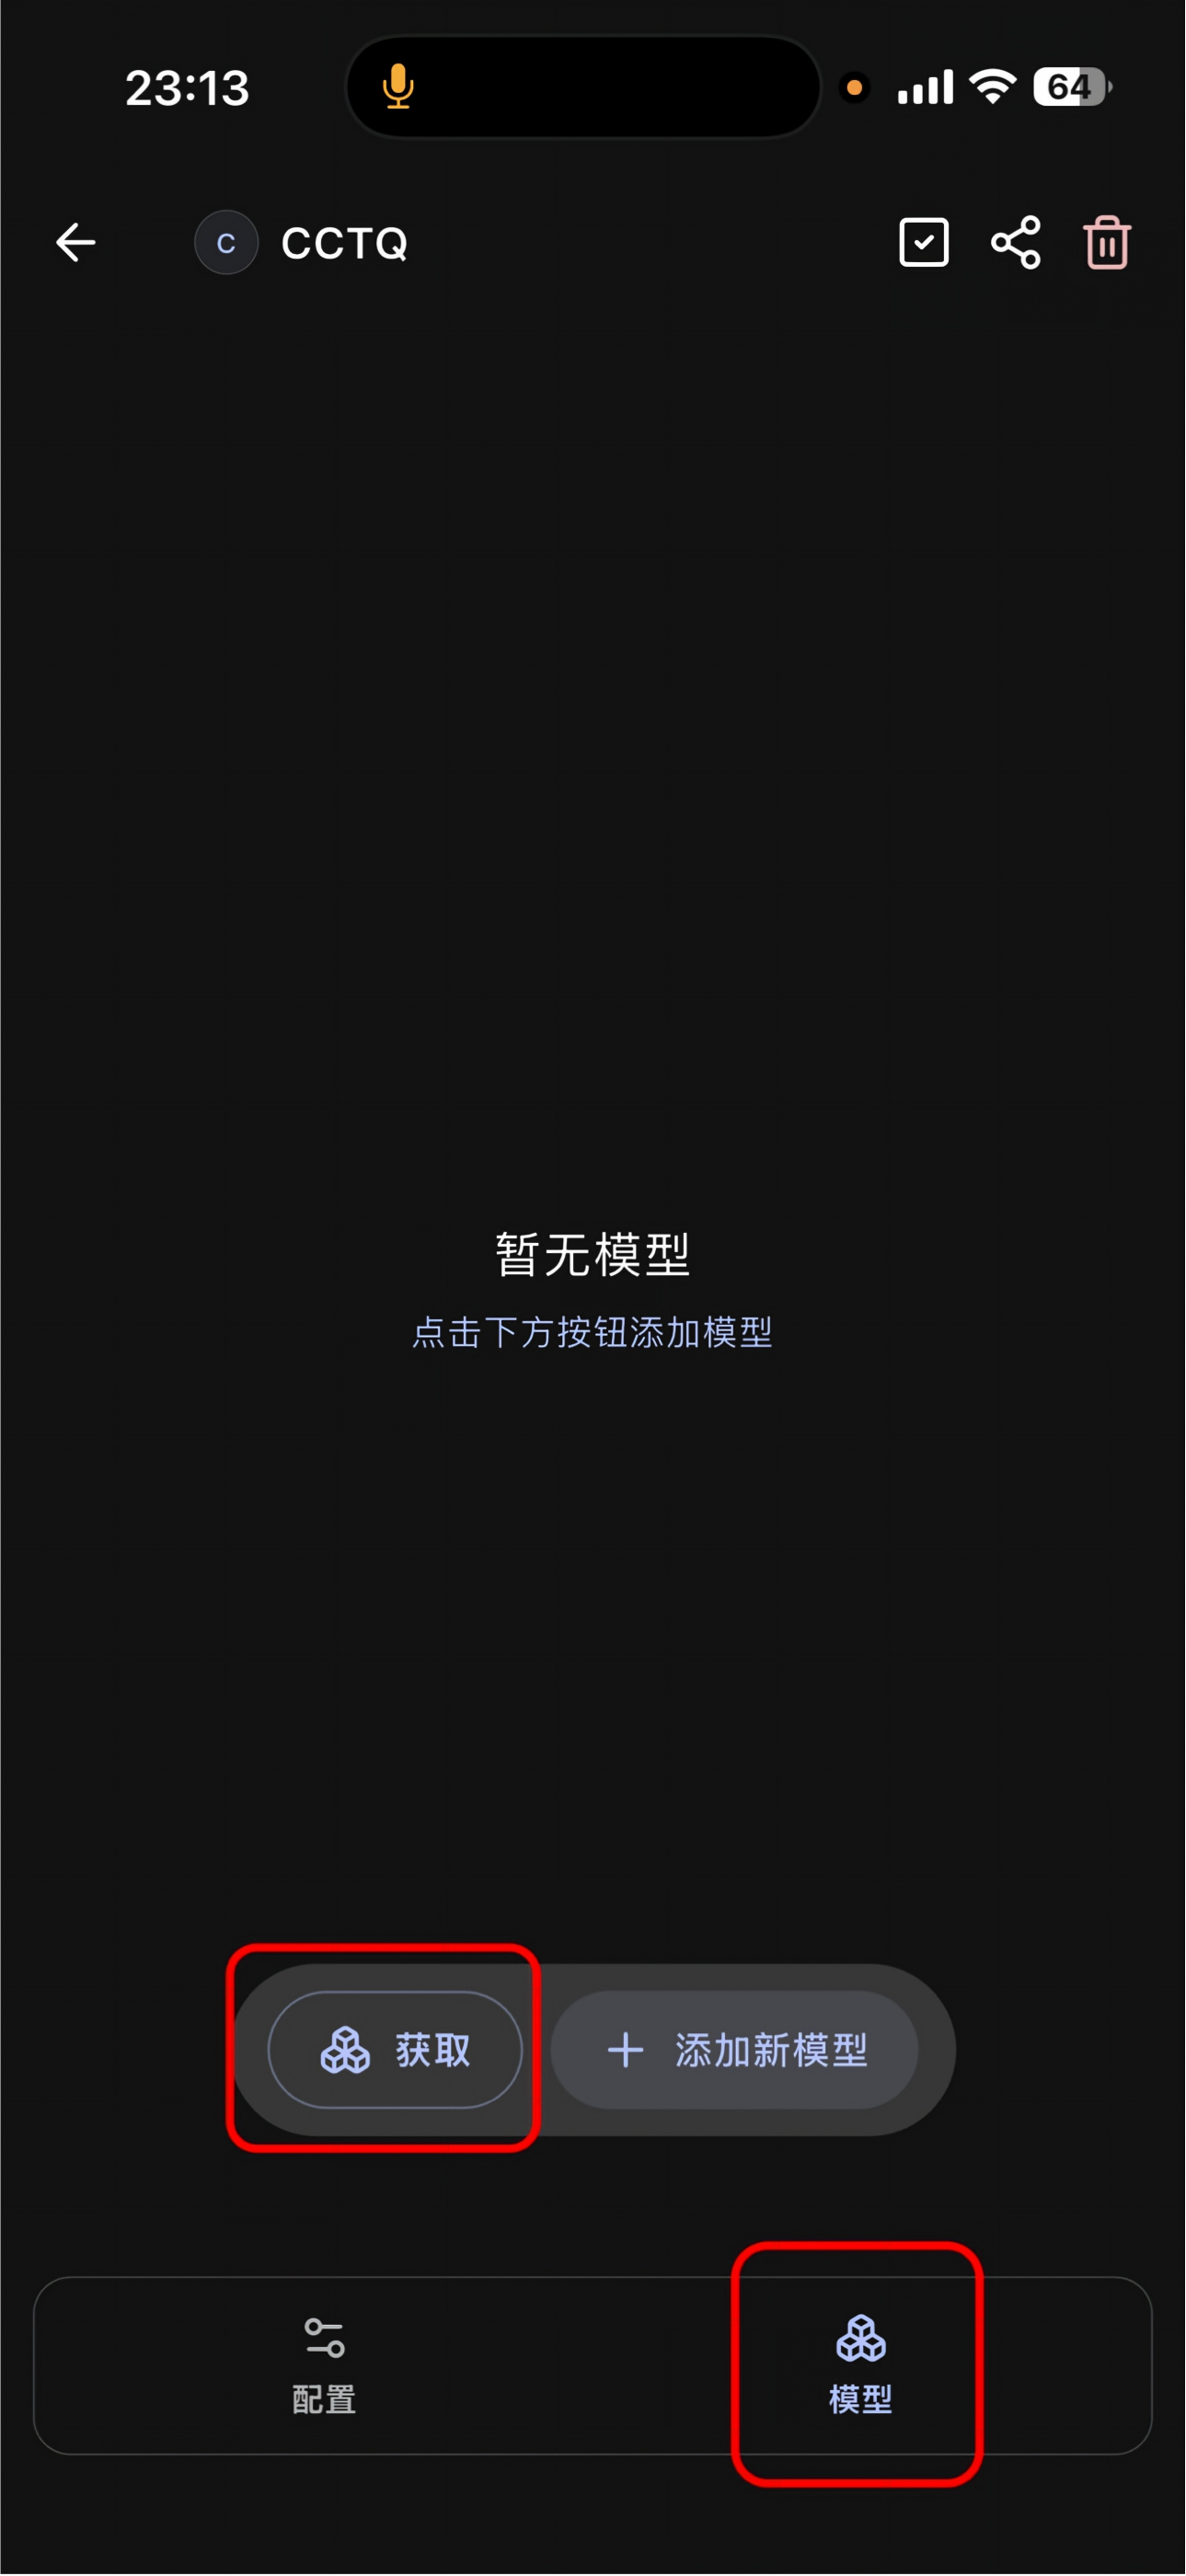
Switch to the Models (模型) tab at the bottom, then tap Fetch (获取) to load the models available to your token.
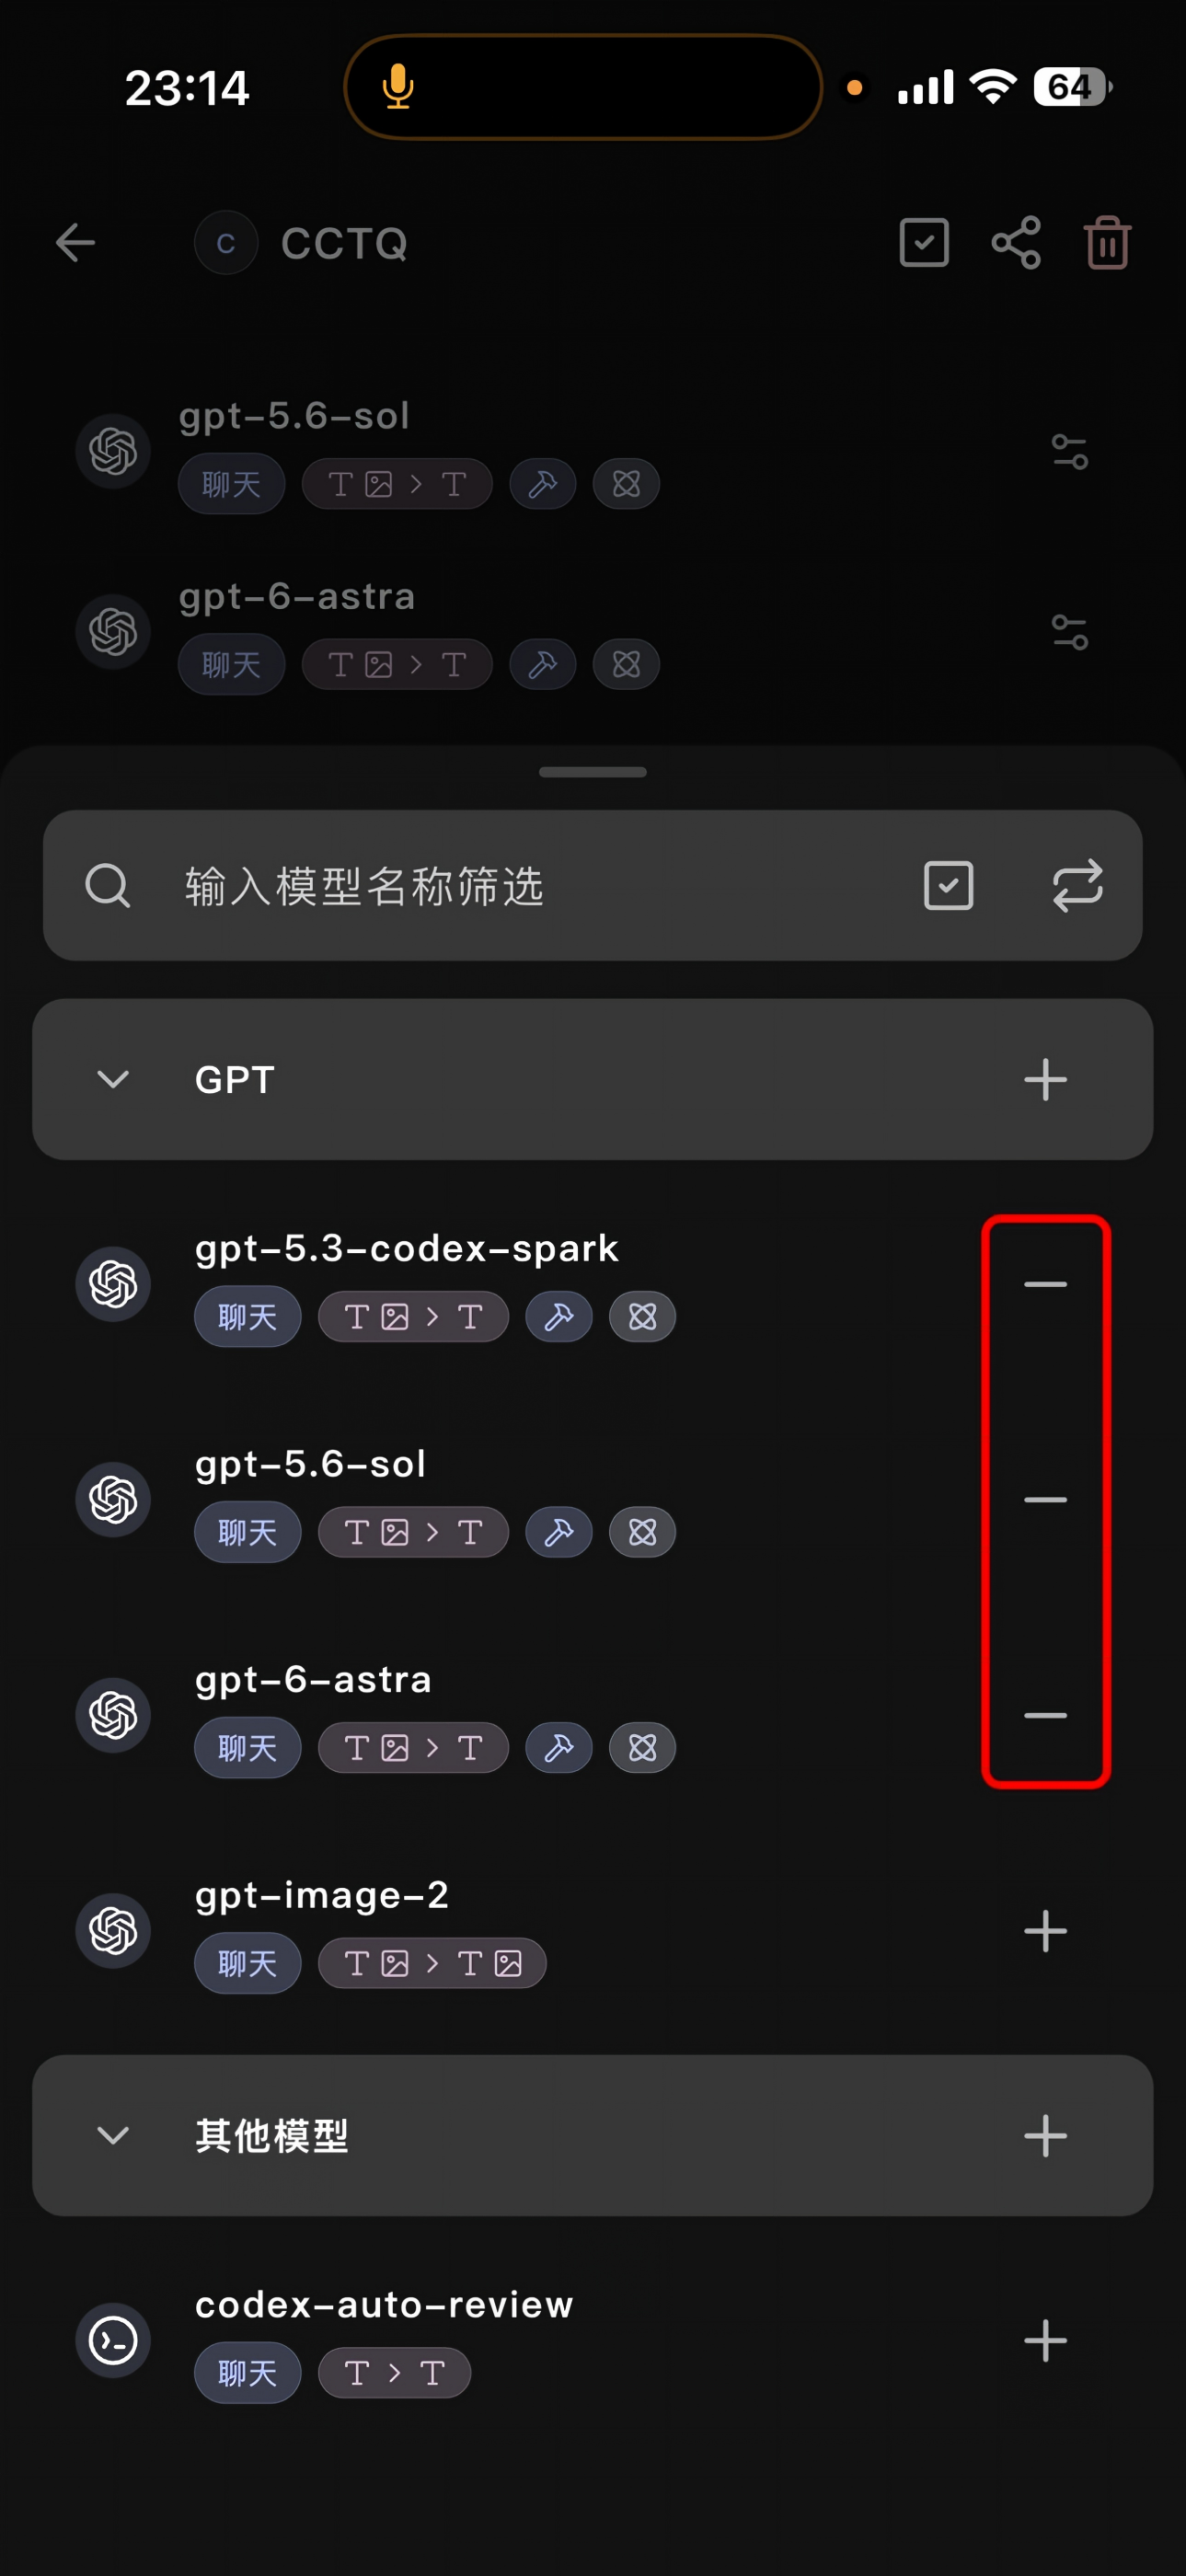
Search the list or expand the GPT group. Tap “+” next to each model you want to add. The screenshots use gpt-5.3-codex-spark, gpt-5.6-sol, and gpt-6-astra as examples; use the models available in your fetched list.
After a model is added, its button changes to “−”. The models outlined in red in the screenshot have already been added, so do not tap their minus buttons again.
4. Select a model and start a chat
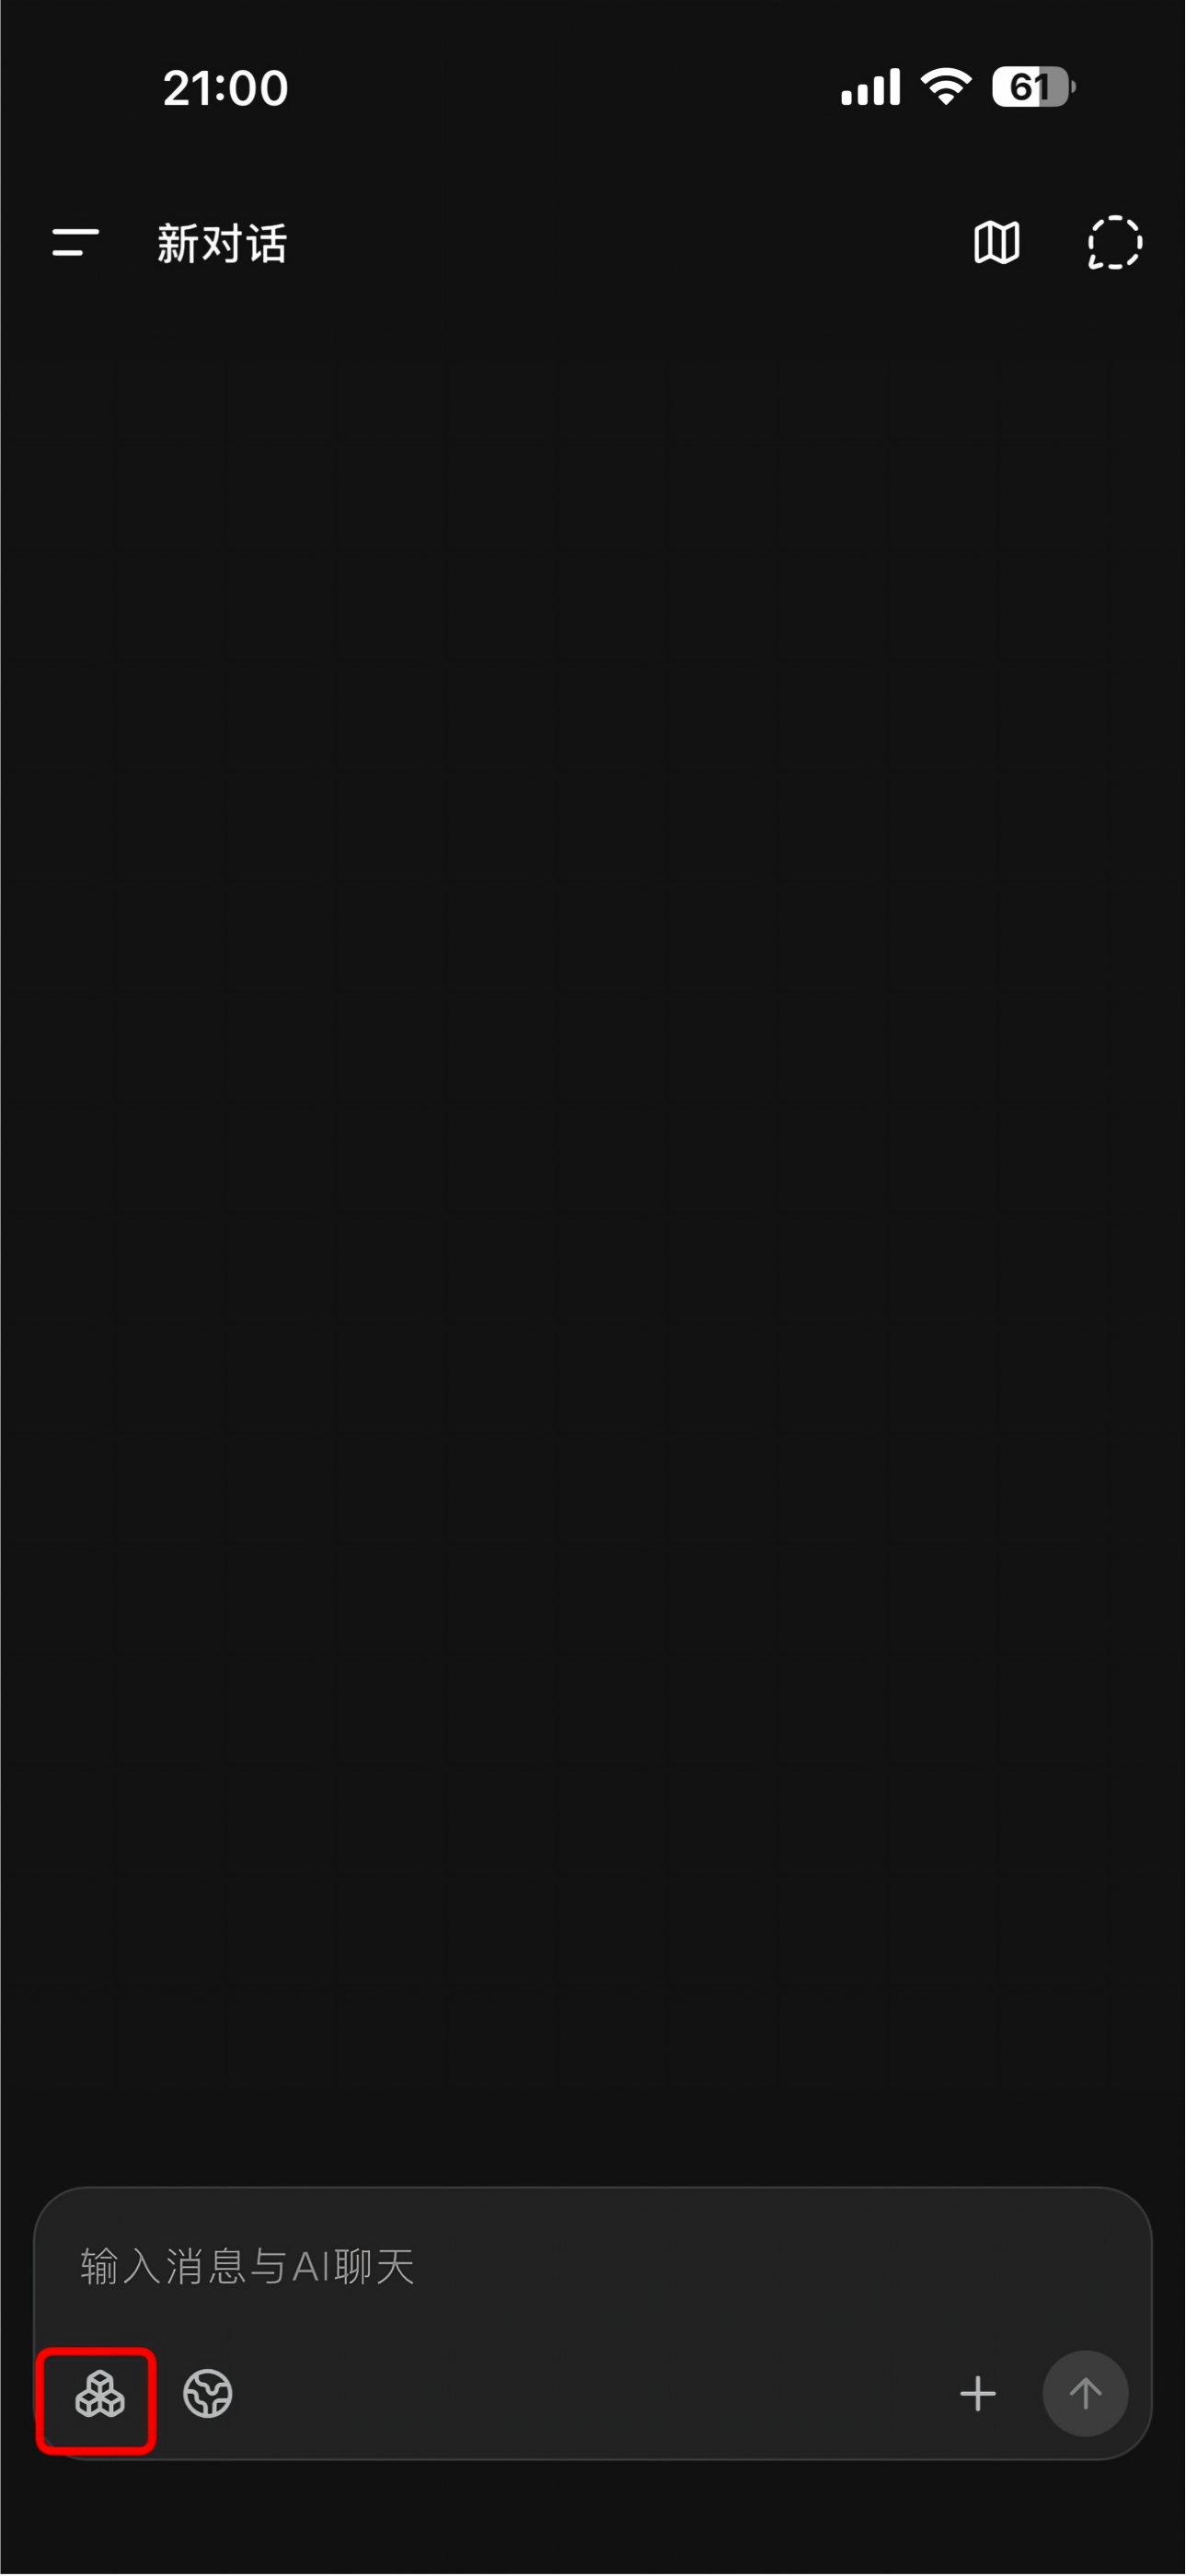
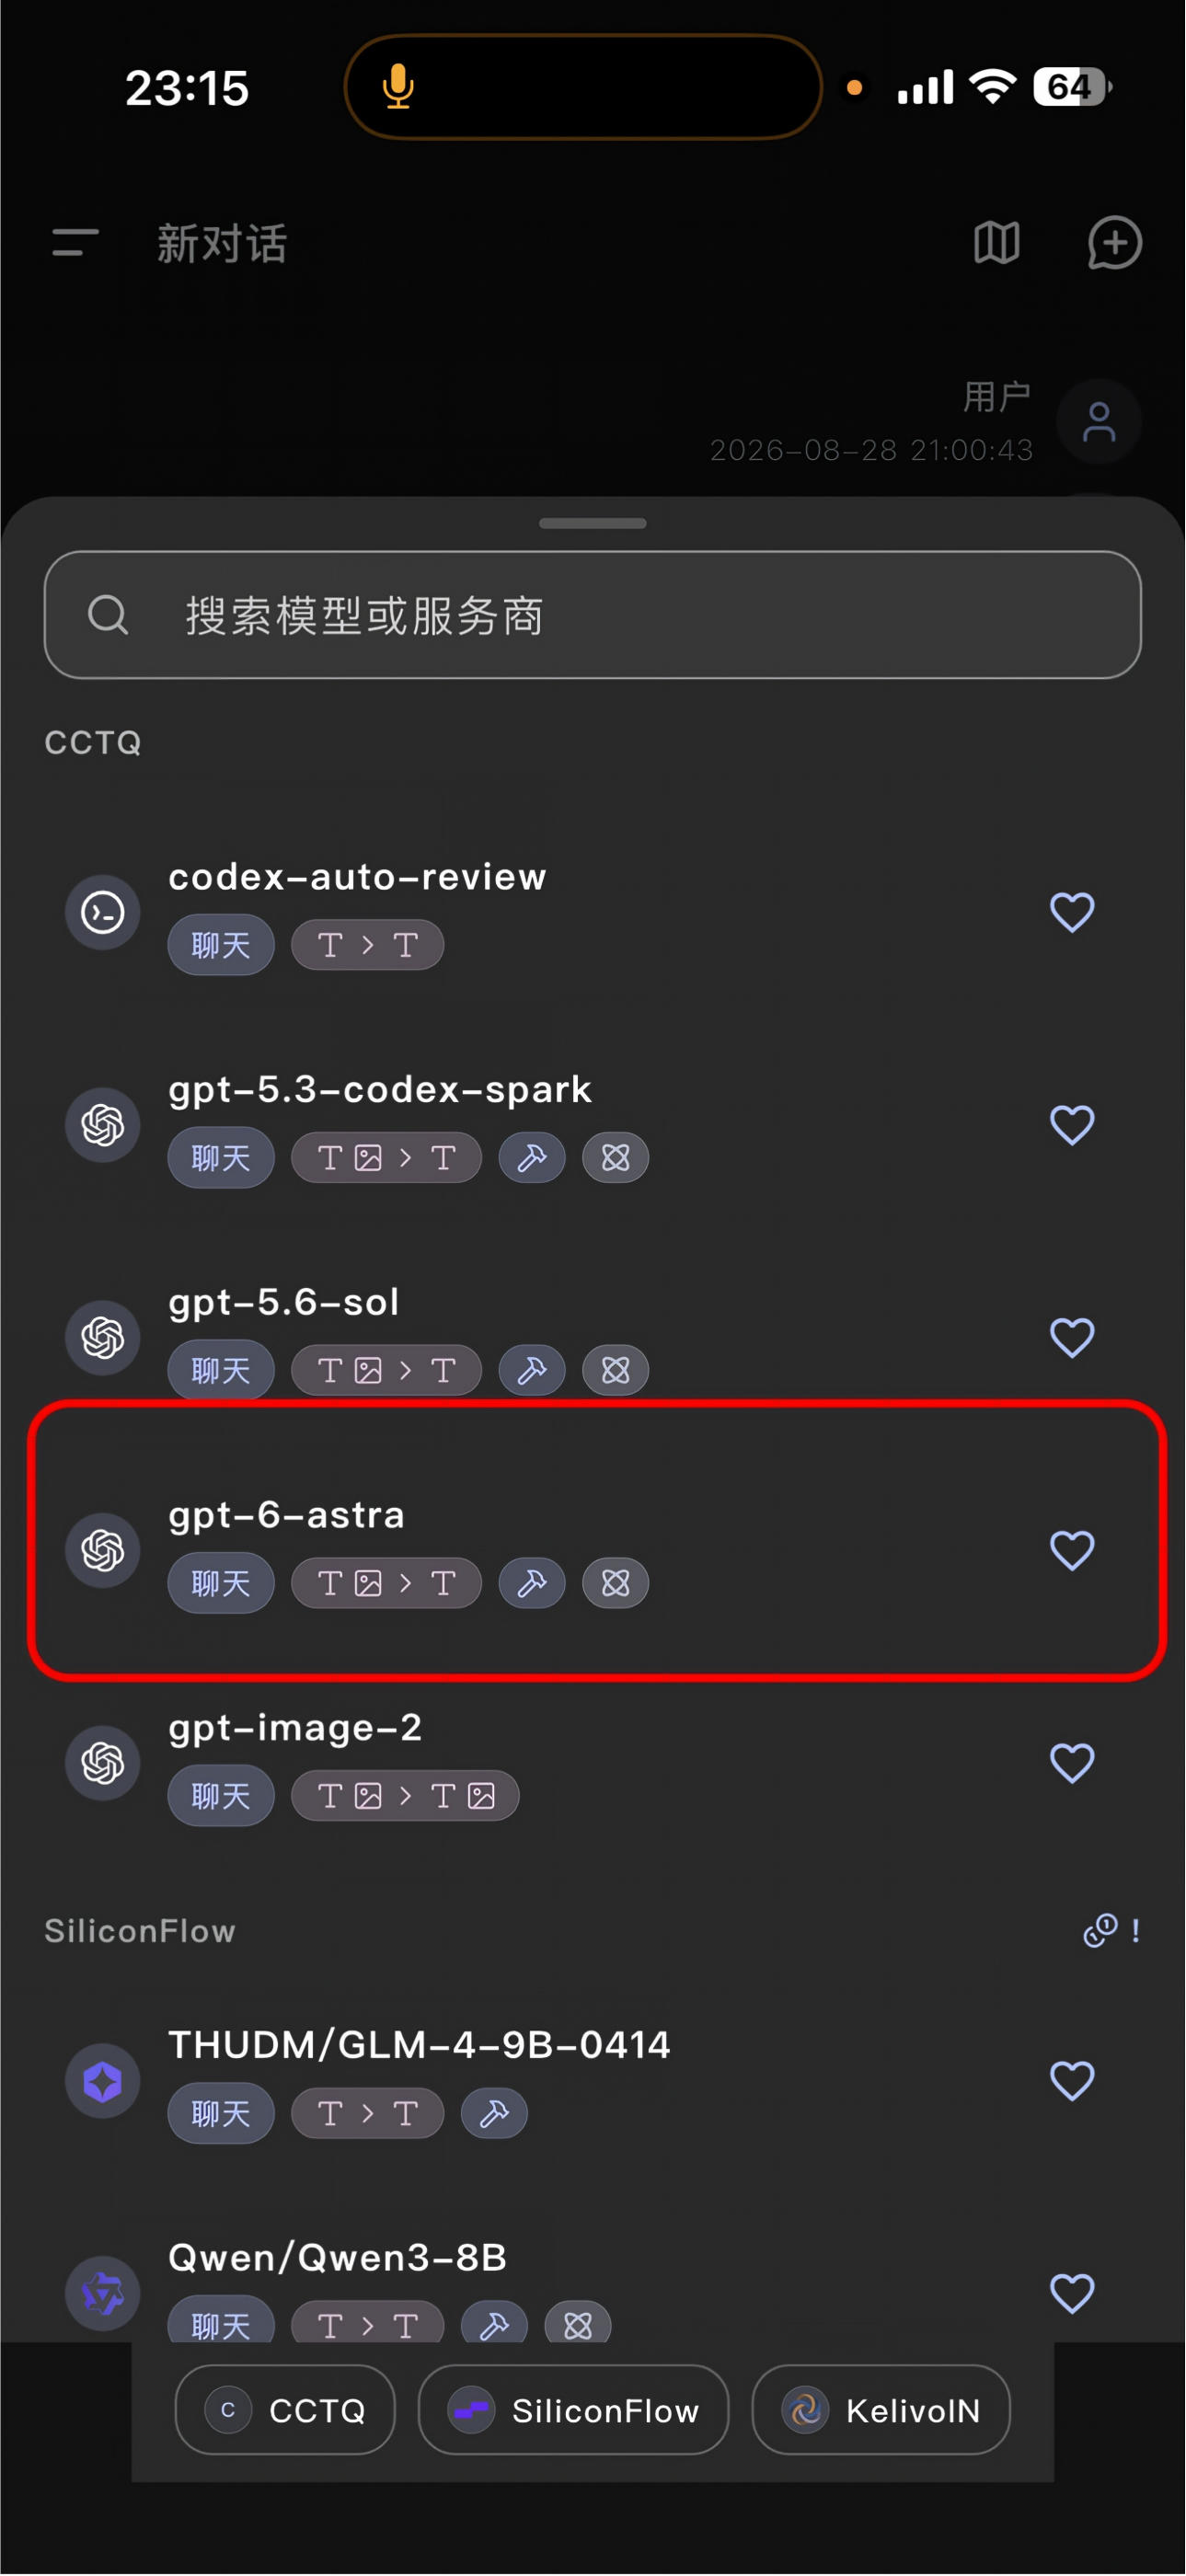
Return to the chat screen and tap the model selector icon at the bottom-left of the message box.
Under CCTQ, tap a GPT model you added, such as gpt-6-astra in the screenshot. You can also search for a model or provider using the search box at the top.
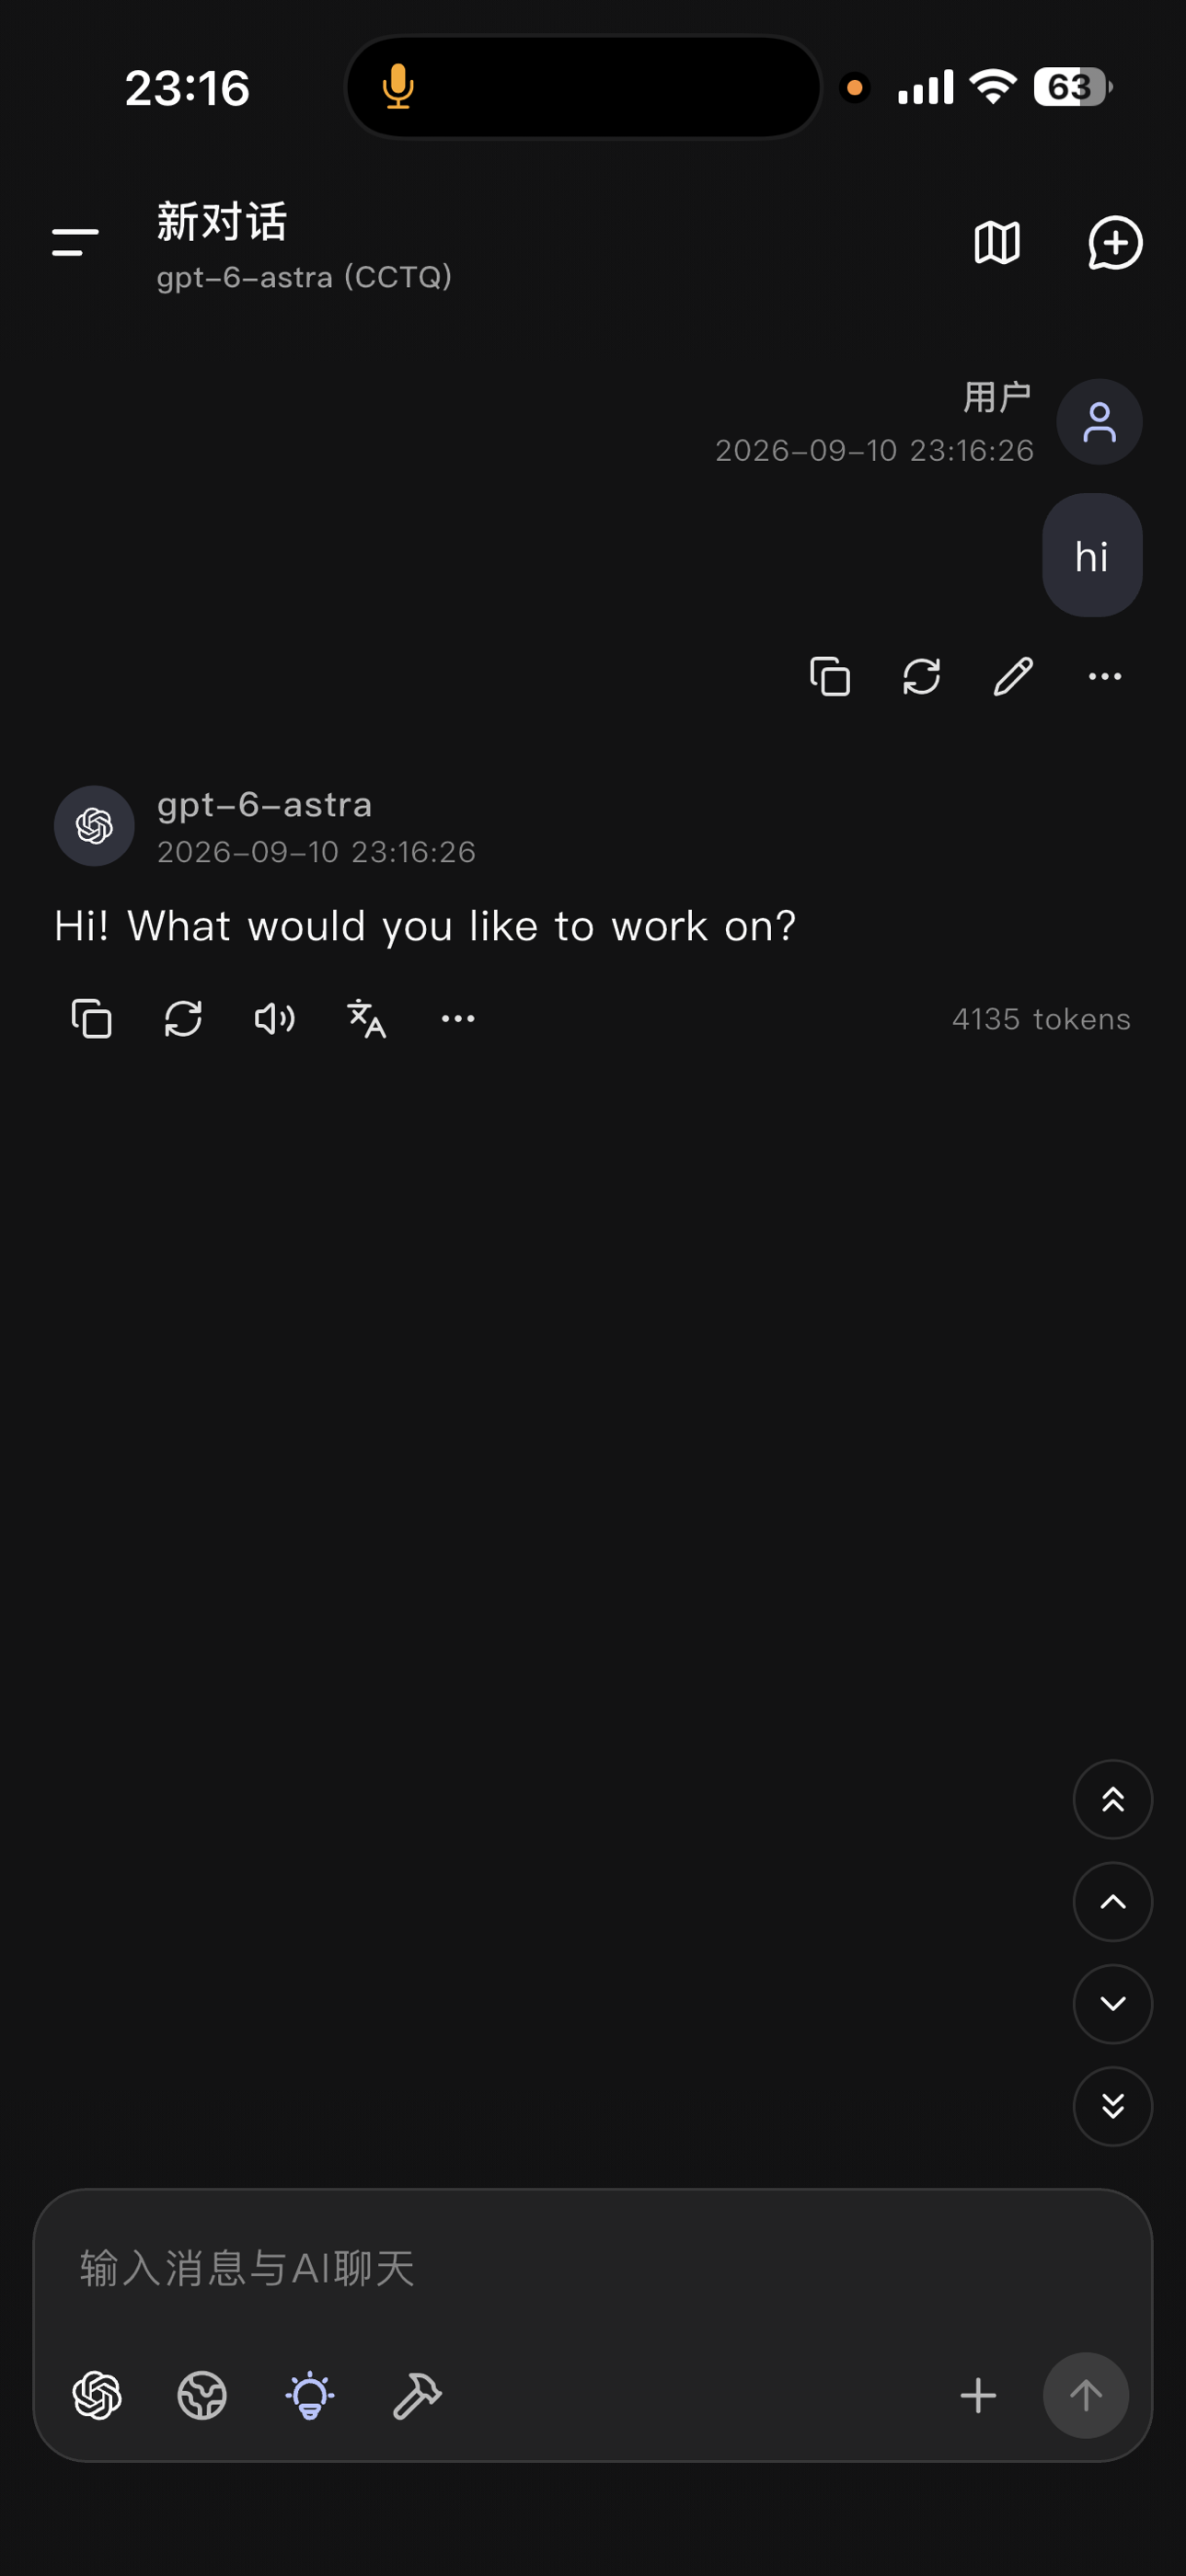
Check that the selected model and provider appear at the top of the chat screen, then send a simple message such as hi. A normal reply confirms that basic text chat is working.
If fetching models or sending a message fails, check that your API Key is valid, the base URL is https://www.cctq.ai/v1, Response API is enabled, and your token has access to the selected model. For further troubleshooting, see Request Errors.