
Reasonix Setup Guide
Using third-party clients
For a more consistent and complete experience, we recommend using each model in its provider’s official client.
Third-party apps update at different speeds and may adapt APIs differently. Compatibility issues can include cache misses, unavailable tools, or request errors. If you encounter a problem, first check the client version, configuration, and model support.
This guide focuses on simple, quick setup for basic use. Advanced features and custom workflows are welcome to explore, but usually require technical knowledge and fall outside our standard support scope. Our support team may offer suggestions where practical, but cannot guarantee troubleshooting or a solution for every issue.
This guide uses the Reasonix desktop interface to set up basic text conversations with GPT and Claude. Before starting, install and open Reasonix, and prepare your own token key. The screenshots show the Chinese interface.
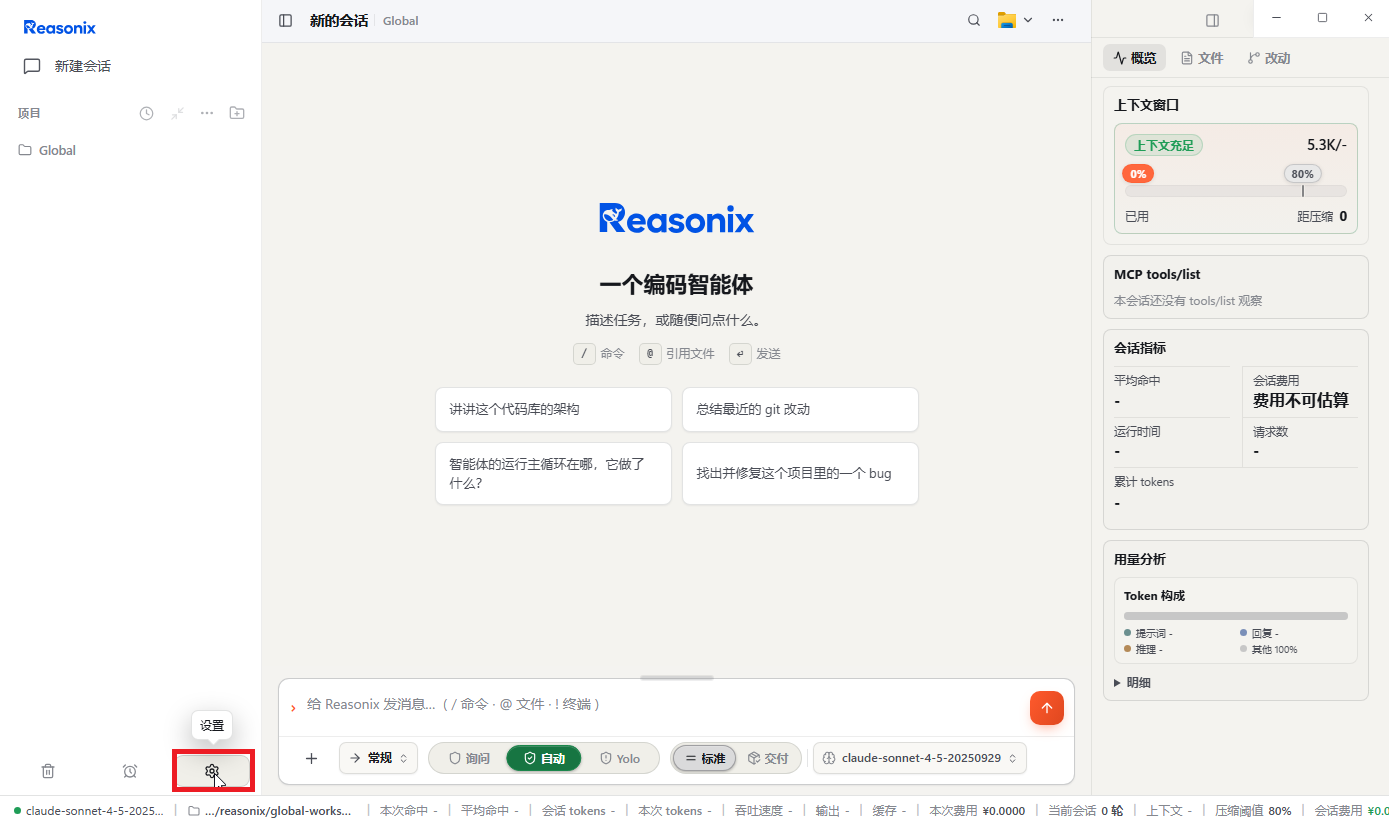
1. Open settings
Click Settings (设置) in the bottom-left of the Reasonix main screen.
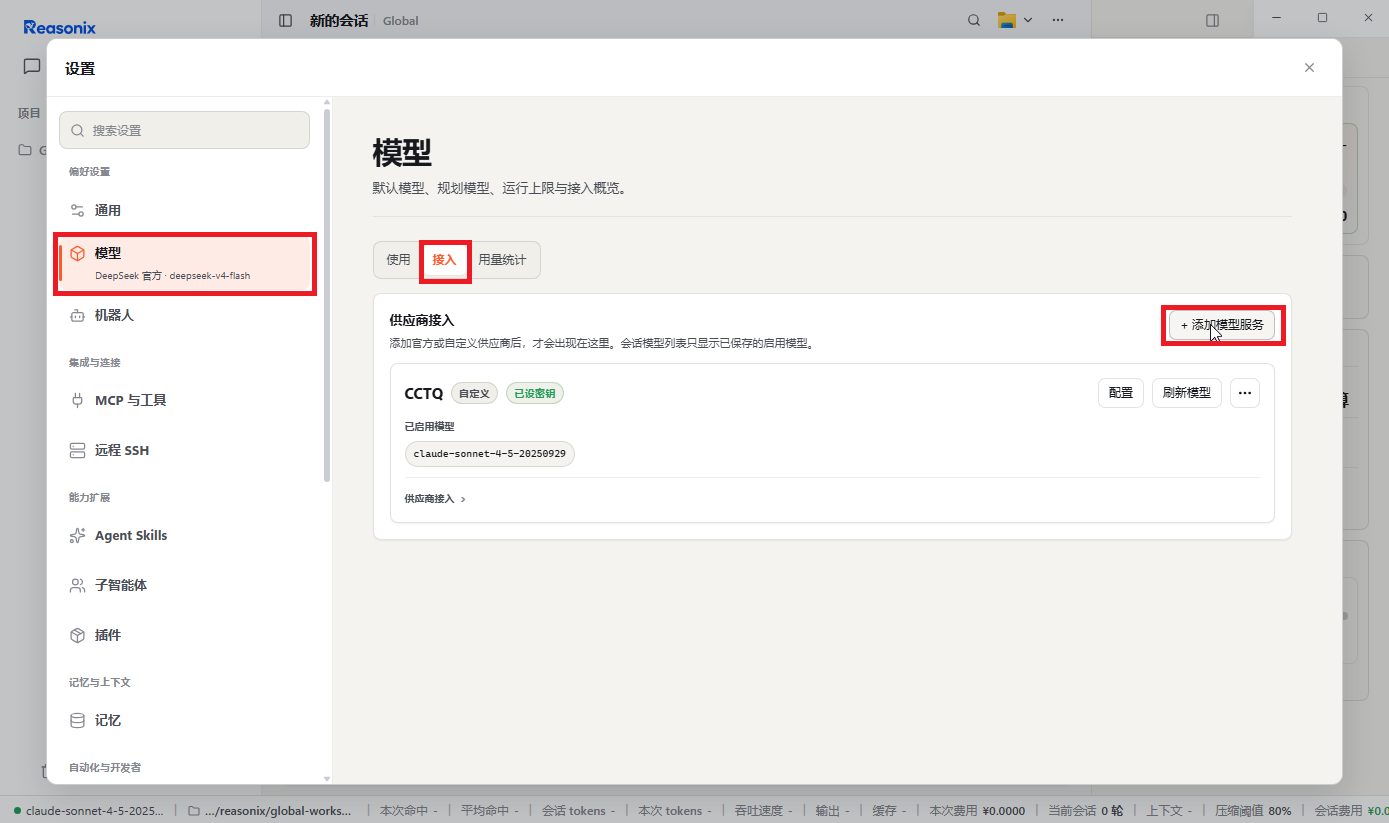
2. Open model settings
In Settings, open Models (模型) → Connect (接入), then click Add Model Service (添加模型服务) in the top-right.
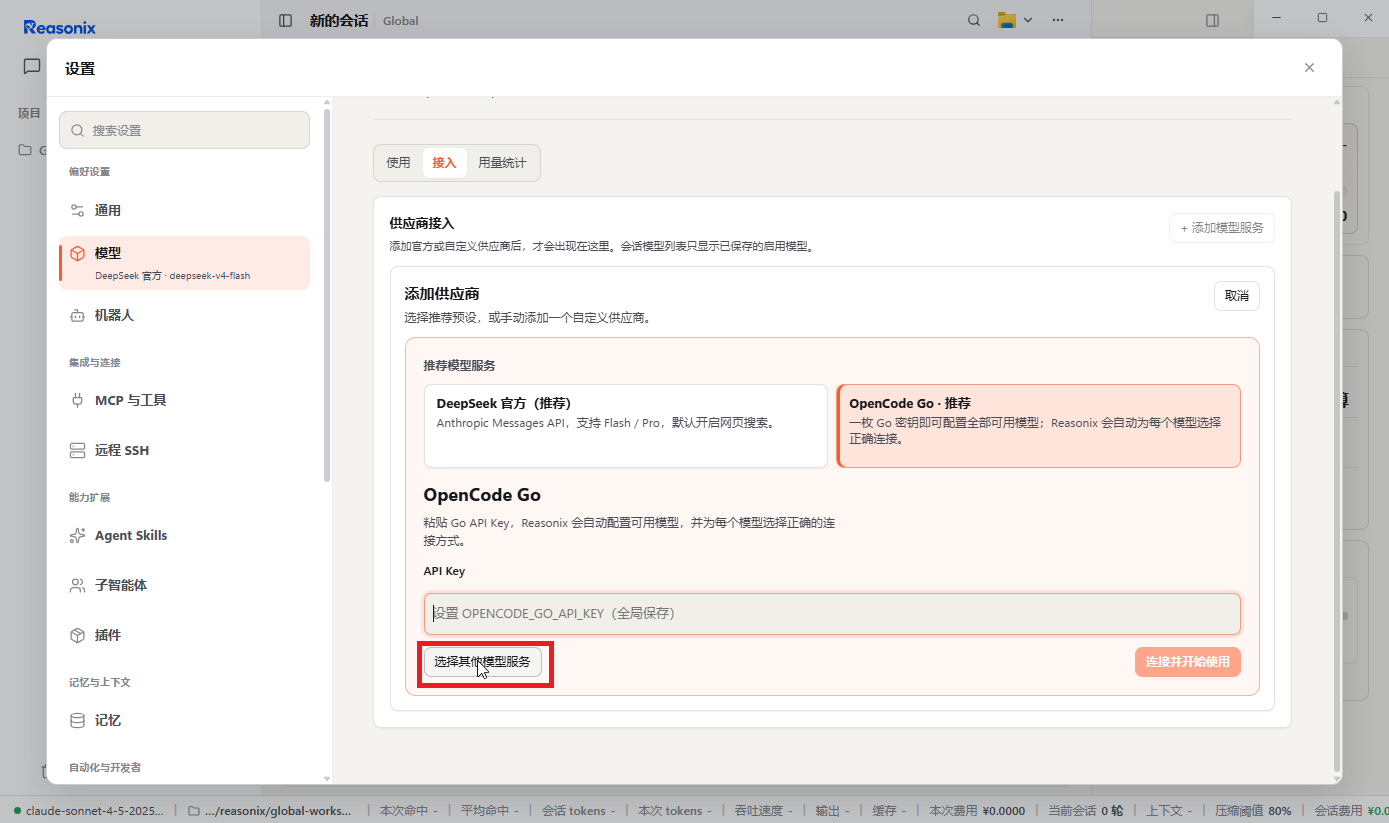
3. Choose another model service
If the recommended model service page appears, click Choose Other Model Services (选择其他模型服务).
4. Select a custom provider
On the model service page, select Custom Provider (自定义供应商) to configure CCTQ.
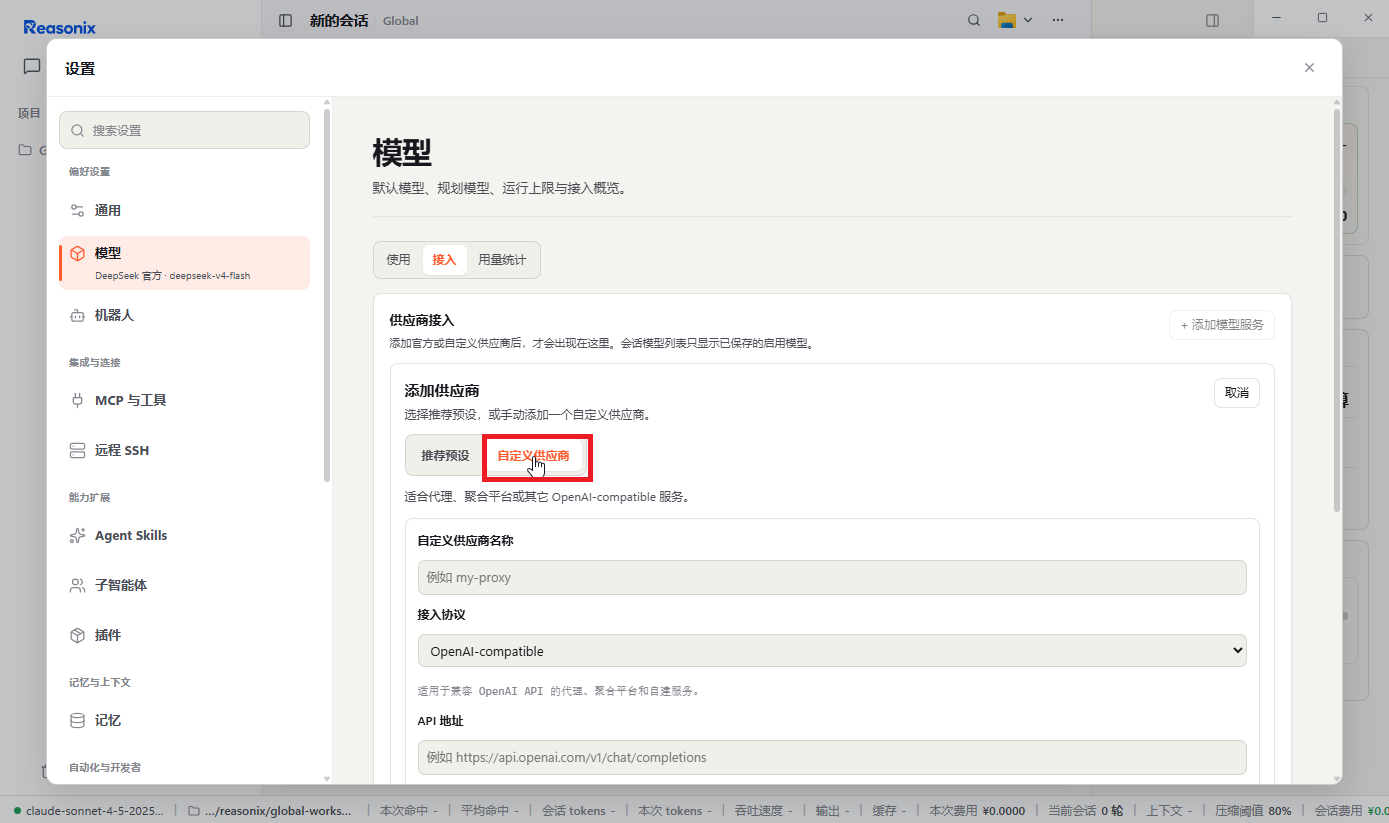
GPT and Claude use different connection protocols, so add two separate providers. The names in the screenshots are examples and can be customized.
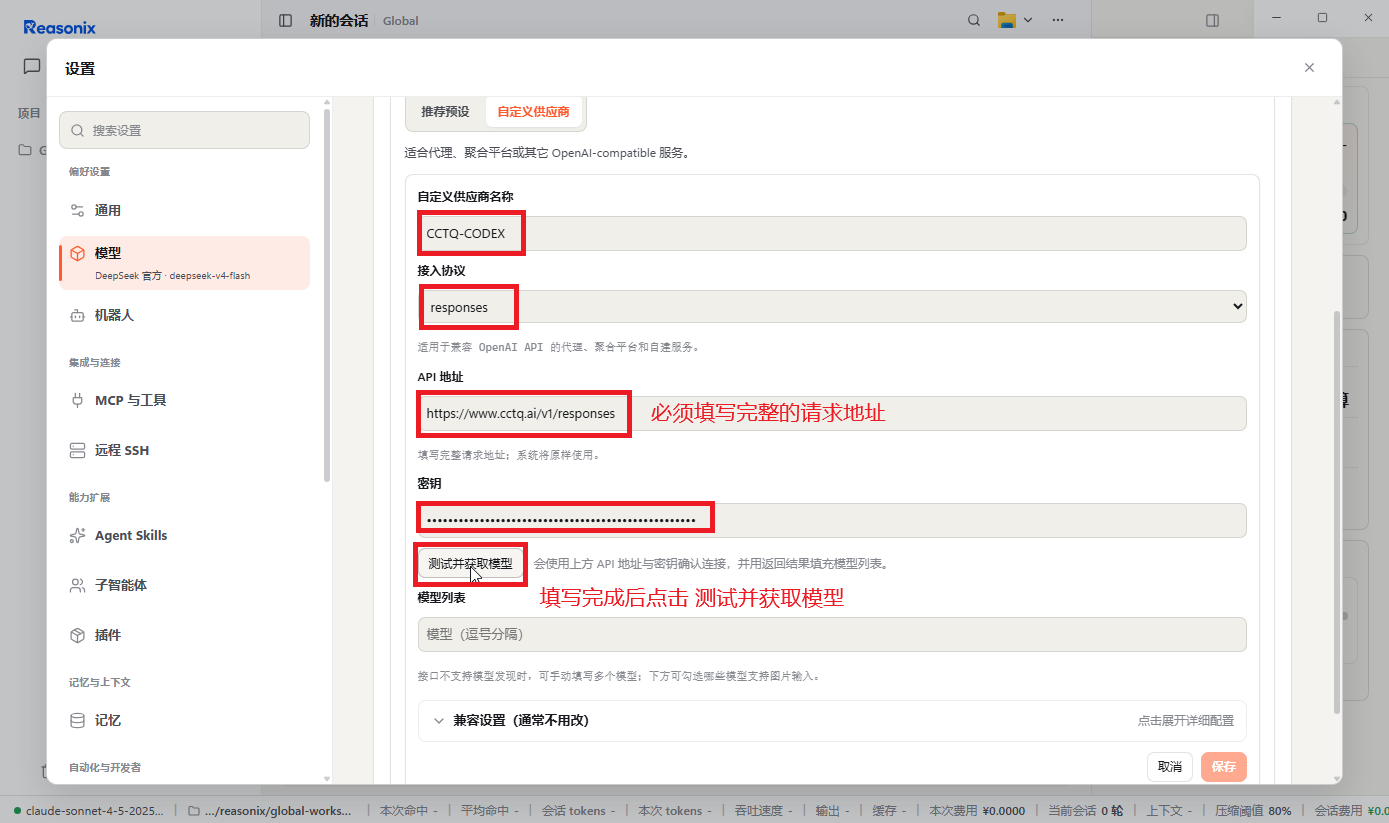
Enter the full request URL, not just the domain or a URL ending in /v1. Reasonix uses the address exactly as entered.
5. Connect GPT models
Enter the following in the custom provider form:
| Setting | Value |
|---|---|
| Custom provider name | For example, CCTQ-CODEX |
| Connection protocol | responses |
| API URL | https://www.cctq.ai/v1/responses |
| Key | Your own token key created on CCTQ |
Click Test and Fetch Models (测试并获取模型) when finished.
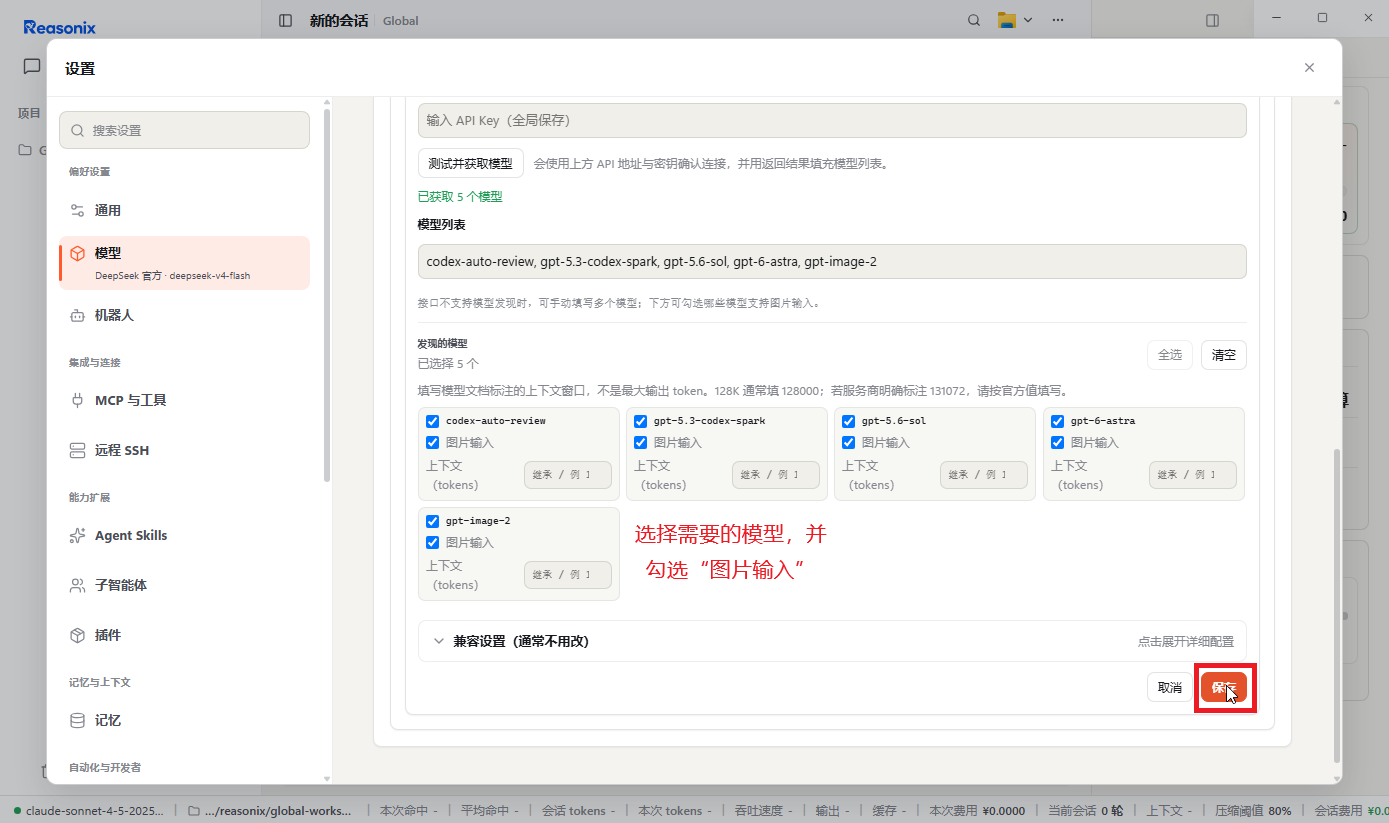
Select the GPT models you need. To use images, check Image Input (图片输入) for models that support them, then click Save (保存). The model names in the screenshot are examples; use the available models returned for your key.
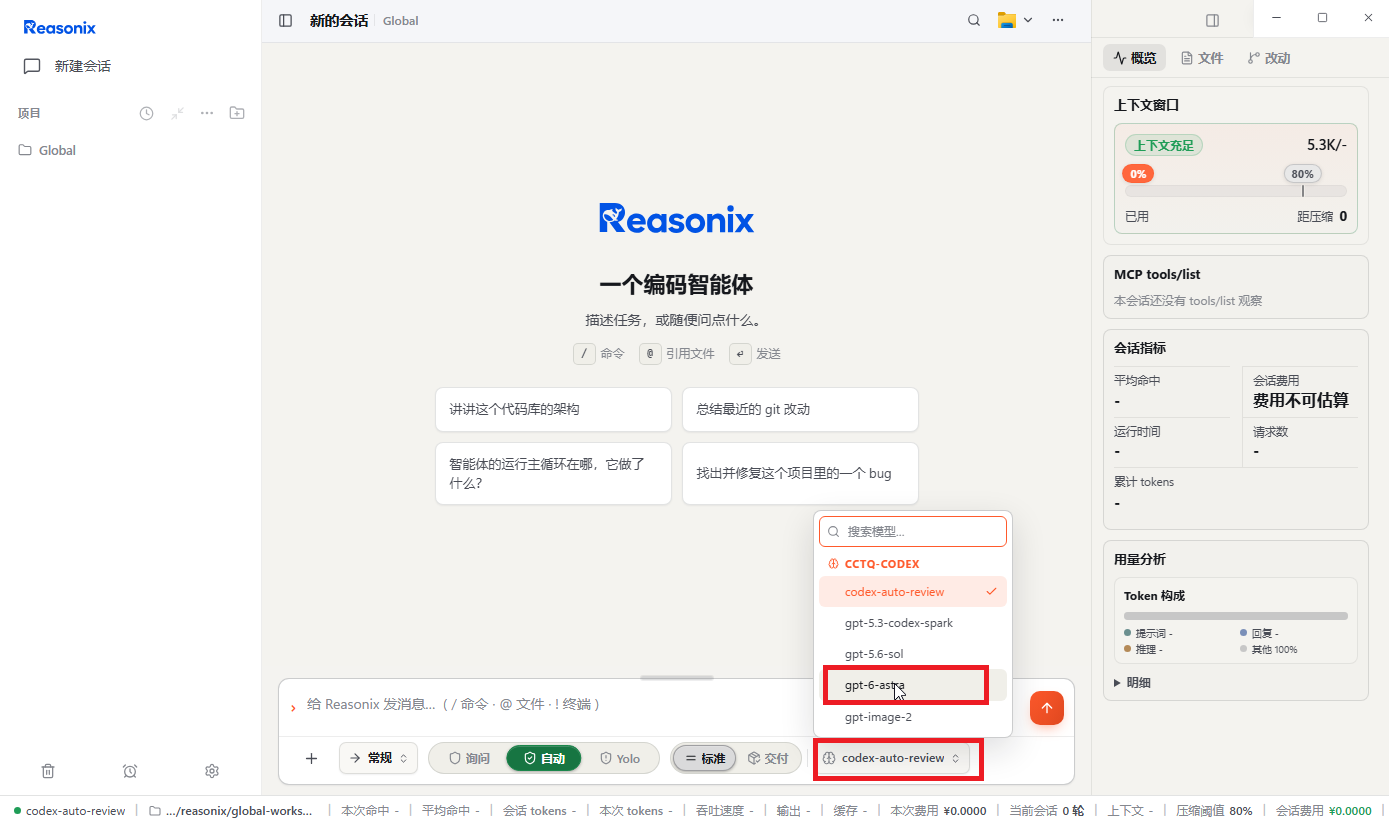
Start a new session, open the model list at the bottom, and select the GPT model you just added.
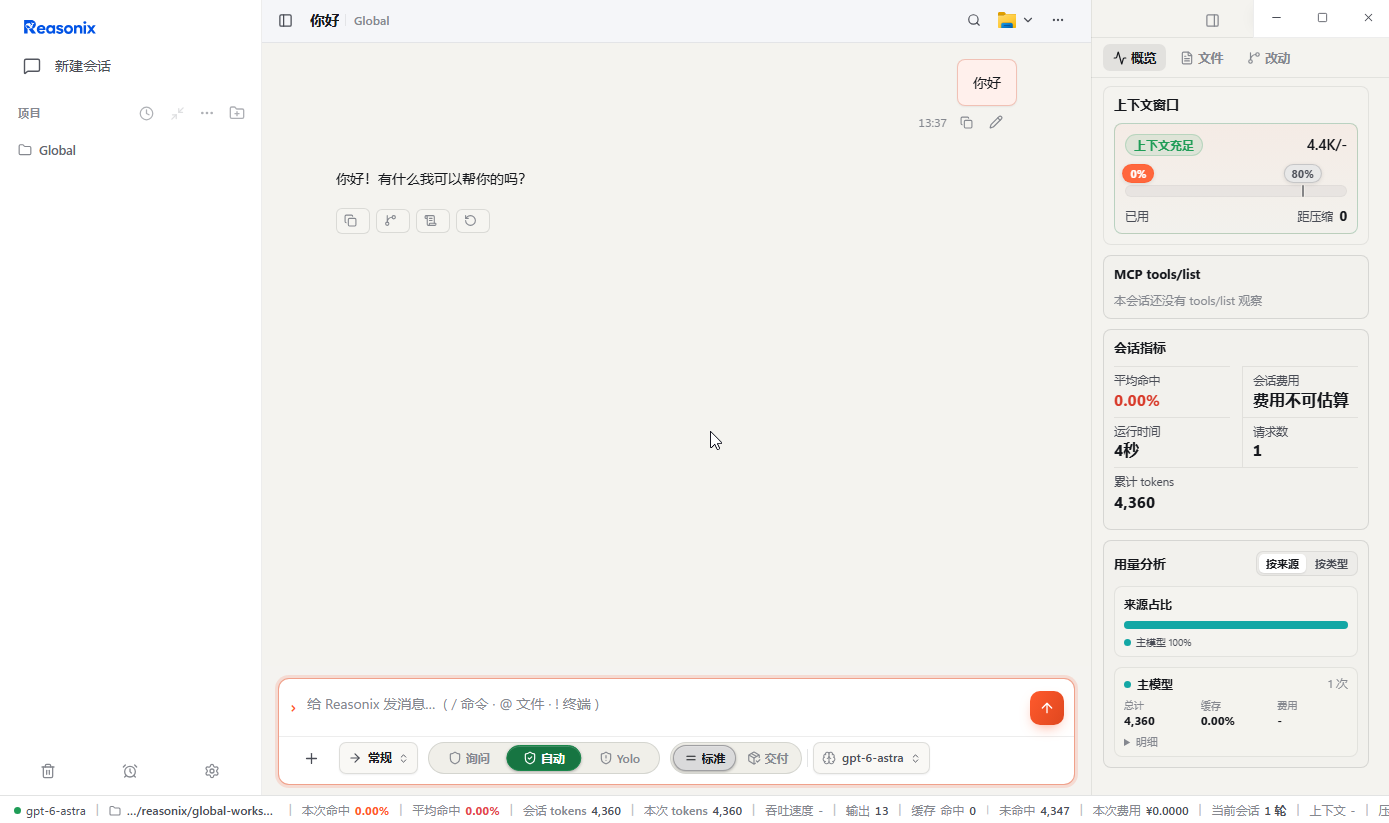
Send a simple message such as Hello. A normal reply confirms that it works.
6. Connect Claude models
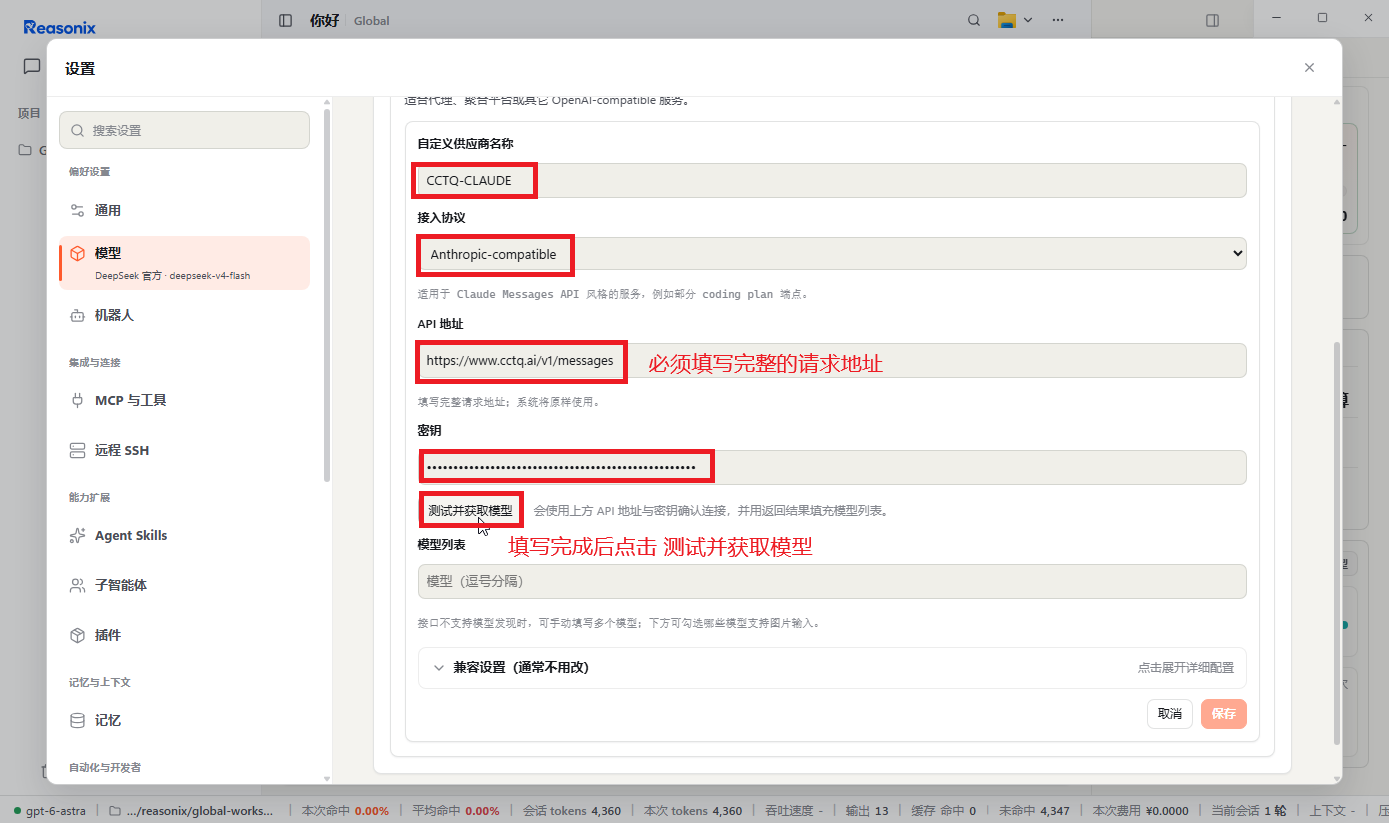
Go to Settings → Models → Connect → Add Model Service → Custom Provider and enter:
| Setting | Value |
|---|---|
| Custom provider name | For example, CCTQ-CLAUDE |
| Connection protocol | Anthropic-compatible |
| API URL | https://www.cctq.ai/v1/messages |
| Key | Your own token key created on CCTQ |
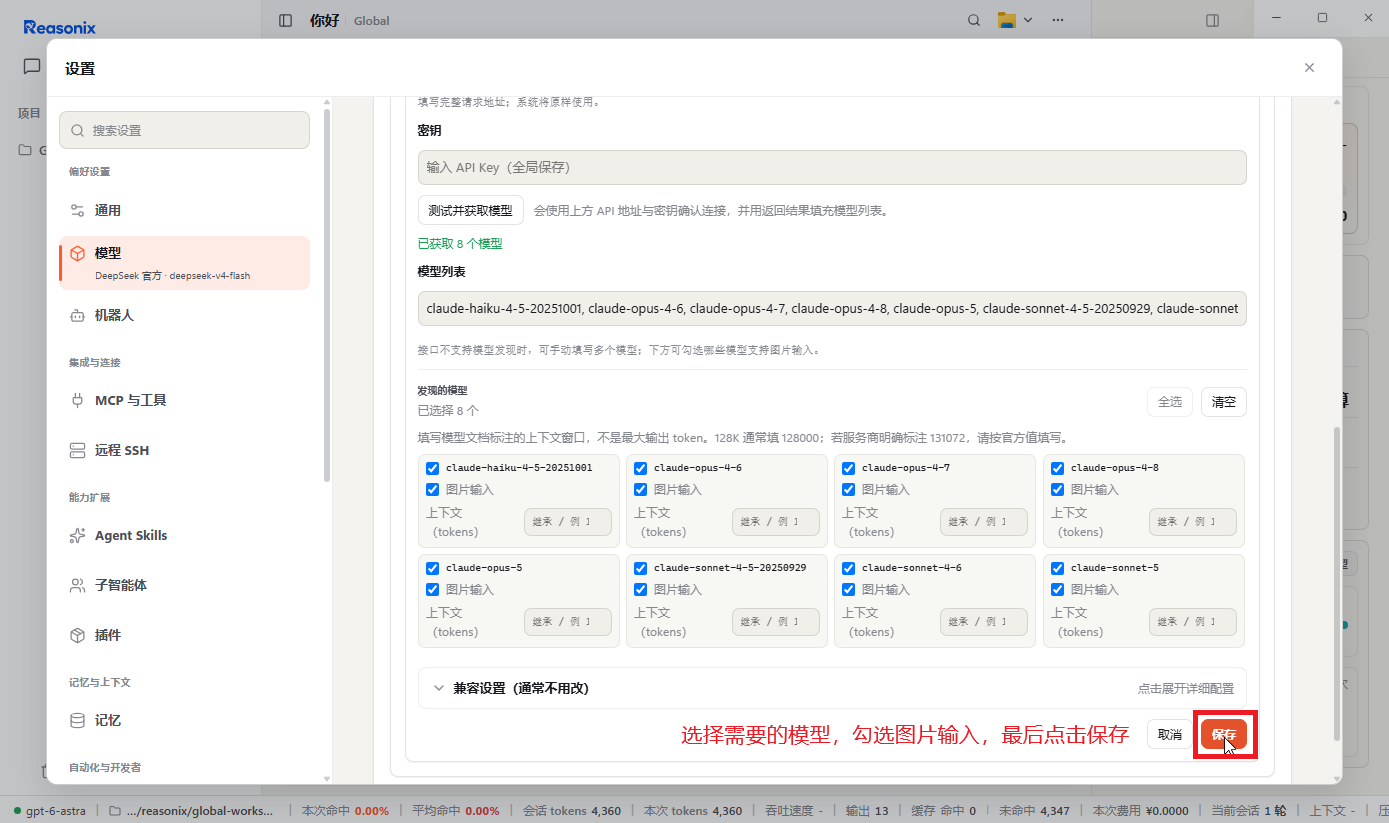
Click Test and Fetch Models (测试并获取模型) when finished.
Select the Claude models you need. To use images, check Image Input (图片输入) for models that support them, then click Save (保存). The model names in the screenshot are examples; use models supported by your key.
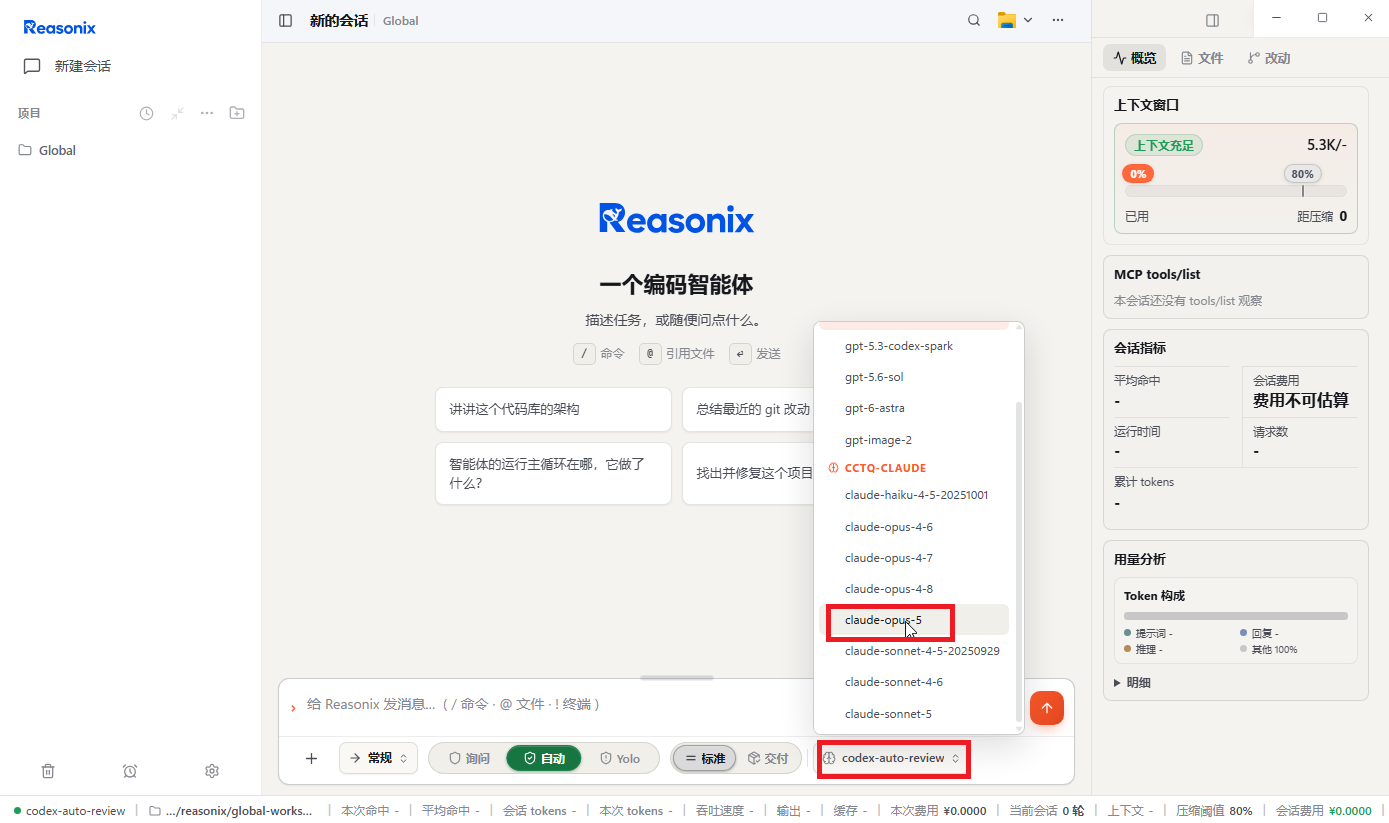
Start a new session and select the Claude model you just added from the model list.
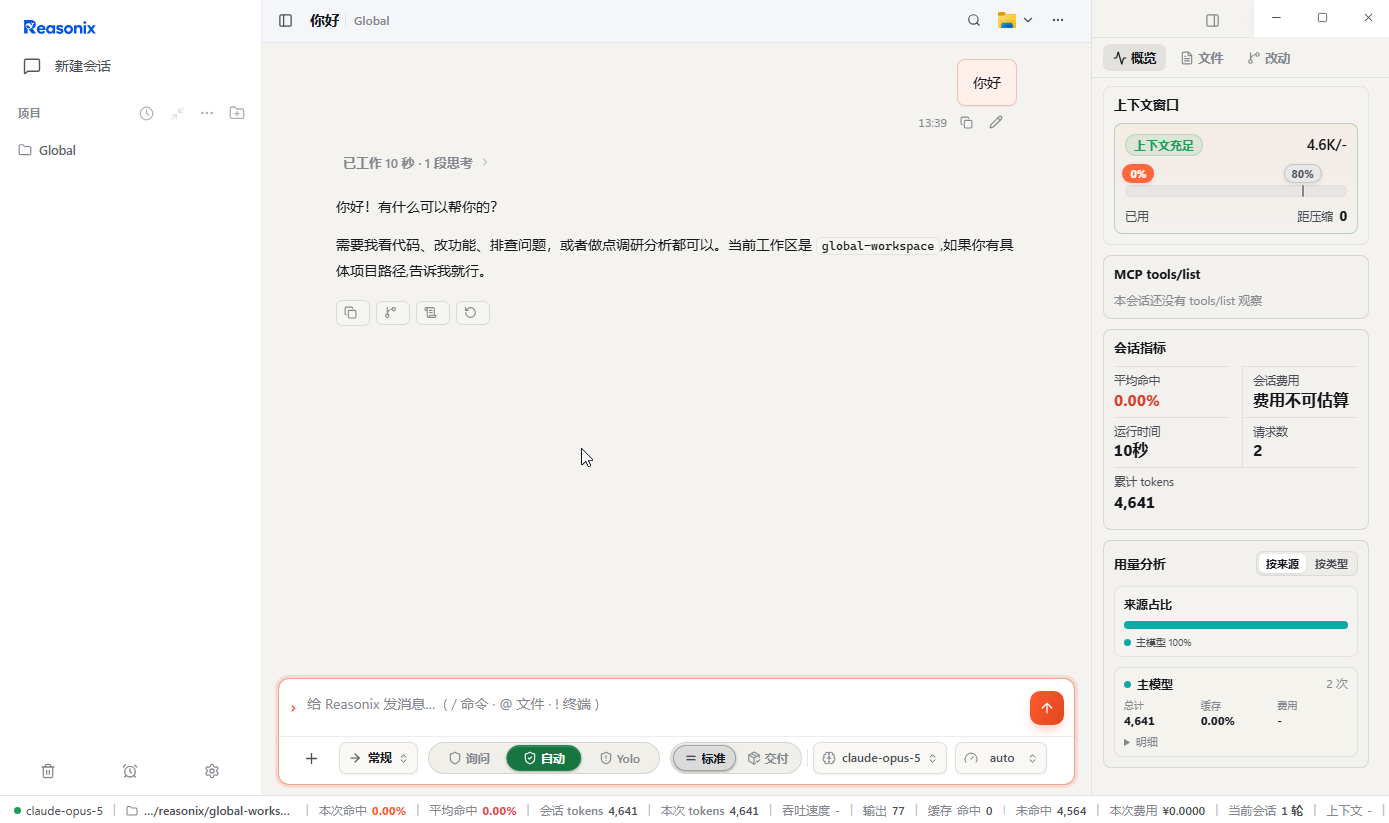
Send a simple message such as Hello and confirm that you receive a normal reply.
Keep your real key private. If a request fails, check the key, API URL, connection protocol, and model name.